


INSTALLATION AND SETUP
-5-
STEP 5: On the touch panel of the keyboard controller, click “Conf” to enter the configuration page, and
click
(P.T.Z) to make related settings as follows.
●
RATE
: Check and set the baud rate as 9600.
MODE
: Choose the proper camera protocol depending on the camera type.
STEP 6: Then, click “ESC” as many as needed to return to the main menu, and set the ID of the camera to
001.
STEP 7: Connect the camera video cable to the DVR for video output and recording, and connect the
camera to power.
2.2.2 Connecting to DVR
You can also connect the camera directly to DVR for pan / tilt / zoom control, but the available camera control is
limited. For details, please refer to “APPENDIX 3 CAMERA CONTROL VIA OUR DVR” at page 27.
DCCS DVR
This camera supports DVR Camera Communication System, DCCS, and users do not need to additionally
connect RS485-A & RS485-B wires to transmit control signals.
1. Video Output Connector (VIDEO OUT)
Connect the camera video output with a 75
Ω
coaxial cable to DVR video input which supports DCCS
technology.
Note:
For details about DVRs supporting DCCS, please check with your distributor or reseller.
2. DC12V Input Terminal
Connect the power terminal of the camera to a DC 12V regulated power supply.
NOTE:
Please use the correct power adaptor, DC12V (regulated), to operate this unit. The power
tolerance of this unit is DC12V ± 10%. Over maximum DC 12V power input will damage this unit.
3. DCCS Transmission Checking
When the camera, monitor and other peripherals are connected to DVR and powered on, power on the DVR
and wait for the initialization is completed.
Then, right-click to show the main menu, and go to “ADVANCE CONFIG”
l
“DCCS” to examine the DCCS
signal transmission.
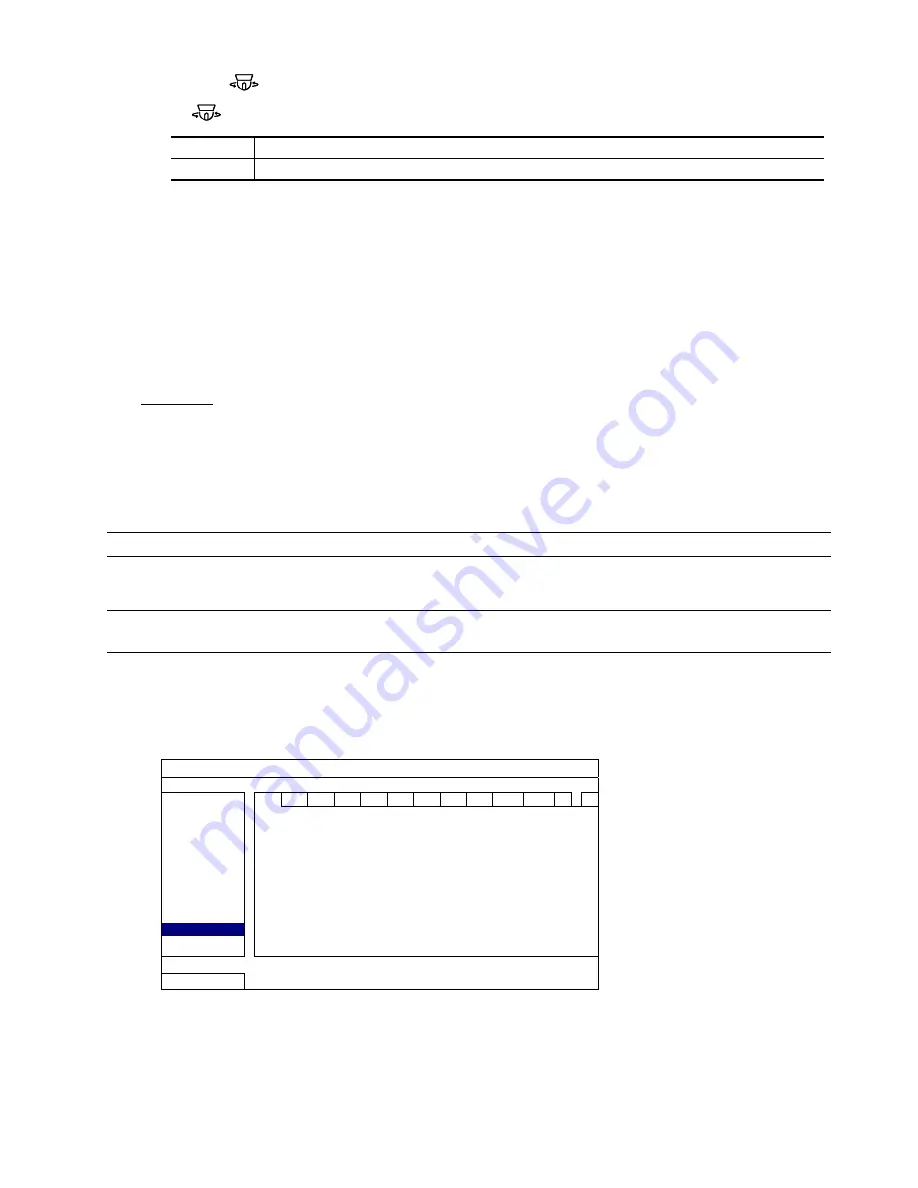
ADVANCE CONFIG
CANERA
CH1
CH2
CH3 CH4 CH5 CH6 CH7 CH8 CH9 CH10 CH11
W
X
DETECTION DIAGNOSTIC START
ALERT
MENU SETUP
NETWORK
SNTP
DISPLAY
RECORD
REMOTE
DEVICE AVK584
DCCS
CONNECTION OK
IVS
EXIT
a) Make sure the model number of your DCCS camera is shown in “DEVICE”. If not, please check your camera
connection.
b) Select the channel which connects to your DCCS camera, and click “START” in “DIAGNOSTIC” to examine the
signal transmission between the DCCS camera and the DVR.
Summary of Contents for 22X series
Page 7: ...INSTALLATION AND SETUP 3...


