


12
Advanced Setup:
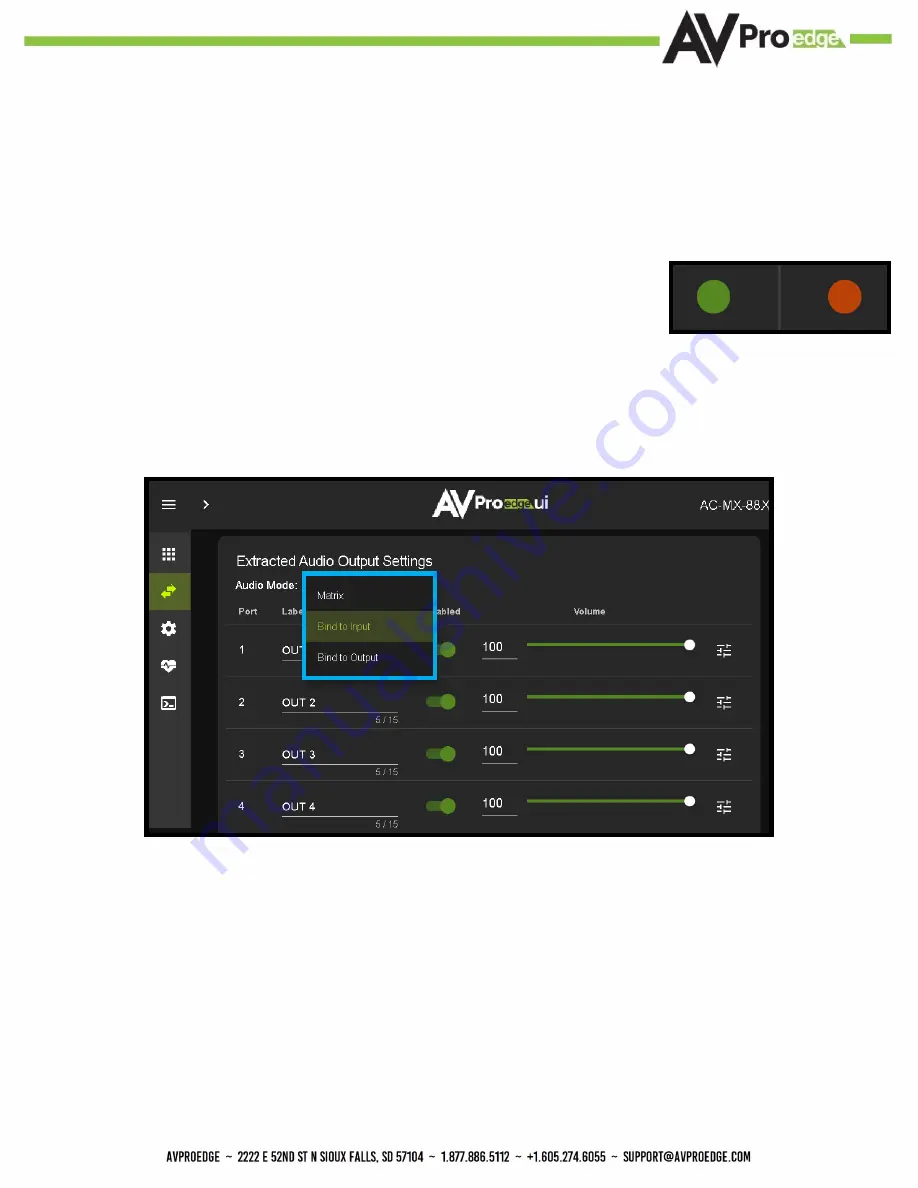
WebUI Extracted Audio Output Settings
1.
Now navigate to the Extracted Audio Output Settings under I/O Config.
2.
The extracted audio ports have 3 distinct operating modes, use the drop-down at the top to select. The three options
are.
4.
Under the Video Scaling mode you can choose Auto, No Scaling (off), 4K to 1080P, or 1080P to 4K.
5.
Signal -
The Signal Indicator on the HDMI outputs shows the current state of the
connected HDMI device. Green means HDMI signal is detected, red means that the
signal is not detected. If red verify that the HDMI cable is properly connected to both
the matrix and HDMI sync device.
·
Auto
- Will automatically scale based on the connected syncs EDID
·
No Scaling (Default)
- Signal remains untouched
·
4K to 1080P
- Down-scales any 4K signal down to 1080P
·
4:4:4 to 4:2:0
- Will convert any 4K Signal (with a Video Clock above 500MHz) with YUV 4:4:4 and convert it to
YUV 4:2:0.
·
Bind to Input (Default)
- where the audio port number corresponds to the input signal. This is ideal for
systems where audio is matrixed separately in a zoned amplifier.
·
Bind to Output
- this configuration the audio will automatically follow the HDMI output. This is ideal for systems
that use local AVR’s for some of the Zones.
·
Matrix
- This mode allows you to matrix the extracted audio ports independently from the HDMI outputs. In this
mode there will be a Tab for the extracted audio under the Matrix page, allowing you to route the audio just like
routing the video. If the matrix is set to Bind to Input or Bind to Output this tab will not be visible.
Summary of Contents for AC-MX-88X
Page 5: ...5 Specifications 5...
Page 36: ...36 Command List Baudrate 57600 Checksum None Bit Num 8 Stop Bit 1...
Page 37: ...37 Command List Continued...
Page 38: ...38 Command List Continued...
Page 42: ...42 Bandwidth Chart...
Page 43: ...43 Bandwidth Chart Continued...
Page 47: ...47...
Page 48: ...48...


