


10
20.
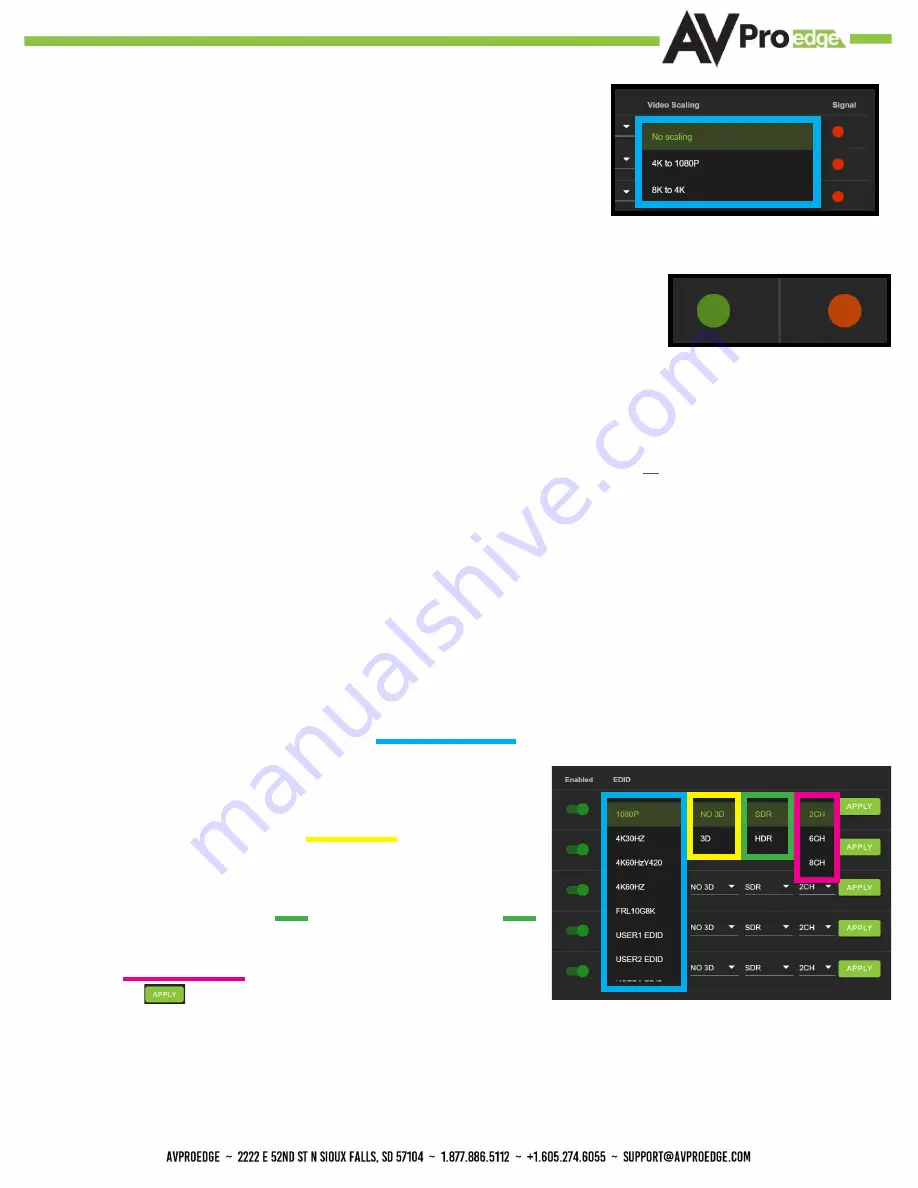
Set the HDMI Video Scaling if needed. Each HDMI OUTPUT has a drop-down
with x3 options for scaling.
21.
With the system and all it’s components powered up it’s time to verify signal path from source to the sync. For now leave
EDID settings to their default 1080P 2CH, the next section Advanced Setup will cover the more advance settings.
22.
Use the Signal Indicator on the HDMI INPUTS. Green means HDMI source is detected,
red means that the source is not detected. If red verify that the input is powered on
and that the HDMI cable is properly connected to the source and to the back of the
matrix.
23.
Now verify the connections to the HDMI outputs using the Signal indicator. Green means HDMI sync is detected, red
means that the HDMI sync is not detected. If red verify that the sync devices are powered on and that the HDMI cables
are properly connected to the back of the matrix.
24.
With everything connected and powered on, green indicators across the applicable inputs and outputs, verify you are
getting all of your sources on all of your displays.
25.
Problems with a source or sync, see the Troubleshooting section for help on page[s]
.
Advanced Setup: WebUI Input Settings - EDID
After verifying good signal path from source to sync now it is time to go through the rest of the settings to maximize the setup.
Starting on the input side with the EDID.
•
No Scaling (default) - No scaling will be applied to that output.
•
4K to 1080P - Any signal above 1080P will be down-scaled to 1080P
•
8K to 4K - Any signal above 4K will be down-scaled to 4K
1.
With the WebUI open, navigate to the I/O Conifg tab and focus on the Input Settings section at the top.
2.
Set the EDID on each input by selecting the resolution drop-down first (default is set to 1080P). The options are 1080P,
4K30Hz, 4K60Hz Y420, 4K60Hz, and FRL10G8K. If you select USER1 EDID, then the drop-downs change to allow you to
select from an output to copy from. You can select any of the 8 HDMI
outputs then click the COPY button. This will save that outputs EDID
to the USER1 slot.
3.
Next use the drop-down to select NO 3D, or 3D depending on the
displays capability.
NOTE: Currently the only resolution you can choose NO 3D for is 1080P.
4.
Next drop-down select either SDR (standard dynamic range) or HDR
(High Dynamic Range).
5.
The fourth drop-down in the EDID section is for the audio, you can
select 2CH, 6CH, or 8CH.
6.
Click the
button to set the EDID.
7.
Verify you are still getting that source to all your displays and that the image looks correct.
NOTE:
Some older displays may take an HDR signal and display correctly (ignoring the HDR Metadata)
others will not ignore the HDR part of the signal and may display incorrectly.
Summary of Contents for AC-MX-88X
Page 5: ...5 Specifications 5...
Page 36: ...36 Command List Baudrate 57600 Checksum None Bit Num 8 Stop Bit 1...
Page 37: ...37 Command List Continued...
Page 38: ...38 Command List Continued...
Page 42: ...42 Bandwidth Chart...
Page 43: ...43 Bandwidth Chart Continued...
Page 47: ...47...
Page 48: ...48...


