background image

25

© 2008 Directed Electronics. All rights reserved.

eral Motors product or a Dodge Dakota pickup, please call Directed 
Electron ics Technical Support for an alternative shut-down method. 
Do not return the vehicle to the customer until this feature is properly 
installed!

D2D and programmer interface

The 4-pin red port is for interfacing with an XK module through D2D, or 
you can use it for programming with the Bitwriter®.
If the XK module is unplugged so the port can be used for Bitwriter® 
programming, you must unplug the  heavy gauge 6 pin remote start 
harness before reconnecting the xk module back in. Once the xk mod-
ule has been plugged in, reconnect the heavy gauge 6pin remote start 
harness and proceed to reprogram the xk module.


When the learn routines have previously been programmed using 

the Bitwriter®, they may have been locked.
Before proceeding with reprogramming the learn routines, they must 
be unlocked with the Bitwriter®, this cannot be done manually with the 
Valet switch.

Summary of Contents for 4103

Page 1: ... installation by a profes sional installer only Any attempt to install this product by any person other than a trained professional may result in severe damage to a vehicle s electrical system and components 2008 Directed Electronics Vista CA N4103L 2008 07 Avital ...

Page 2: ... mation Bitwriter 2 compatible Bitwriter Code Hopping Doubleguard ESP FailSafe Ghost Switch Learn Routine Nite Lite Nuisance Prevention Circuitry Reveng er Silent Mode Soft Chirp Stinger Valet Vehicle Recovery System VRS and Warn Away are all Trademarks or Registered Trademarks of Di rected Electronics The Bitwriter p n 998U requires chip version 2 5 or newer to program this unit ...

Page 3: ...9 pin connector 14 Heavy gauge relay interface 20 Remote start harness H2 5 pin connector 21 Neutral safety switch interface 24 D2D and programmer interface 25 Programming jumpers 26 Light flash 26 Plug in program switch 27 Tach learning 27 Virtual tach 27 To learn the tach signal 28 Tach threshold on off 28 Remote control learn routine 29 Remote Configuration 31 Operating settings learn routine 3...

Page 4: ......

Page 5: ...ipment does cause harmful interference to radio or television which can be determined by turning the equipment OFF and ON the user is encouraged to try to correct the interference by one or more of the following measures Reorient or relocate the receiving antenna Increase the separation between the equipment and receiver Connect the equipment into an outlet on a circuit different from that to whic...

Page 6: ...t is the user s sole responsibility to properly handle and keep out of reach from children all remote controls to assure that the system does not unintentionally remote start the vehicle USER MUST INSTALL A CARBON MONOXIDE DETECTOR IN OR ABOUT THE LIVING AREA ADJACENT TO THE VEHICLE ALL DOORS LEADING FROM ADJACENT LIVING AREAS TO THE ENCLOSED OR PARTIALLY ENCLOSED VEHICLE STORAGE AREA MUST REMAIN ...

Page 7: ...d The remote start module must be removed or properly reinstalled so that the vehicle does not start in gear All installations must be performed by an authorized Directed Electronics dealer OPERATION OF THE REMOTE START MODULE IF THE VEHICLE STARTS IN GEAR IS CONTRARY TO ITS INTENDED MODE OF OPERATION OPERAT ING THE REMOTE START SYSTEM UNDER THESE CONDITIONS MAY RESULT IN PROPERTY DAMAGE OR PERSON...

Page 8: ...ectronics All rights reserved What is included The control module see diagram HX antenna receiver Two remote transmitters A push button Valet switch A hood pinswitch A shut down toggle switch Red 4 pin D2D Bitwriter port ...

Page 9: ... logic probes computer safe test lights Test all circuits with a high quality digital multi meter before making connections Do not disconnect the battery if the vehicle has an anti theft coded radio If equipped with an air bag avoid disconnecting the bat tery if possible Many airbag systems will display a diagnostic code through their warning lights after they lose power Discon necting the battery...

Page 10: ...icle using a very fast micro controller and an analog to digital converter The micropro cessor saves the base voltage as a reference When Virtual Tach sees the slightest uptick in voltage indicating that the alternator is charging the battery the starter motor shuts off instantly D2D The system has the ability to interface with an XK module through the D2D port The advantage to using a D2D interfa...

Page 11: ...acceptable ways of making a wire connection solder connections and crimp connectors When properly performed either type of connection is reliable and trouble free Regardless of whether you solder your connections or you use mechanical type crimp on con nections ensure that all connections are mechanically sound and that they are insulated especially when connecting data lines in the ve hicle Cheap...

Page 12: ... 7 RED WHITE TRUNK RELEASE OUTPUT H1 8 BLACK GROUND H1 9 WHITE LIGHT FLASH 4 pin satellite harness diagram 1 BLUE STATUS OUTPUT 2 ORANGE ACCESSORY OUTPUT 3 PURPLE STARTER OUTPUT 4 PINK STARTER OUTPUT Heavy gauge relay wiring diagram 1 PINK 30 AMP OUTPUT TO IGNITION CIRCUIT 2 PURPLE 30 AMP OUTPUT TO STARTER CIRCUIT 3 ORANGE 30 AMP OUTPUT TO ACCESSORY CIRCUIT 4 RED 30A HIGH CURRENT 12 INPUT 5 PINK W...

Page 13: ...OUTPUT 2 EMPTY NOT USED 3 GREEN LOCK OUTPUT Remote start harness H2 wiring diagram H2 1 BLACK WHITE NEUTRAL SAFETY SWITCH INPUT H2 2 VIOLET WHITE TACHOMETER INPUT WIRE H2 3 BROWN BRAKE SWITCH SHUTDOWN WIRE H2 4 GRAY HOOD PINSWITCH SHUTDOWN WIRE H2 5 BLUE WHITE 200mA 2ND STATUS REAR DEFOGGER OUTPUT ...

Page 14: ...Y ALARM DISARM This wire sends a negative pulse every time the remote start is activated or the doors are unlocked This can be used to pulse the disarm wire of the vehicle s factory anti theft device Use a relay to send a or pulse to the disarm wire as shown in the following diagram Delay for Negative Disarm Wire ...

Page 15: ...or pulse to the arm wire H1 3 YELLOW IGNITION OUT TO ALARM As a stand alone system The H1 3 YELLOW wire should not be con nected to anything As an add on car starter If connected disconnect the ignition ac cessory input of the remote controlled security or keyless entry system Connect the H1 3 YELLOW ignition output to the ignition accessory input of the remote controlled security or keyless entry...

Page 16: ...activate or deacti vate Note When the activation pulse count can be programmed to 1 2 or 3 pulses when changed it will affect both activation inputs the White Blue wire and the remote control activation H1 5 ORANGE GROUND WHEN LOCKED OUTPUT This wire supplies a 500 mA ground as long as the system is locked and when the remote start is activated This feature can be turned off by programming the ant...

Page 17: ...stem Note the honk upon locking and panic features are not available with the 1 button remote H1 7 RED WHITE trunk release 200 mA output When the system receives the code controlling trunk release for longer than 1 5 seconds the RED WHITE wire will supply an output as long as the transmission continues This is often used to operate a trunk hatch release or other relay driven function Important Nev...

Page 18: ...Important Do NOT connect this wire to a negative vehicle light flash wire before changing the program ming jumper to the negative polarity position or dam age to the vehicle light circuit may occur As factory configured the H1 9 WHITE wire should be connected to the parking light wire If the light flash polarity jumper is moved to the position refer to the Programming Jumper section of this guide ...

Page 19: ...cted Electronics All rights reserved ming Jumpers section of this guide P N 8617 or a standard automo tive SPDT relay must be used on the H1 2 light flash output wire Positive Light Flash Output Light Flash Output ...

Page 20: ...le 3 ORANGE 30 AMP OUTPUT TO ACCESSORY CIRCUIT Connect this wire to the accessory wire in the vehicle that powers the climate control system 4 6 RED 30A HIGH CURRENT 12 INPUT Remove the two 30 amp fuses prior to connecting these wires and do not replace them until the satellite has been plugged into the control module These wires are the source of current for all the circuits the relay satellite w...

Page 21: ... the other wire from the toggle switch to the park neutral switch in the vehicle This wire will test with ground with the gear selector either in PARK or NEUTRAL This will prevent the vehicle from accidentally being started while in a drive gear This input MUST rest at ground in order for the remote start system to operate Connected properly the vehicle will only start while in PARK or NEUTRAL In ...

Page 22: ...ctioning properly H2 2 VIOLET WHITE TACHOMETER INPUT WIRE This input provides the module with information about the engine s revo lutions per minute RPMs It can be connected to the negative side of the coil in vehicles with conventional coils In multi coil and high energy ignition systems locating a proper signal may be more difficult Once connected you must teach the system the tach signal See Ta...

Page 23: ...INSWITCH SHUTDOWN WIRE This wire MUST be connected to the hood pinswitch This input will dis able or shut down the remote start when the hood is opened H2 5 BLUE WHITE 200mA 2ND STATUS REAR DEFOGGER OUTPUT This wire supplies a 200mA output as soon as the module begins the remote start process The H2 5 BLUE WHITE wire can also be used to activate the defogger trigger latched pulsed 10 seconds after...

Page 24: ...n Testing the neutral safety switch 1 Make sure there is adequate clearance to the front and rear of the vehicle because it may move slightly 2 Make sure the hood is closed and there are no remote start shut downs active 3 Set the emergency brake 4 Turn the key to the run position this will release the shifter 5 Place the car in drive D 6 Place your foot directly over the brake pedal but do not de...

Page 25: ...gramming with the Bitwriter If the XK module is unplugged so the port can be used for Bitwriter programming you must unplug the heavy gauge 6 pin remote start harness before reconnecting the xk module back in Once the xk mod ule has been plugged in reconnect the heavy gauge 6pin remote start harness and proceed to reprogram the xk module When the learn routines have previously been programmed usin...

Page 26: ... will output 12V on the WHITE wire H1 9 In the position the on board relay is dis abled The WHITE wire H1 9 will supply a 200mA output suitable for driving factory parking light relays Note For parking light circuits that draw 10 amps or more the internal jumper must be switched to a light flash output P N 8617 or a standard automotive SPDT relay must be used on the H1 9 light flash output harness...

Page 27: ...shut off the remote start with the remote that s it Virtual Tach is programmed Virtual Tach handles disengaging the starter motor during remote start ing it does not address over rev If the customer wants to have the over rev protection capability the tach wire must be connected This may involve more installation shop charges than initially quoted Important If the Virtual Tach mode over cranks or ...

Page 28: ...ch signal is learned 4 Release the Program switch Tach threshold on off In most cases this jumper can be left in the OFF po si tion Some new vehicles use less than 12 volts in their ignition systems The unit may have trouble learning the tach signal in these ve hi cles Changing the jumper to the ON setting changes the trigger threshold of the digital tach circuit so it will work properly with thes...

Page 29: ...N position 2 Choose Within 10 seconds press and release the Program switch the number of times correspond ing to the desired channel listed next Once you have selected the channel press the switch once more and hold it The LED will flash to confirm the selected channel Do not release the Program switch Ch Function 1 Auto Learn Standard Configuration default The auto learn configuration automatical...

Page 30: ...med It is not possible to teach a remote control to the system more than once 4 Release Once the code is learned the Program switch can be released You can advance from programming one channel to another by releas ing the Program switch and tapping it to advance steps and then hold ing it For instance You have programmed Channel One and you want to program Channel Two Release the Program switch Pr...

Page 31: ...f Ignition is turned off Program switch is pressed too many times More than 25 seconds elapses between programming steps Remote Configuration Lock Panic On Panic Off Unlock Panic Off Trunk release Remote Start timer mode car finder rear defogger Note See owner s guide for details ...

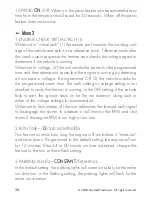
Page 32: ...ss and hold the Program switch When the LED flashes once and the horn honks Menu One has been selected Continue to hold the switch until the LED flashes twice and the horn honks twice Menu Two has now been selected Release the Program switch after the desired Menu choice has been selected 3 Choose Within 10 seconds press and release the Program switch the number of times correspond ing to the feat...

Page 33: ...y to get from the feature you just programmed to the feature you wish to access For example in Menu One if you just programmed feature 1 3 to off and you next want to program the next feature 1 4 release the Program switch Press and release it once to advance from Feature 1 3 to Feature 1 4 Then press it once more and hold it The LED will flash in groups of 4 to confirm that you have accessed Feat...

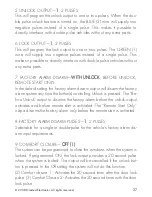
Page 34: ...es Off 20 mS 30 mS 40 mS 50 mS 2 Ignition con trolled lock Off On 3 Ignition con trolled unlock Off On 4 Doorlock pulse duration 0 8 sec 3 5 sec 0 4 sec 5 Unlock output 1 pulse 2 pulses 6 Lock output 1 pulse 2 pulses 7 Factory Alarm Disarm function with unlock Before unlock Remote start only 8 Factory Alarm Disarm 1 pulse 2 pulses 9 Comfort Closure Off Comfort Closure 1 Comfort Closure 2 10 Panic ...

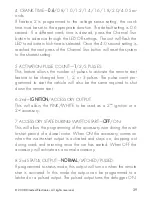
Page 35: ...3 Park lights Constant Flashing 4 Crank time 0 6 sec 0 8 sec 1 0 sec 1 2 sec 1 4 1 6 1 8 2 0 4 0 sec 5 Activation pulse 1 pulse 2 pulses 3 pulses 6 Ignition acces sory output Ignition Accessory 7 Acc state during wait to start Off On 8 2nd status output Normal latched pulsed 9 Anti grind On Off 10 Wait to start time Off 15 sec 30 sec 45 sec 11 Timer mode run time 12 min 3 min 6 min 9 min ...

Page 36: ...he key is on and all doors are closed 3 IGNITION CONTROLLED UNLOCK OFF ON When programme d ON the doors will unlock automatically when the key is turned off 4 DOOR LOCK PULSE DURATlON 0 8 3 5 0 4 SECONDS Some European vehicles such as Mercedes Benz and Audi require longer lock and unlock pulses to operate the vacuum pump Program ming the system to provide 3 5 second pulses will accommodate the doo...

Page 37: ...arm output will disarm the factory alarm system any time the button s controlling Unlock is pressed The Be fore Unlock output to disarms the factory alarm before the unlock output activates and before remote start is activated The Remote Start Only output disarms the factory alarm only before the remote start is activated 8 FACTORY ALARM DISARM PULSES 1 2 PULSES Selectable for a single or double p...

Page 38: ...d crank time The tach setting or voltage setting is not checked to verify that the car is running In the OFF setting if the vehicle fails to start the ignition stays on for the run duration Using tach or either of the voltage settings is recommended When set to Tachometer 4 the unit references the learned tach signal to disengage the starter In addition it will monitor the RPM and shut down if the...

Page 39: ...e to be changed from 1 2 or 3 pulses The pulse count pro grammed to start the vehicle will also be the same required to shut down the remote start 6 2nd IGNITION ACCESSORY OUTPUT This will allow the PINK WHITE to be used as a 2nd ignition or a 2nd accessory 7 ACCESSORY STATE DURING WAIT TO START OFF ON This will allow the programming of the accessory wire during the wait to start period of a diese...

Page 40: ...he car with the key when doing key takeover If accessories such as a voice module or window module are added to the unit it may be necessary to use the two honk setting to program this feature OFF 10 WAIT TO START TIME OFF 15 30 45 SECONDS Default is the Wait to Start input control wire or programmable to ignore the input control wire by a delay of 15 30 or 45 seconds 11 RUN TIME TIMER MODE 0 3 6 ...

Page 41: ...nutes 1 60 minutes Diesel start delay Off Timed Diesel start timer 1 90 seconds Tach mode starter release 10 normal 0 1 2 3 4 5 6 7 8 9 10 11 12 13 14 15 16 17 18 19 20 Feature programming Unlocked Locked Virtual tach fine tune Not initialized 0 to 1 second in 50ms increments Transmitter programming Unlocked Locked Note When using Owner s Recognition with the Bitwriter the following are the only a...

Page 42: ...ystem To enter diagnostic mode 1 Turn the ignition off 2 Press and hold the Program switch 3 Turn the ignition on and then off 4 Release the Program switch 5 Press and release the Program switch The LED will now report the last system shutdown by flashing for one minute in the following grouped patterns and will stop flashing when the ignition is turned on ...

Page 43: ...ust be completed before testing including connection to the brake switch and hood switch 1 Test the BRAKE shutdown circuit With the vehicle in Park P ac tivate the remote start system Once the engine is running press the brake pedal The engine should shut down immediately If the engine continues to run check the brake circuit connection 2 Test the HOOD PIN shutdown circuit With the vehicle in Park...

Page 44: ...p on the brake to shutdown the remote start system f Activate the remote start system If the starter engages immediately step on the brake to shut down the system If it does engage recheck the neutral safety input con nection The vehicle may use a mechanical neutral safety switch See H2 1 BLACK WHITE neutral safety switch input in Remote Start Harness Wire Connection Guide section of this guide If...

Page 45: ...te the climate control system The remote start will not activate 1 Check harnesses and connections Make sure the harnesses are fully plugged into the remote start module Make sure there are good connections to the vehicle wiring 2 Check voltage and fuses Also make sure that the ground wire is going to a chassis ground and not to something under the dash 3 Check diagnostics The diagnostics will tel...

Page 46: ...not be set high enough or you may have to adjust the voltage threshold in programming Voltage sense will not work on some vehicles 3 Check diagnostics Sometimes a shutdown will become active during cranking or just after cranking The vehicle starts but the starter keeps running 1 Is the system programmed for engine checking off or voltage sense When programmed for either of these features the engi...

Page 47: ...s reserved The vehicle will start and run only for about 10 seconds 1 Is the remote start programmed for voltage sense Try program ming the unit for low voltage reference If this does not work a tach wire should be used 2 Check diagnostics ...

Page 48: ...48 2008 Directed Electronics All rights reserved Wiring quick reference guide BROWN horn honk output ...

Page 49: ...49 2008 Directed Electronics All rights reserved Wiring quick reference guide continued ORANGE ground when locked red 4 pin d2d bitwriter port ...

Page 50: ......

Page 51: ......

Page 52: ...rovide consumers with the finest vehicle security and car stereo products and accessories available The recipient of nearly 100 patents and Innovations Awards in the field of advanced electronic technology Directed is ISO 9001 registered Quality Directed Electronics products are sold and serviced throughout North America and around the world Call 800 274 0200 for more information about our product...

Reviews: