FXT 5000 Series Field Service Guide
3. Insert the new drive
Make sure that you have labeled the new drive with the correct numbered label.
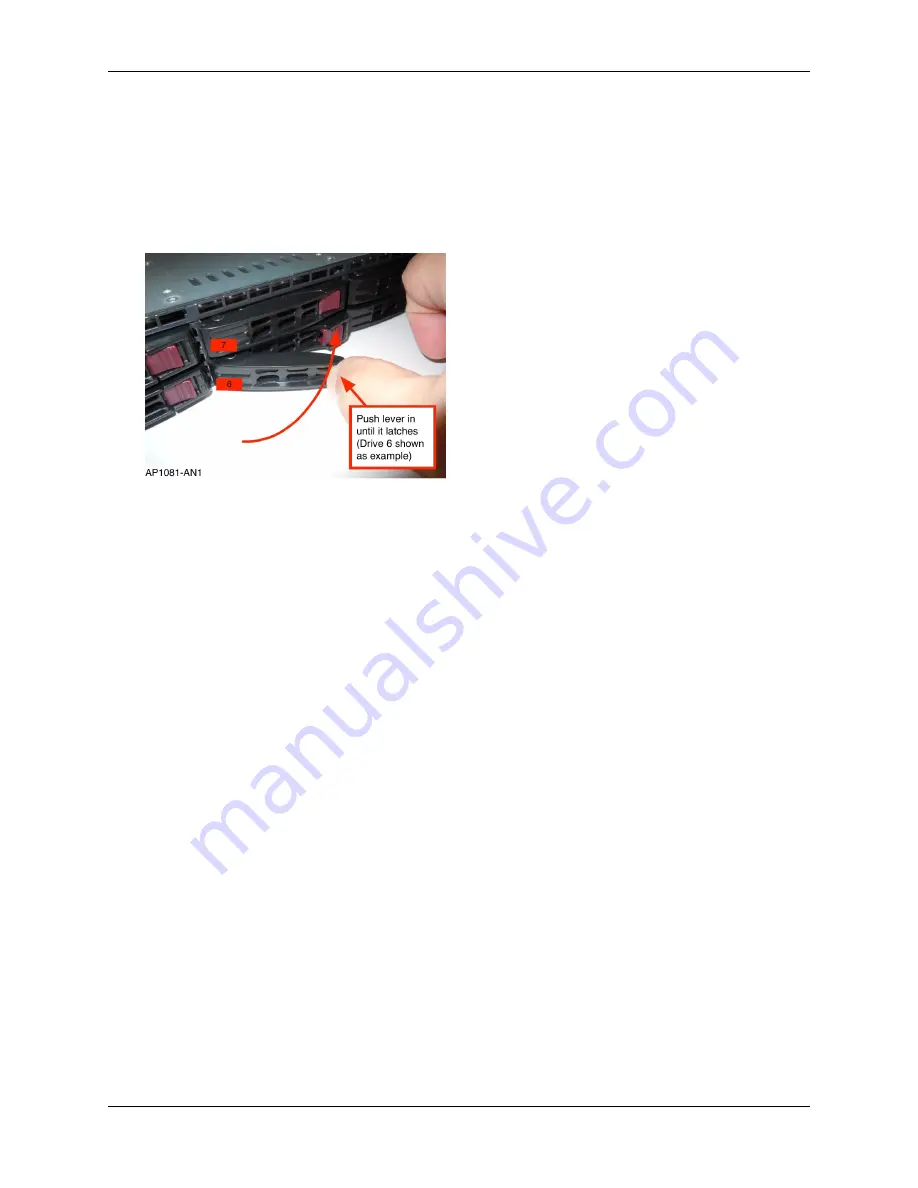
Insert the replacement drive assembly into the slot of the drive being replaced, then slide the assembly into the
slot by pushing firmly on the bezel until the lever begins to close.
Completely seat the drive assembly into place by pressing the replacement drive assembly’s lever until it locks
into place.
Latching a drive in the chassis
After the new system drive is inserted, the activity LEDs on both system drives will begin to flash quickly while
Avere OS rebuilds the mirror. This is normal operation.
4. Package the failed system drive and return it to Avere Systems. Instructions for returning the drive are included
in the replacement part’s shipping box, or can be emailed from Avere Global Services.
5.3.2 Replacing Both System Drives
Follow these steps if you need to replace a pair of system drives on an FXT 5000 Series node that have both failed.
1. Use the Avere Control Panel web interface to remove the node from the cluster. A detailed description of this
process is included in
Removing the Node from the Cluster Configuration
(page 36).
• Open the
FXT Nodes
page in the
Cluster
section of the
Settings
tab.
• Locate the failed node in the table.
• Click the
Remove
button in the
Actions
column.
2. If the node is still powered on, use the power button to shut it down according to the procedure in
(page 12).
3. Unlatch and eject the drives
As shown in the following illustrations, press the maroon button on each drive assembly of the failed drive to
release it. A black lever is released from the front of the drive assembly. Grasp the lever of the drive assembly
and rotate it out to eject the drive.
5.3. Replacing A Failed System Drive
25


