FXT 5000 Series Field Service Guide
Use the lever to pull the drive assembly from the node chassis. Note the number on the label applied to the
assembly lever.
From the set of labels that is supplied with the replacement drive assembly, select the label with the same num-
ber as the drive being replaced and apply it to the lever of the replacement drive. Apply the numbered label
to the replacement drive assembly in the same orientation and the same location as the original drive’s label.
Press the label firmly to make sure that it sticks to the drive. See
FXT 5000 Series Front and Rear Illustrations
(page 10) for an illustration of how drives are labeled.
3. Insert the new drive
Make sure that you have labeled the new drive with the correct numbered label.
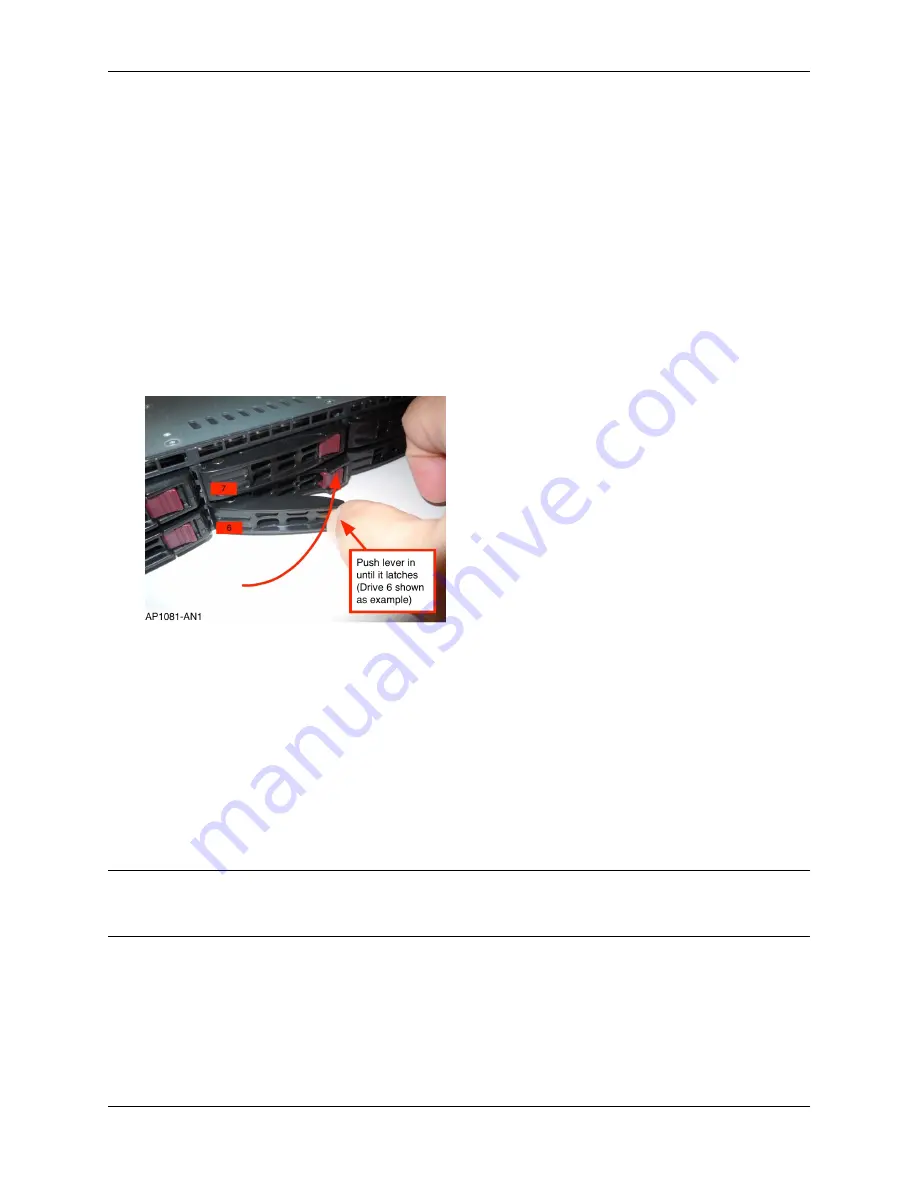
As shown in the photo below, insert the replacement drive assembly into the slot of the drive being replaced,
then slide the assembly into the slot by pushing firmly on the bezel until the lever begins to close.
Completely seat the drive assembly into place by pressing the replacement drive assembly’s lever until it locks
into place.
Latching a drive in the chassis
4. Package the failed drive and return it to Avere Systems. Instructions for returning the drive are included in the
replacement part’s shipping box, or can be emailed from Avere Global Services.
After installing the replacement drive, follow the steps in the next section (
Reformatting the Node To Use the New
(page 22)) to add it to the node.
5.2.3 Reformatting the Node To Use the New Drive
After installing the replacement drive in the node, you must manually start a node reformat operation before the node
will recognize and use the newly installed data drive.
Note:
During the reformat process, a minor disruption in service to clients might be seen while virtual interfaces are
moved. The interruption is minimal, but if your system requires consistent throughput, reformat the node at a non-
peak usage time or during a system maintenance period.
To reformat a node, follow these steps:
1. In the Avere Control Panel, navigate to the
FXT Nodes
page, under the
Cluster
heading on the
Settings
tab.
2. Locate the node with the replaced drive in the
FXT Nodes
table.
22
Chapter 5. Replacing Failed Drives


