background image

Setting log parameters

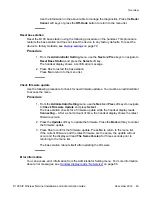
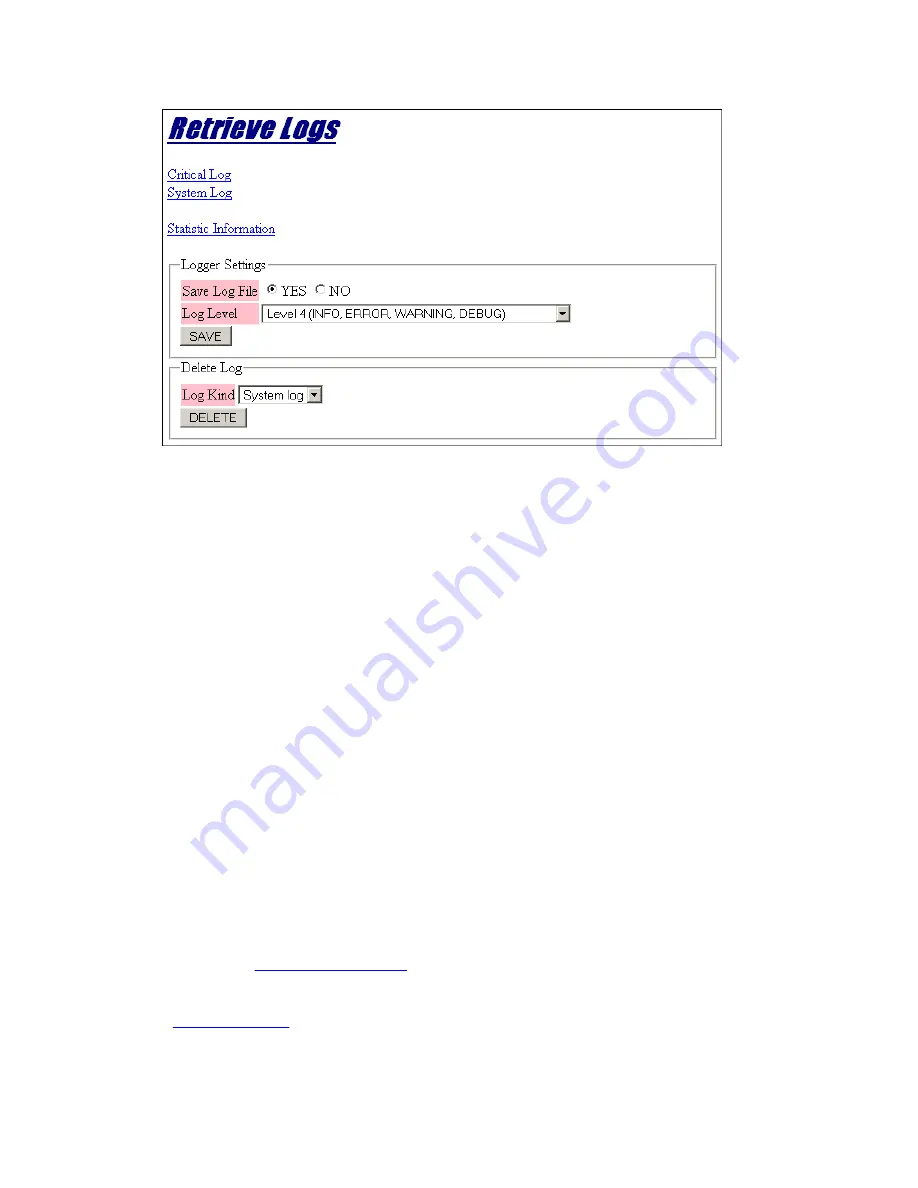
You can configure two types of logs: critical logs and system logs.

Critical log

 (Critical.log):

The Critical log saves Reboot and Firmware update events. The size of the Critical.log
file is greater than 300Kb and you can save more than 600 events.

System log

 (System.log):

According to the System.log parameter for Log Level, and whether or not saving the log
is enabled, you can save all kinds of system log information, such as network, SIP, RF,
etc. The size of the System.log file is approximately 1Mb.

The Log Level determines the corresponding system log parameters as follows:

- Level 1: INFO log saved.

- Level 2: INFO and ERROR logs are saved (Default).

- Level 3: INFO, ERROR and WARNING logs are saved. Set this level for heavy

testing and RF-related problems.

- Level 4: INFO, ERROR and WARNING and DEBUG logs are saved. Set this level

for system and SIP-related problems.

- Level 5: INFO, ERROR, WARNING, DEBUG and TRACE logs are saved.

Downloading statistical information

You can download statistical information using the 

Statistic Information

 link. Clicking on the

link downloads the StatisticInformation.log file that contains the parameters listed in the table
found under 

Statistics information

 on page 69.

Related topics:

Using SSL VPN

 on page 74

Overview

D100 SIP Wireless Terminal Installation and Administration Guide

December 2012     73

Summary of Contents for IP Office D100

Page 1: ...IP Office D100 SIP Wireless Terminal Installation and Administration Guide Issue 2 3 December 2012 ...

Page 2: ...ignated System License The applicable number of licenses and units of capacity for which the license is granted will be one 1 unless a different number of licenses or units of capacity is specified in the documentation or other materials available to you Designated Processor means a single stand alone computing device Server means a Designated Processor that hosts a software application to be acce...

Page 3: ...zed party for example a person who is not a corporate employee agent subcontractor or is not working on your company s behalf Be aware that there can be a risk of Toll Fraud associated with your system and that if Toll Fraud occurs it can result in substantial additional charges for your telecommunications services Avaya Toll Fraud Intervention If you suspect that you are being victimized by Toll ...

Page 4: ...4 D100 SIP Wireless Terminal Installation and Administration Guide December 2012 Comments infodev avaya com ...

Page 5: ...46 Repeater installation 47 Chapter 5 Coverage information 53 Out of range 53 Chapter 6 Administration and maintenance 55 Overview 55 System Status Application 56 Administration on the handset 59 Base Station Web Management Interface 71 Updating base station firmware 75 Updating handset firmware 76 Chapter 7 Factory settings 79 Resetting the base station to factory default 80 Resetting the base st...

Page 6: ...reads Searching 86 Handset not recognized by the upgrade firmware 87 Maintenance Mode 87 Repeater registration failure 88 Unknown DECT PIN 88 Unknown IP address 88 Index 89 6 D100 SIP Wireless Terminal Installation and Administration Guide December 2012 ...

Page 7: ...strative options are available using the handset the preferred method of configuration is through IP Office Manager Use System Status Application to administer the D100 and view configuration details The critical factor for installation is the location of the base station which emits the wireless signal range up to 350 feet 100 metres indoors You can extend this range using repeaters Before you be...

Page 8: ...ge For more information see Base station installation scenarios on page 37 See also Site planning on page 30 Phone functionality The following table summarizes the phone functions available on the D100 Category Support Telephony Account Code Entry Automatic Callback Automatic Intercom Dial voice call After Call Work Button Programming Call Forward Call Log Call Pickup Any Call Park Call Record Con...

Page 9: ...cations for the D100 appear below Base station capacity and performance Item Value Cell radius 100 to 350 feet 30 to 100 metres indoors Maximum number of base stations per IP Office 4 base stations Maximum number of handsets that can belong to a base station 8 handsets Maximum simultaneous calls per base station 40 calls 5 calls per handset Maximum number of repeaters per base station 6 Maximum nu...

Page 10: ...ance Item Value Cell radius 100 to 350 feet 30 to 100 metres indoors Maximum number of repeaters per base station 6 Maximum number of linked repeaters 3 Maximum number of channels per repeater 4 Note that calls carried from linked repeater consumes channels Limitations There is currently no support for DTMF over SIP Info There is currently no support for Account Code Entry using a soft key Overvie...

Page 11: ...ration button Press and hold until the base station LED flashes to register the base station with IP Office Hold this button for three seconds when registering handsets For more information see the following Capacity and performance on page 9 Base station installation on page 36 D100 SIP Wireless Terminal Installation and Administration Guide December 2012 11 ...

Page 12: ...ol the speaker and ringer volume You can also use these keys to correct name and number entry when programming a speed dial button 2 Mute key Use the Mute key to mute the handset microphone 3 Soft keys S1 S4 Use a soft key to activate the option listed directly above the key on the display The D160 has four soft keys Hardware and display elements 12 D100 SIP Wireless Terminal Installation and Admi...

Page 13: ... the feature assigned to that function key The D160 has eight configurable function keys For more information see the following Capacity and performance on page 9 Powering the handset on page 43 Handset registration on page 43 Updating handset firmware on page 76 Repeater Repeaters effectively extend the range of the base station by 100 to 350 feet 30 to 100 metres indoors For more information see...

Page 14: ...e handset is placed in the charge unit 4 Blue battery LED To indicate when the battery slot is in use 5 Battery slot tab To lock the rechargeable battery in place Press down on this tab to unlock and remove the battery Headset To use a headset plug the headset into the headset jack during the talk or handsfree modes While using a headset you can switch between the talk mode and the handsfree mode ...

Page 15: ... for the handset LCD as well as the base station charger and repeater LEDs Handset LCD The handset LCD consists of three rows The top row consists of six icons while the remaining two rows consist of 24 alphanumeric characters The following tables describe the icons and soft key options visible on the handset LCD Upgrade Jig D100 SIP Wireless Terminal Installation and Administration Guide December...

Page 16: ...Low Zero bars indicate that the remaining capacity is between 5 and 15 The icon flashes intermittently Change Battery Message The phone is not functional The remaining capacity is between 0 and 5 The mute icon Indicates that the ringer is set to Off In the Vibrate mode the mute icon is not visible The mail icon Indicates a new voicemail message The speaker icon Indicates that the phone is in the h...

Page 17: ...he blue LED indicates the base station operating mode Green LED state Connection status On Connected to IP Office Off Not connected to IP Office Flashing Trying to connect to IP Office Blue LED state Base station mode On The normal operating mode Off The base station is powered off Flashing 300ms on 300ms off The registration mode Flashing 200ms on 200ms off The maintenance mode Flashing 300ms on ...

Page 18: ...Hardware and display elements 18 D100 SIP Wireless Terminal Installation and Administration Guide December 2012 Comments infodev avaya com ...

Page 19: ...erred DHCP server In this scenario the system requires minimum configuration The base station obtains the IP address subnet mask default gateway and configuration server address from the DHCP server If the network uses a third party DHCP server the base station obtains the IP address subnet mask and default gateway from the DHCP server and then runs an IP Office discovery mechanism to obtain the c...

Page 20: ...described in Configuring the base station on page 22 Configure the SIP DECT Extensions as described in Configuring the extensions on page 23 Optional Configure the static IP parameters for the base station See Configuring the static IP parameters for the base station on page 25 Double check the values you enter as you might inadvertently lose connectivity to the base station by providing incorrect...

Page 21: ...gure the static IP parameters for the base station See Configuring the static IP parameters for the base station on page 25 2 In the Base Station Web Management Interface configure the static IP parameters for the base station See Configuring the D100 using the Base Station Web Management Interface on page 26 3 Connect the base station to the subnet where the IP Office resides The base station dow...

Page 22: ...ser does not require licensing specific to the base station Related topics Configuring the base station on page 22 Configuring the extensions on page 23 Configuring the static IP parameters for the base station on page 25 Configuring the base station Procedure 1 In IP Office Manager open the Line menu for the desired IP Office control unit 2 Right click any line and select New SIP DECT Line 3 Conf...

Page 23: ...steps Configure at least one extension to associate with the SIP DECT line See Configuring the extensions on page 23 Configuring the extensions Procedure 1 In IP Office Manager open the Extension menu for the desired IP Office control unit Configuring the D100 using IP Office Manager D100 SIP Wireless Terminal Installation and Administration Guide December 2012 23 ...

Page 24: ...tion of an associated user Select Yes to accept or No to cancel If you select Yes the system opens the user configuration window 7 Configure the user as you would for a regular SIP extension 8 Navigate to the Telephony Supervisor Settings tab and configure the Login code for the user 9 Press OK System configuration 24 D100 SIP Wireless Terminal Installation and Administration Guide December 2012 C...

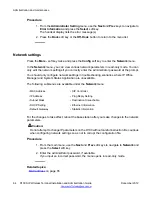
Page 25: ...enu for the desired IP Office control unit and select the SIP DECT line dedicated to the base station 2 In the SIP DECT Line window enable the Configure Base IP settings and uncheck the DHCP Client checkbox 3 Configure the parameters for IPAddress IP Mask IP Gateway and Provisioning Server 4 Select the appropriate server from the Provisioning Server drop down menu Configuring the D100 using IP Off...

Page 26: ...gement Interface on page 71 Procedure 1 Log into the Base Station Web Management Interface and select Configuration Parameters from the side menu The Configuration Parameters window lists the base station details as shown in the following image 2 Configure the parameters for IP Address Subnet Mask Default Gateway and Configuration Server 3 For DHCP Setting select the off radial button 4 Click SAVE...

Page 27: ...Configuring the D100 using the Base Station Web Management Interface D100 SIP Wireless Terminal Installation and Administration Guide December 2012 27 ...

Page 28: ...System configuration 28 D100 SIP Wireless Terminal Installation and Administration Guide December 2012 Comments infodev avaya com ...

Page 29: ...orming the survey After you plan the site register the handsets to the correct base station as identified by your floor plan When registering repeaters first determine the appropriate installation scenario You should register the repeaters prior to deployment to avoid unnecessary traveling between repeater and base station After you determine either long and narrow coverage or broad coverage and p...

Page 30: ...its repeaters A repeater must be within the cell radius of the base station to which the repeater registers and subsequent linked repeaters must be within the cell radius of the previous repeater A repeater can handle up to four channels and you can register up to six repeaters to each base station Note that a chain of linked repeaters is also limited to four channels since all channels are carrie...

Page 31: ...ws with reflective film or specialized glass produce increased signal reflection and reduced signal pass through Wire meshes and grills with apertures of less than 4cm 1 5 inches obstruct signals as effectively as continuous sheet metal Fire doors can block the signal In multi occupancy buildings such as hotels the high number of fire doors might be a problem Stairwells such as in modern office bu...

Page 32: ... the floor plan for a sample company 4 Using the base station as the center draw a circle with 160 foot 50 meter radius This circle indicates the typical coverage area of the base station Note that the coverage area goes in all directions horizontally and vertically The following image demonstrates a complete floor plan showing coverage for a single base station Hardware preparation and installati...

Page 33: ... the areas you must modify the floor plan to accommodate another base station or a repeater The following image demonstrates a modified floor plan that accommodates a repeater Note that some areas still do not receive full coverage Overview D100 SIP Wireless Terminal Installation and Administration Guide December 2012 33 ...

Page 34: ...irm that the DECT RF spectrum is not fully used by other DECT equipment in the area Perform the site survey if there is likely to be a number of other DECT systems in the area Also it is recommended that you perform the survey during normal site operation The handset can measure the RSSI of all channels within one slot If the RSSI value calculated is under 60dBm for at least one channel that slot ...

Page 35: ...lots had at least one free channel All five channels were free on slots 1 10 11 and 12 Four channels were free on slots 2 3 7 8 and 9 Three channels were free on slots 4 5 and 6 Note The site should have at least 10 clear slots in order for the D100 to work properly 3 Press the soft key used in step 2 to restart the survey In North America you can press soft key 3 to continue with a base station s...

Page 36: ...te evenly in all directions The signal typically propagates strongest in the horizontal plane However the base station might be able to serve callers on other floors You can then provide coverage to areas not frequently used and so not meriting a dedicated local base station Other radio signals Receiving normal broadcast radio signals in an area is not an indication that the base station will rece...

Page 37: ...s Users from one area do not get coverage in the other Note that both base stations register to the same IP Office Adjacent locations In this installation scenario base stations cover two adjacent areas Repeaters provide coverage for users outside of the cell radius of the base station These repeaters must be within the cell radius of the base station and additional repeaters must be within the ce...

Page 38: ...orted by a single base station This scenario might require repeaters but a repeater can only register to a single base station Each base station in this scenario must be at least 17 feet 5 meters away from each other Hardware preparation and installation 38 D100 SIP Wireless Terminal Installation and Administration Guide December 2012 Comments infodev avaya com ...

Page 39: ...s in the same location must be at least 17 feet 5 meters away from each other Ensure that you register the appropriate repeaters prior to mounting the base station in the environment Registering repeaters prior to mounting the base station helps to avoid signal disruptions and unnecessary traveling between repeater and base station See Repeater registration on page 48 Standing the base station on ...

Page 40: ...or ceiling use the following procedure Note that you will not require the base attachment Before you begin Refer to the following diagram to determine the required mounting space for the base station which is 12 cm 4 7 in by 20 3 cm 8 in Hardware preparation and installation 40 D100 SIP Wireless Terminal Installation and Administration Guide December 2012 Comments infodev avaya com ...

Page 41: ...tation until you hear it click 3 Ensure that the cable is securely attached and not disrupted then mount the base station on the screws installed in step 1 Next steps After installing and connecting the base station to IP Office register the handsets and install the appropriate repeaters for that base station Powering the base station The base station receives power through the Ethernet cable usin...

Page 42: ...equired components D100 base station D160 handset Ethernet cable for PoE Procedure 1 If DHCP is enabled the base station obtains the IP address from the DHCP server If DHCP is disabled the base station begins to boot up with the IP address that was provided in advance The status LED flashes to indicate the booting status 2 If the current IP parameters of the base station differ from those paramete...

Page 43: ...0 compatible battery Fully charge the battery before use When the battery no longer holds a charge dispose of the battery responsibly Registering a handset using the handset You can register a D160 handset using the following procedure Before you begin Ensure that your device is not connected to a base station The handset display should read Not Registered or Searching If at any time the registrat...

Page 44: ...De registering a handset using the handset You can perform de registration on the handset using the following procedure Note that de registration does not affect calls in progress Procedure 1 From either the Idle or logged out state on the handset press the Config soft key The display reads Configuration while the handset attempts to connect to the base station Press the On Hook key to quit de reg...

Page 45: ...istered results in an error tone and you will not be able to proceed to the next step extension number represents the actual extension number of the user who is logged in 6 Select the handset you wish to de register and press OK to execute de registration Press Back to quit de registration and return to the menu list 7 After de registration the handset emits a confirmation tone and displays a mess...

Page 46: ... reads Searching then the handset is out of range Otherwise the handset enters Signal Strength Survey mode and the display reads as follows S L 0 R S 2 2 L O C K C H 1 C R 3 3 L 0 0 0 0 0 0 N O R M A L Note If the LOCK SL or RFPI fields show FF then the handset is not connected to the base station or repeaters being surveyed SL Locked Slot Slot Number 0 B CH Channel Channel Number 0 4 NA 0 9 EU RS...

Page 47: ...the blue LED on the repeater flashing three times then the LED turns solid to indicate that the repeater has connected to the base station A failed registration which can occur if the repeater cannot find a base station to register with results in 10 fast flashes of the blue LED before the repeater returns to its original state The blue LED flashes slowly to indicate that the repeater is registere...

Page 48: ...essfully registers the repeater LED flashes three times The repeater connects to the base station to which it was previously registered and the repeater LED changes from flashing to solid indicating that the repeater is now registered If the repeater fails to register with a base station the repeater LED blinks 10 times and the repeater returns to its previous registration state i e Searching or C...

Page 49: ... areas where they cause a trip hazard If the cords are damaged they can create fire or electrical hazards Procedure 1 Plug the repeater s AC adapter into a standard 120V AC wall outlet 2 Using a handset perform a site survey to determine a location with adequate signal strength to support the repeater The signal strength should be at least 22 and error free See Signal strength survey on page 46 If...

Page 50: ...gnal interference Note that a repeater must be no closer than 35 feet 10 meters from the base station or another repeater on the same base station Also the repeater must be no closer than 17 feet 5 meters from other DECT equipment Before you begin Ensure that you have the necessary screwdriver to use with the two mounting screws supplied with the repeater Refer to the following diagram to determin...

Page 51: ... 3 Plug the AC adapter connector into the yellow adapter opening as in the following image 4 Without inserting the cover on an angle carefully replace the adapter cover and press on it until you hear it click 5 Mount the repeater on the mounting screws installed in step 1 6 Plug the power supply into the nearby outlet and dress the power cable For EU models install the appropriate plug into the re...

Page 52: ...the linking repeater is installed registered and connected The repeater blue LED should be on but not flashing Hardware preparation and installation 52 D100 SIP Wireless Terminal Installation and Administration Guide December 2012 Comments infodev avaya com ...

Page 53: ...ange while establishing an RF link If you press a button but the handset cannot establish an RF link with the base station the handset emits an error tone and the display reads Out of Range Out of range while talking If the handset does not receive a signal from the base station in approximately five seconds the handset terminates the call and the handset reverts to the Searching mode Likewise if ...

Page 54: ...Coverage information 54 D100 SIP Wireless Terminal Installation and Administration Guide December 2012 Comments infodev avaya com ...

Page 55: ... device Some of the administrative changes you make on the handset revert when the base station reboots You can use the Base Station Web Management Interface to access various management functions on the D100 including configurations logging information rebooting and updating firmware Note that you must be an administrator in order to view and utilize the Base Station Web Management Interface due ...

Page 56: ...current state of an IP Office system and the details of any problems that have occurred The report consists of real time events historical events status data and configuration data to assist in troubleshooting and diagnoses SSA provides real time status historic utilization and alarm information for ports modules and expansion cards on the system The following sections outline the status pages rel...

Page 57: ...hat lists the details of the base station highlighted in the Base Station Status table see the following section Alternatively you can double click a base station name in the table Allow Registration Enables the Registration mode on the highlighted base station Reset Base Reboots the base station Reset Base To Default Resets the base station to the factory defaults Reset Base Admin Pass Resets the...

Page 58: ...e The following options are available in addition to those described for the SIP DECT Base Stations status page Refresh Refreshes the Base Station Status page and the handset table Unregister Handset Unregisters the selected handset from the base station Reset Handset Resets the highlighted handset Unregister All Handsets Unregisters all handsets from the selected base station Reset All Handsets R...

Page 59: ...The administrative settings available include in order of appearance DECT PIN change Administrator password change Diagnostics Reset base station Check firmware update Error information The network settings available include in order of appearance MAC Address IP Address Subnet Mask DHCP setting Default Gateway SIP Controller Ping Reply setting Destination unreachable Ethernet information Statistic...

Page 60: ... navigate to Administrator Setting and press the Select soft key 2 Enter the administrator password and press the OK soft key Press the Del soft key to delete the last character entered By default the administrator password is 7 8 2 8 8 7 6 or Q U A T T R O 3 If the password is correct navigate to the desired menu If the password is incorrect the display reads Failed and the handset emits an error...

Page 61: ...sword using the following procedure Procedure 1 From the Administrator Setting menu use the Next and Prev keys to navigate to Password Change and press the Select soft key The system provides a confirmation message 2 Press Yes to change the password 3 Enter the new administrator password The maximum password length is eight characters but you can enter an empty password To change the password back...

Page 62: ...k fails the base station might behave unexpectedly Can be run in maintenance mode using the Base Station Web Management Interface PHY Check To check the status of the PHY register If the PHY check is successful press the Details soft key to view more information on Link Duplex and Speed If the check fails the base station cannot connect to IP Office Can be run in maintenance mode using the Base St...

Page 63: ...enu Procedure 1 From the Administrator Setting menu use the Next and Prev soft keys to navigate to Check Firmware Update and press Select The base station checks for a firmware update while the handset display reads Connecting After a short amount of time the handset display shows the latest firmware version 2 Press the Update soft key to update the firmware Press the Back soft key to cancel the f...

Page 64: ...submenus are available under the Network menu MAC Address IP Address Subnet Mask DHCP Setting Default Gateway SIP Controller Ping Reply Setting Destination Unreachable Ethernet Information Statistic Information For the changes to take effect reboot the base station after you make changes to the network parameters Caution Do not attempt to change IP parameters on the D100 without careful instructio...

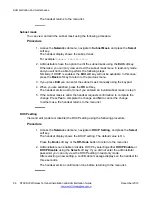
Page 65: ...ct soft key The handset display shows the IP address For example IP Addr 192 168 100 200 2 Administrators have the option to edit the address using the Edit soft key Otherwise you can only view and exit the IP address menu in read only mode and you will not be able to perform the following steps 3 Press Edit and enter the IP address manually using the keypad The and soft keys move the cursor in th...

Page 66: ...he subnet mask is valid the handset requests confirmation to complete the change Press Yes to complete the change and No to cancel the change In either case the handset returns to the menu list DHCP setting View and edit enable or disable the DHCP setting using the following procedure Procedure 1 Access the Network submenu navigate to DHCP Setting and press the Select soft key The handset display ...

Page 67: ...the handset returns to the menu list SIP controller You can view and edit the SIP controller settings using the following procedure Procedure 1 Access the Network submenu navigate to SIP Controller and press Select The handset display shows the SIP controller IP address For example SIP 192 168 100 100 2 Administrators can edit the SIP controller IP address using the Edit soft key If you are not an...

Page 68: ...tion tone before returning to the menu list Destination Unreachable View and edit enable or disable the Destination Unreachable Internet Control Message Protocol ICMP using the following procedure Procedure 1 Access the Network submenu navigate to Destination Unreachable and press the Select soft key The handset display shows the Destination Unreachable setting The default setting is On enabled 2 ...

Page 69: ...u can view statistics information using the following procedure Procedure 1 Access the Network submenu navigate to Statistics and press the Select soft key The handset display shows the available statistics information as a list of menu items 2 Select an item according to the information below Press the Back soft key to return to the menu list Menu item Description Recv INVITE Total INVITE message...

Page 70: ... RTP Total number of received RTP packets Sent RTP Total number of sent RTP packets Recv IP The total number of received IP packets Sent IP The total number of sent IP packets Recv Ethernet The total number of received Ethernet packets Sent Ethernet The total number of sent Ethernet packets Recv Error Ethernet The total number of received error Ethernet packets Administration and maintenance 70 D1...

Page 71: ...d to the same network as the D100 Despite the functionality of the Base Station Web Management Interface the application does not provide as many configuration options as IP Office Manager which is used for the majority of device configurations While the functionality of the Base Station Web Management Interface is similar to IP Office Manager you should use the interface solely as a tool for retr...

Page 72: ...he IP Office and the base station are in a location that is remote from the administrator then you must access the web interface using a secure VPN tunnel For more information see Using SSL VPN on page 74 To enter the log interface click Retrieve Logs on the left frame of the Base Station Web Management Interface Using the log interface you can set parameters download logs delete logs and view sta...

Page 73: ...og parameters as follows Level 1 INFO log saved Level 2 INFO and ERROR logs are saved Default Level 3 INFO ERROR and WARNING logs are saved Set this level for heavy testing and RF related problems Level 4 INFO ERROR and WARNING and DEBUG logs are saved Set this level for system and SIP related problems Level 5 INFO ERROR WARNING DEBUG and TRACE logs are saved Downloading statistical information Yo...

Page 74: ...t Custom The Protocol and Internal Port Number fields are automatically filled with the default values 5 Modify the External Port Number field 6 Repeat steps 4 and 5 to configure rules for additional base stations 7 Optional To delete an NAPT rule use the empty column on the left side of the table Right click in the empty cell next to the rule you want to delete and select the Delete option Next s...

Page 75: ...tically updates the D100 base station firmware but only if IP Office Manager is configured such that the system s memory card is the source for the files used by the D100 In IP Office Manager navigate to the System System tab and ensure that the Phone File Server Type is set to Memory Card as the following image demonstrates Once the correct Phone File Server Type is set IP Office can automaticall...

Page 76: ...ast the duration of the upgrade which might be a few minutes Also ensure that you have the latest USB UART driver installed for the Upgrade Jig CDM 2 04 06 WHQL Certified which is also required Locate the available Upgrade Jig drivers for each operating system in the Upgrade Jig Drivers folder Note that the following procedure has been tested and successfully performed on Windows XP and Windows 7 ...

Page 77: ... the Writer application then reinstall the battery The writing begins The writing process should take less than a minute to complete If the handset was not detected by the application the status display reads Handset not detected 7 If successful the status display reads Update complete If unsuccessful the status display reads Update failed If the update fails Check the connection between the Upgra...

Page 78: ...Administration and maintenance 78 D100 SIP Wireless Terminal Installation and Administration Guide December 2012 Comments infodev avaya com ...

Page 79: ...te Off n a Ear Speaker Volume 4 n a Hands Free Volume 4 n a Headset Volume 4 n a Range Alarm On n a DHCP n a Enable IP Address n a 192 168 1 100 Subnet Mask n a 255 255 0 0 Default Gateway n a 192 168 1 1 SIP Controller n a 192 168 1 1 Ping Reply n a Enable Destination Unreachable n a Enable DECT PIN ID n a 3100 Administrator Password n a 7828876 Login ID for the Base Station Web Management Interf...

Page 80: ...Status Application on page 80 Resetting the base station using the Base Station Web Management Interface on page 81 Resetting the base station using the base station on page 81 Resetting the base station using System Status Application Using System Status Application is the preferred method for resetting the base station to factory default Attempt the procedure below before you attempt any other f...

Page 81: ...ets to factory default Resetting the base station using the base station Only use this method to reset the base station to factory default when the preferred and alternative methods fail See Resetting the base station using System Status Application on page 80 before you attempt the following method Procedure 1 Press and hold the Registration button located on the front of the base station and ins...

Page 82: ...Factory settings 82 D100 SIP Wireless Terminal Installation and Administration Guide December 2012 Comments infodev avaya com ...

Page 83: ...n and select Avaya to list all Avaya accessories available through Uniden You can also enter Avaya D100 in the search field at the top of the page to list accessories specific to the D100 SIP Wireless Terminal The D100 accessories available include batteries headsets protective covers and replacement parts D100 SIP Wireless Terminal Installation and Administration Guide December 2012 83 ...

Page 84: ...Accessories 84 D100 SIP Wireless Terminal Installation and Administration Guide December 2012 Comments infodev avaya com ...

Page 85: ...tion IP address using the handset menu Parameter Description Default value DHCP setting DHCP On Off On MAC address The MAC address of the base station The MAC address parameter is read only The MAC address of the network interface IP address The IP address of the base station If DHCP is disabled you can change the IP address 192 168 1 100 Subnet mask The subnet mask If DHCP is disabled you can cha...

Page 86: ...No Connection Verify the IP connectivity Not Configured The base station is not configured on IP Office Verify the configuration in IP Office Manager Specifically check that the base station s MAC Address is configured correctly Wrong Market The IP Office system companding law does not match the market for the base station If the IP Office system operating mode uses companding law of mu law and ma...

Page 87: ...he Reset button on the front of the base station for five seconds After a short while the base station automatically begins to reboot 2 Plug the Ethernet cable into the base station while pressing the Reset button 3 Use the Base Station Web Management Interface to reboot the D100 to factory default See Rebooting the base station on page 74 In Maintenance Mode you can access most of the areas avail...

Page 88: ... other DECT equipment with registration enabled as this could be causing the interference Test the registration by turning off the base station to which the repeater is registered and watch to see if the LED on the repeater changes from solid to a slow flash A slow flash indicates that the base station is either not detected or out of range Unknown DECT PIN If the base station has an unknown DECT ...

Page 89: ...ameters 25 connecting 15 D D100 cfg 42 D100prov txt 42 D100settings txt 42 DECT PIN 61 DECT RF 43 registration 43 default 75 default gateway 67 deployment 35 36 deregister 44 handset 44 destination unreachable 68 DHCP 20 42 66 setting 66 DHCP 66 diagnostics 62 DoS attack protection 9 E error information 64 ethernet 9 Ethernet 69 extension 23 configure 23 F factory default 80 factory settings 79 fe...

Page 90: ...reboot 75 register 43 handset 43 registration failure 88 repeater 14 48 50 installation 48 registration 48 reset 63 80 base station 63 80 reset 63 reset button 12 ROM 42 S settings 60 administrator 60 signal strength 46 survey 46 SIP controller 67 site planning 30 SSA 57 SSL VPN 74 static addressing 20 static IP parameters 25 configure 25 statistics 69 subnet mask 66 System Status Application 57 T...

Reviews: