Operation Mode
Operator's Handbook, AutroSafe Interactive Fire Alarm System, Release 3, ASAFE-FO/FE Rev. E, 021105,
Autronica Fire and Security AS
Page 18
3.7 How to View Detailed Zonal Information
To be able to select among zones in alarm, fault or test state, you
simply press the ENTER button ( ). You can now use the up/down
arrow buttons to select the wanted zone (in this example
Fire Alarms
).
FIRE ALARMS
19:23
Total: 3
1 OFFICES
2 CANTEEN
3 WORKSHOP
1: SHOW POINTS
19:23
Total: 3
To view
detailed zonal information
for the zone you have selected
(highlighted), you simply press the ENTER button ( ) once more. ,
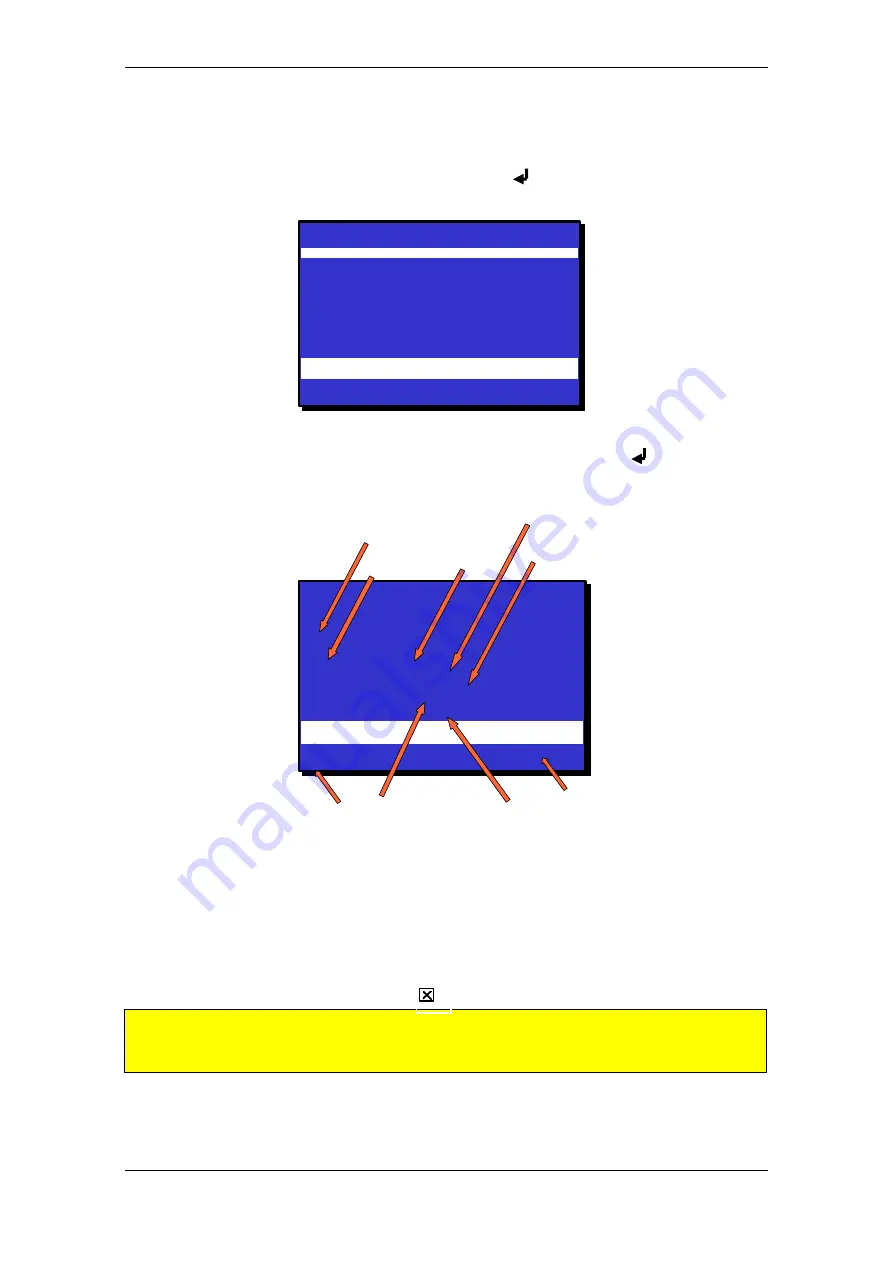
The following screen picture will appear (example):
FIRE ALARM INFO
19:23
Total: 3
ZONE IN ALARM
OFFICES
FIRST POINT/MCP IN FIRE ALARM:
P6 Manual
TIME ENTERING ALARM: 19:07
OUTPUTS
: Activated
ACTIVATED BY
: McpOperation
ACTIVATION TIME
: 19:07
FIRE ALARMS Total: 3
3 WORKSHOP
Last
zone
in alarm
Total
number
of zones
in alarm
First
point
The
activation
time
The point
type
The time
entering
alarm
Zone in
Alarm
Activated
by
1: SHOW POINTS
Outputs
activated
(or not)
Figure 3-4: Detailed Zonal Information - Example: Fire Alarm Info
Detailed zonal information will be available. In the
example
above you
can view the zone in alarm, the first point in fire alarm, the time
entering alarm, the activation state of outputs, what triggered the alarm
(for example, Manual Call-point operation) and the activation time. You
can also move directly to SHOW POINTS (press digit 1).
The close button ( ) is used to go one step backwards (at any time).
NOTE: If you have entered SHOW STATUS for more detailed point information, you have
to press the Close button to re-enter Operation Mode
in order to activate the Silence
Alarms button and the Reset button.
www.ukpanels.com


