


-|Transparent Guide|-
Wiring of Output
■ S14, S24, S34, S44, S54 : P channel safety outputs
The instantaneous or off-delay safety outputs go to ON or OFF based on the safety
inputs, feedback start input, logic input, and input signals of non-contact door switch.
•
Leave unused safety outputs in the OPEN state.
•
Configure a protection circuit against the counter electromotive force when
connecting inductive loads.
•
To expand the number of safety outputs in the form of contacts, connect the
expansion cable of the expansion relay unit to advanced unit or the expansion
connector of non-contact door switch unit, and connect the loop connector to the
expansion relay unit located at the end of position.
•
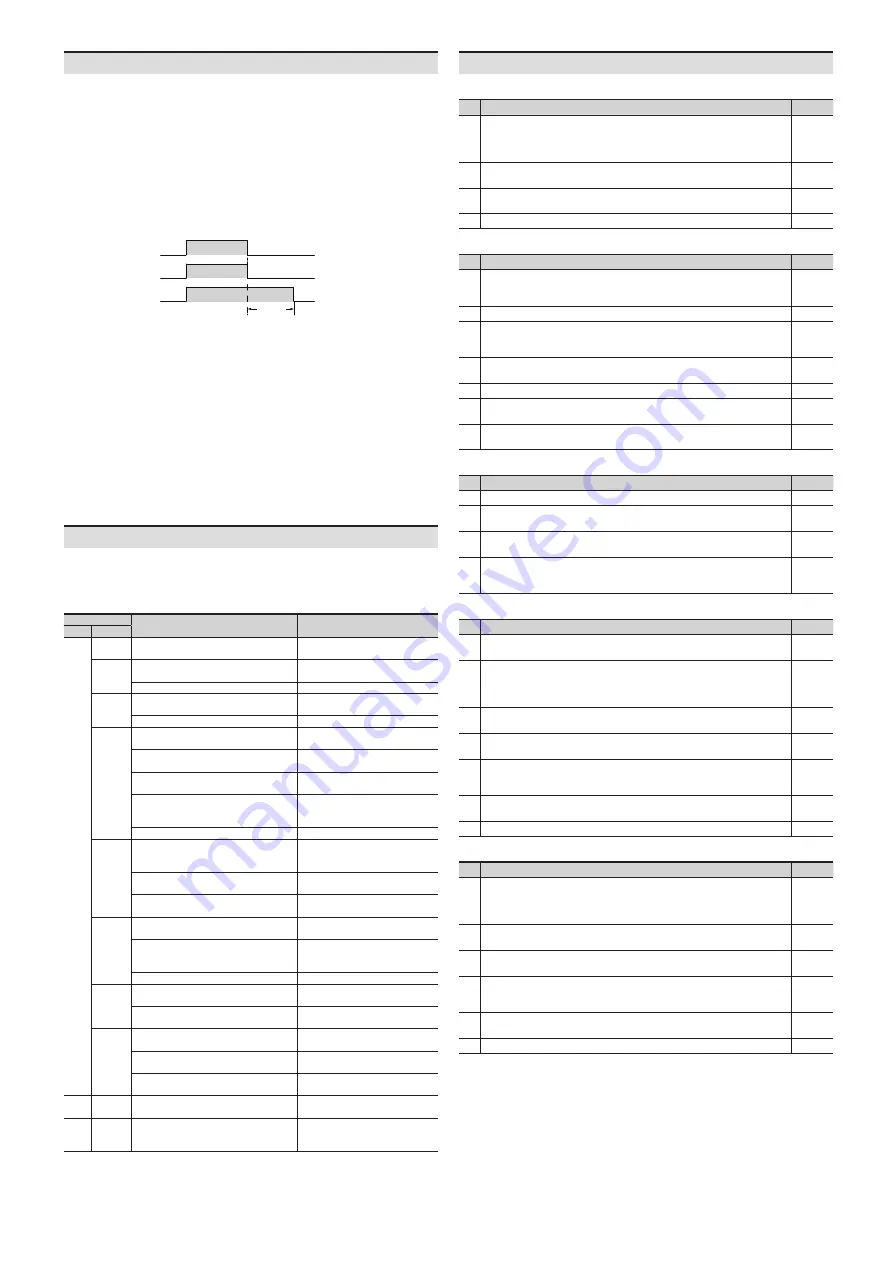
Operation of safety output and safety off-delay output based on the safety input signal
Safety input
ON
OFF
ON
OFF
ON
OFF
Safety instantaneous
output
Safety off-delay
output
Off-delay
set time
■ 13/14, 23/24, 33/34 (37/38), 43/44 (47/48)
: Safety outputs of relay unit
The instantaneous or off-delay safety outputs go to ON or OFF based on the safety
inputs, feedback start input.
•
Leave unused safety outputs in the OPEN state.
■ X1: Auxiliary output 1
When the instantaneous safety outputs are ON, the X1 auxiliary output goes to ON.
When the instantaneous safety outputs are OFF, the X1 also goes to OFF.
•
Leave unused auxiliary output in the OPEN state.
■ X2: Auxiliary output 2
X2 auxiliary output goes to ON when the ERR indicator turns on or flashes.
•
Leave unused auxiliary output in the OPEN state.
Error Indication
When an error occurs, the ERR indicator and other indicators turn on or flash to notice
the cause of error.
Be sure to check and take measures according to the table below, and turn the power
on again. If the measures are not valid, please contact the Autonics.
Indicator
Cause
Check and measures
ERR Others
ON
PWR
flashes
The power voltage is out of the allowable
range.
Check the supplied power voltage.
M1
flashes
Wiring error of safety input 1
Check the wiring to M11, M12
terminal.
Failure of internal circuit of safety input 1 Please contact the Autonics.
M2
flashes
Wiring error of safety input 2
Check the wiring to M21, M22
terminal.
Failure of internal circuit of safety input 2 Please contact the Autonics.
FB
flashes
Wiring error of feedback start input
Check the wiring to M51, M52 and
M53 terminal.
Internal circuit error of feedback start
input
Please contact the Autonics.
Error at the power of expansion relay unit Check the supplied power voltage
to the expansion relay unit.
Feedback error of the relay unit
Check the cable of expansion
relay unit and loop connector
connection.
Safety output error of the relay unit
Please contact the Autonics.
NS
flashes
Wiring error of input and output of the
non-contact door switch
Check the wiring to the D1 and
D2 terminal of non-contact door
switch.
Wiring error of series connection of the
non-contact door switch
Check the wiring to between the
non-contact door switches.
Failure of internal circuit of the non-
contact door switch
Replace the non-contact door
switch (SFN series).
AND
flashes
Wiring error of logic input
Check the wiring to M61 and M62
terminal.
Setting error of logic input
Check the setting values of SW1
and SW2 at switch for logic (AND)
input.
Failure of internal circuit of logic input
Please contact the Autonics.
OUT1
flashes
Wiring error of instantaneous safety
output
Check the wiring to instantaneous
safety output terminal.
Failure of internal circuit instantaneous
safety output
Please contact the Autonics.
OUT2
flashes
Wiring error of the off-delay safety output Check the wiring to the off-delay
safety output terminal.
Failure of internal circuit of the off-delay
safety output
Please contact the Autonics.
Setting error of the off-delay time
Check the setting value of the
switch for off-delay time.
Flash -
Error at internal circuit and output relay
of the expansion relay unit
Please contact the Autonics.
OFF M1 M2
flashes
The different input signal between safety
input 1 and safety input 2
Check the wiring to the safety
input devices. Check the input
sequence of safety inputs.
Check and Maintenance
■ Check installation conditions
Checklist
Check
1
The distance from hazardous zone or source of the machine to the product,
safety sensors connected to the product, installed location is equal to or
greater than calculated safety distance.
Safety distance: ()mm / Actual distance: ()mm
2
Installed in the environment without the material causing deformation such as
corrosion or ignition.
3
When installing the DIN rail or panel, the product is firmly fixed to prevent
separation.
4
There is no product damage or appearance problem.
■ Check wiring connection
Checklist
Check
1
The power supply used for devices related to the product and safety-related
functions is 24VDC, and a dedicated power supply meets the specified rated
specifications and is not connected to other devices or equipment.
2
When connecting power supply, the polarity is not connected in reverse.
3
The appearance of the wiring connected to the product is not damaged, such
as cracking, breakage, etc. of the outer shell, and there is no cause for damage
around the wiring.
4
In case of connecting more than two products, it is configured for the
dedicated series connection or mutual interference.
5
The wiring connected to the product is correctly connected to each purpose.
6
The wiring connected to the product is firmly fixed to prevent separation
during use.
7
In case of auxiliary output (AUX1,AUX2), it is configured to prevent the
connection to safety-related part of the control system.
■ Safety system-check in operation
Checklist
Check
1
Inspect without operator in hazardous zone or near the source of hazard.
2
The safety input signal is off while the machine is operating, then the safety
system immediately stops.
3
In case of the power shut down, the safety system stops and maintains the
status.
4
The actual machine response time (the time taken for the hazard source to
stop) is less than the calculated time
Calculated machine response time: ()ms / Actual machine response time: ()ms
■ Daily inspection
Checklist
Check
1
Accessible to hazardous zone or source of the machine only by passing through
the detection zone of the product.
2
The distance from hazardous zone or source of the machine to the product,
safety sensors connected to the product, installed location is equal to or
greater than calculated safety distance.
Safety distance: ()mm / Actual distance: ()mm
3
When installing the DIN rail or panel, the product is firmly fixed to prevent
separation.
4
The wiring connected to the product is firmly fixed to prevent separation
during use.
5
The appearance of the wiring connected to the product is not damaged, such
as cracking, breakage, etc. of the outer shell, and there is no cause for damage
around the wiring.
6
The input/output wiring of the product is firmly fixed to prevent separation
from each device.
7
There is no product damage or appearance problem.
■ Regular inspection
Checklist
Check
1
The distance from hazardous zone or source of the machine to the product,
safety sensors connected to the product, installed location is equal to or
greater than calculated safety distance.
Safety distance: ()mm / Actual distance: ()mm
2
When installing the DIN rail or panel, the product is firmly fixed to prevent
separation.
3
The wiring connected to the product is firmly fixed to prevent separation
during use.
4
The appearance of the wiring connected to the product is not damaged, such
as cracking, breakage, etc. of the outer shell, and there is no cause for damage
around the wiring.
5
The input/output wiring of the product is firmly fixed to prevent separation
from each device.
6
There is no product damage or appearance problem.


