


Industrial Managed
Ethernet Switch
User Manual
Configuring
with a Web
Browser
Page
15
of
49
Table 2.2 Description of IP Network Settings
Label
Description
Factory Default
DHCP Client
By selecting
Enabled
, an IP address and related fields
will be automatically assigned. Note the fields below
will be grey out. Otherwise, users can select
Disabled
and continue to set up the static IP address and
related fields manually.
Disabled
IPv4 Address
The current IPv4 address of the device. Users can set a
new static IP address for the device.
10.0.50.1
Subnet Mask
Display current Subnet Mask or set a new subnet mask
255.255.0.0
G
ateway IP
Show current Gateway IP address or user can set a
new one
0.0.0.0
D
NS Server 1
Show current primary DNS IP address to be
used by
your network or user can set a new one
0.0.0.0
D
NS Server 2
Show current secondary DNS IP address to be
used by
your network or user can set a new one
0.0.0.0
2.2.3
System Log feature
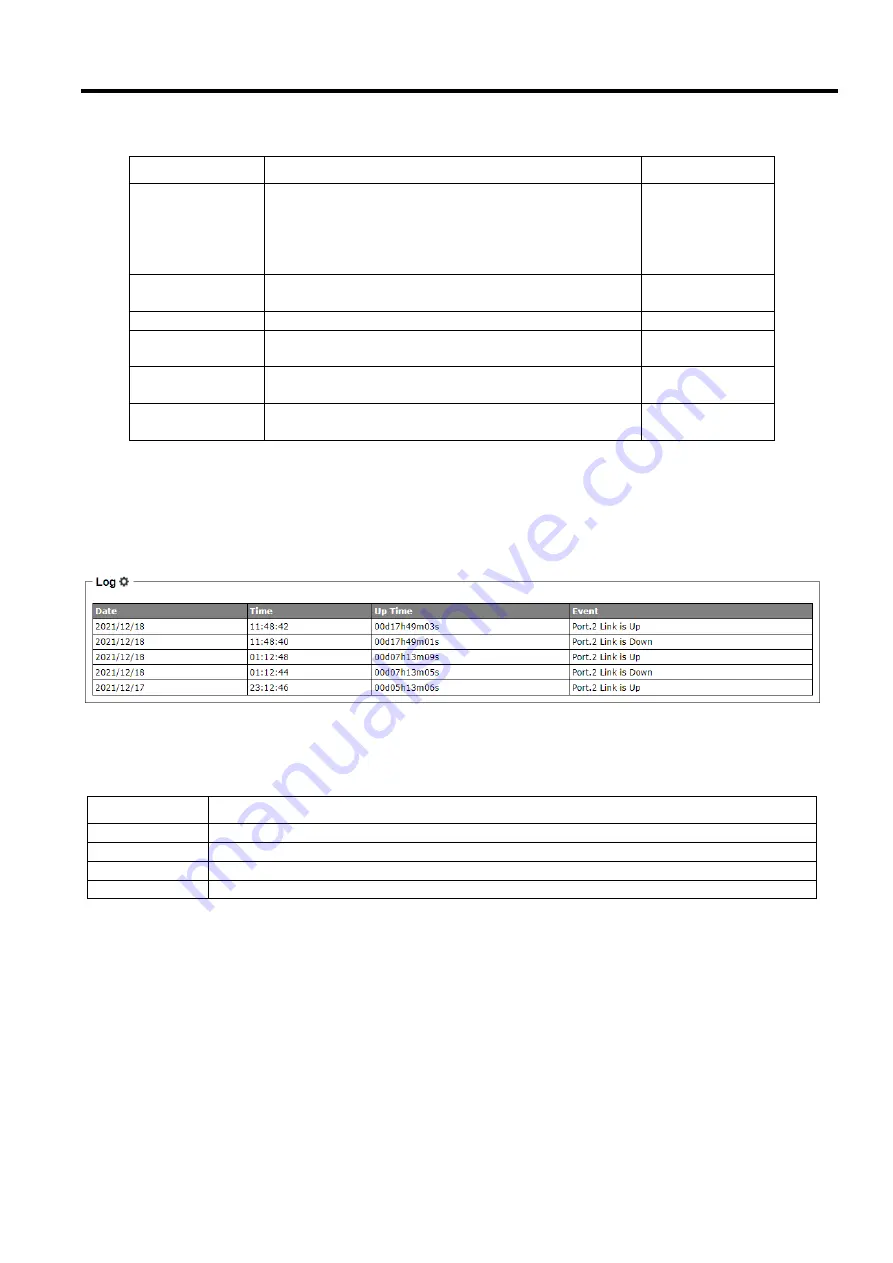
The
Log
feature at the buttom of the Information function shows a table of at least 5 system logs as shown in Figure
2.10. Each log entry includes
Date
,
Time
,
Up Time
, and
Event
description. Note that the log entries are sorted by date
and time. Table 2.3 provides explanation of each column in the Log table.
Figure 2.10 Log Feature
Table 2.3 Description of Log Entry
Label
Description
Date
Indicate the system date of the
occurred event
Time
Indicate the time stamp that this event occurred
Up Time
Indicate how long the system
(managed switch) has been up since this event occurred
Event
Details description of this event
If the user would like to configure the System Log Setting, the user can click on the gear icon to bring up a
System
Log Setting
pop-up window as shown in Figure 2.11. On this window, the user can enable or disable sending log to a
log server. If the user enables the
Log to Server
option by choosing from the pull-down menu, the user will have to
specify the Log’s
Server IP Address
and
Server Service Port
in the next two fields. After you finished, clicking on the
Save Changes
button to save any changes or clicking on the
Save Changes and Apply
button to save and apply the
setting.


