background image

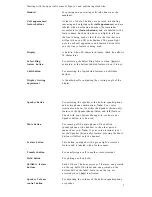
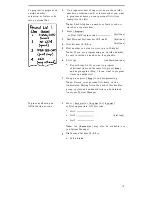
Starting with the upper left corner of Figure 1 and continuing clockwise:

Handset

For placing and answering calls (also known as the
receiver).

Call appearances/

At least 3 of these 5 buttons are devoted to handling

feature buttons

incoming and outgoing calls (call appearances) and are
labeled with an extension number; the remainder
access features (feature buttons)  and are labeled with a
feature name. Each button has a red light to tell you
the line is being used or that this is the line that you
will get when you lift your handset. The green light
next to each call appearance and feature button tells
you the line or feature is being used.

Display

A built-in 2-line, 48-character display. (Each line allows
24 characters.)

Select Ring/

For accessing the Select Ring feature when [ 

Shift

 ] is

feature button

activated, or the bottom-labeled feature when it is not.

Shift button

For accessing the top-labeled features on shiftable

buttons.

Display viewing

A thumbwheel for adjusting the viewing angle of the

adjustment

display.

Speaker button

For accessing the speaker or the built-in speakerphone
and microphone combination.  Note:  Your voice
terminal can be set for either the Speaker (listen-only)
feature or the Speakerphone (listen and talk) feature.
Check with your System Manager to see how your
Speaker button is to be used.

Mute button

Feature button

Transfer button

Hold button

Shiftable feature

buttons

Speaker Volume
control button

For turning off the microphone of the built-in
speakerphone or the handset so the other person

cannot hear you.  Note:  If your voice terminal is set
for the Speaker (listen-only) feature, pressing the Mute
button will affect only the handset.

This button, equipped with a green light, accesses a
feature and is labeled with a feature name.

For transferring a call to another voice terminal.

For putting a call on hold.

Each of these 7 buttons accesses 2 features, one printed
on the top half of the label and one printed on the
bottom half of the label. Features on the top are
accessed when [ 

Shift

 ] is activated.

For adjusting the volume of the built-in speakerphone
or speaker.

2

Summary of Contents for 7406BIS

Page 1: ...AT T DEFINITY Communications System Generic 1 7406BIS Voice Terminal User s Guide...

Page 2: ...mer Information Center 2855 North Franklin Road P O Box 19901 Indianapolis IN 46219 1 800 432 6600 In Canada 1 800 255 1242 Document No 555 204 737 Issue 1 March 1990 For more information about AT T d...

Page 3: ...of a high quality built in speakerphone You can use the speakerphone for placing and answering calls or for using voice features without lifting your handset and for allowing others to participate in...

Page 4: ...thumbwheel for adjusting the viewing angle of the adjustment display Speaker button For accessing the speaker or the built in speakerphone and microphone combination Note Your voice terminal can be se...

Page 5: ...A sliding switch to control the volume for the tone under voice terminal ringer Drop button For disconnecting from a call and dropping the last party added on a conference call Conference button For s...

Page 6: ...ge Provides automatic redirection of certain calls to your voice terminal for answering Your System Manager determines which calls will be sent to you Use to answer calls for other extensions for whom...

Page 7: ...ge which gives your name and extension the date and time you called and the number of times you called Use any time you wish to have someone call you back it will help cut down on repeated call attemp...

Page 8: ...le you were away Display Features Note These features can be used only with a 7406D05A voice terminal the 7406BIS voice terminal with a display Inspect Shows you call related information for an incomi...

Page 9: ...the blanks provided within the procedures write in the feature code numbers Note Remember to press Shift before attempting to use any of the top labeled features on shiftable buttons Also if you recei...

Page 10: ...Meanings For a list of glossary terms see the section titled Key Words to Know Quick Reference Lists Following the procedures is a set of quick reference lists Use them to record your feature and trun...

Page 11: ...es you want to program Note Each AD button will hold one complete telephone number or feature code Pick up handset Press call appearance button dial tone Press Program or Dial AD Program code dial ton...

Page 12: ...ramming an outside number be sure to include a trunk code if applicable Press confirmation tone Repeat Steps 4 6 if you want to program additional items on the same list press Drop and begin again at...

Page 13: ...en both you and the called extension are idle when you answer regular ringing is sent to the called party Note Automatic Callback is automatically canceled after 30 minutes To cancel Automatic Callbac...

Page 14: ...not available press the fluttering xxxxx to reconnect to call 3 Press Transfer again to send call to co worker or press Conference make it a 3 party call Call Forwarding All Calls To temporarily redir...

Page 15: ...rked 4 Hang up To retrieve parked call 1 Dial Answer Back code dial tone from any extension 2 Dial extension where call is parked confirmation tone If returning to call parked at your voice terminal d...

Page 16: ...ence again All parties now connected Repeat Steps 1 3 for additional conference connections To add a call you ve put on hold to another call you re connected to 1 Press Conference dial tone Held call...

Page 17: ...call make a call or perform some other task 1 Press Hold Green light flutters Note If you put a conference call on hold the other parties remain connected To answer a new call 1 Press Hold while acti...

Page 18: ...ily group 2 Dial group member s 1 or 2 digit code Special intercom ring is sent dial tone ringback tone Note If call is unanswered press Go to Cvr while call is ringing if you want to redirect it to c...

Page 19: ...e Word Calling code dial tone 2 Dial the extension confirmation tone Message light comes on called voice terminal To cancel a LWC message 1 Press Cancel LWC Note You cannot cancel messages for an AUDI...

Page 20: ...n with the other party press Mute again Red light goes off and other party can hear you again Note The Mute feature turns off automatically when you hang up or switch from the speakerphone to the hand...

Page 21: ...patterns 5 Press Shift again when you hear the desired ring pattern Your new ring is set Shift light goes off Note If you receive a call during selection process is interrupted and you must begin agai...

Page 22: ...All Calls 1 Press Send Calls again while on hook or Dial Send All Calls Cancel code confirmation tone Shift To use the Shift feature 1 Press Shift to access any of the top labeled features on buttons...

Page 23: ...he Volume control button labeled to lower the volume press the left half of the Volume control button labeled If you have a display it shows SPEAKER L H There are 8 possible volume settings On the dis...

Page 24: ...one speak and listen feature To place answer a call 1 without lifting the handset or to use speakerphone with any 2 feature 3 Press Speaker Green light next to Speaker goes on Place or answer call or...

Page 25: ...goes on next to Speaker 2 Hang up handset To end a call 1 Press Speaker again to hang up Green light goes off Transfer To send present call to 1 another extension or outside number 2 3 4 Press Transfe...

Page 26: ...est assistance 5 REPEAT read message again 8 CALL call back named extension Note When you call back an extension with 8 be sure to also delete the message by pressing 3 before you press 8 otherwise th...

Page 27: ...at number is shown and then replaced by the called party s name and extension When a call is received from another extension the caller s name is shown when a call is received from outside OUTSIDE CAL...

Page 28: ...essage Retrieval To see your messages 1 Press Msg Rtrv when your Message light 2 Press Next Msg to see first message and then for is on while on hook each following message off hook or on a call To re...

Page 29: ...message is shown 3 Press Transfer Co worker is connected to call attempt To erase a message 1 Press Delete while any part of message is shown To leave Message Retrieval and return to normal display 1...

Page 30: ...ored list item 2 Press selected Pers List or Grp List or Sys List or Dial appropriate AD list code List 1 List 2 List 3 Note An Enhcd List may also be available see your System Manager 3 Dial selected...

Page 31: ...e 1 Press Date Time Display returns to normal mode after a few seconds To see elapsed time 1 Press Timer hours minutes seconds Green light comes on 2 Press Timer again to stop timer and clear display...

Page 32: ...ated indicates an incoming call is waiting to be answered Number of beeps designates the source 1 for an internal call 2 for an outside or attendant call 3 for a priority call confirmation tone Three...

Page 33: ...all communications equipment in your network dial pad The 12 pushbuttons you use to dial a number and access features enhanced list One of the 4 types of Abbreviated Dialing lists programmable only b...

Page 34: ...ronic ringing sound in your voice terminal stored number A telephone number which has been programmed and stored as a 1 2 or 3 digit list item for use with Abbreviated Dialing It can be a complete or...

Page 35: ...ne display administrable buttons etc and functional capabilities that distinguish it from a conventional telephone Quick Reference Lists Feature Codes Feature Code ABBREVIATED DIALING List 1 List 2 Li...

Page 36: ...e Personal List 1 Personal List 2 Personal List 3 Item No Name Name Name 1 2 3 4 5 Miscellaneous 6 Description Extension 7 Attendant 8 9 0 You can have as many as 3 personal lists and each list can ha...

Reviews: