2-16
Chapter 2: Basic installation
2.7.2 Floppy disk drive
The system supports a 3.5” floppy disk drive.
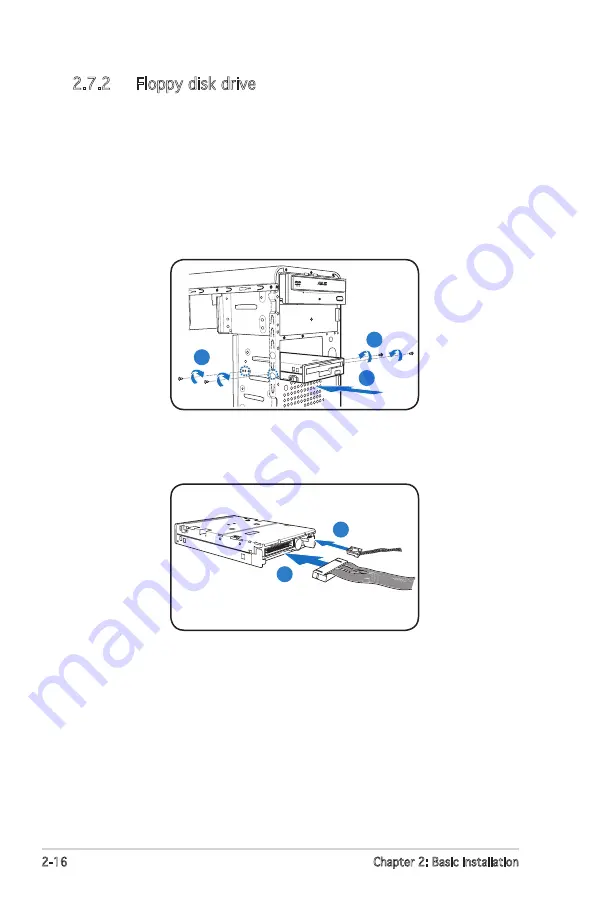
To install a floppy disk drive:
1. Place the chassis upright, then remove the lower 3.5” drive bay metal
plate cover.
2. Insert the floppy disk drive to the bay, then carefully push the drive
until its screw holes align with the holes on the bay.
3. Secure the floppy disk drive with two screws on both sides of the bay.
4. Connect the signal (A) and power (B) plugs to connectors at the back
of the drive.
5. Connect the other end of the floppy cable to the floppy disk drive
connector (labeled FLOPPY) on the motherboard. See page 4-6 for the
connector location.
3
3
2
B
A
Summary of Contents for Vintage V2-AH2
Page 1: ...Vintage V2 AH2 PC Desktop Barebone ...
Page 36: ...2 20 Chapter 2 Basic installation ...
Page 52: ...3 16 Chapter 3 Starting up ...


