1-14
Chapter 1: Product Introduction
Chapter 1
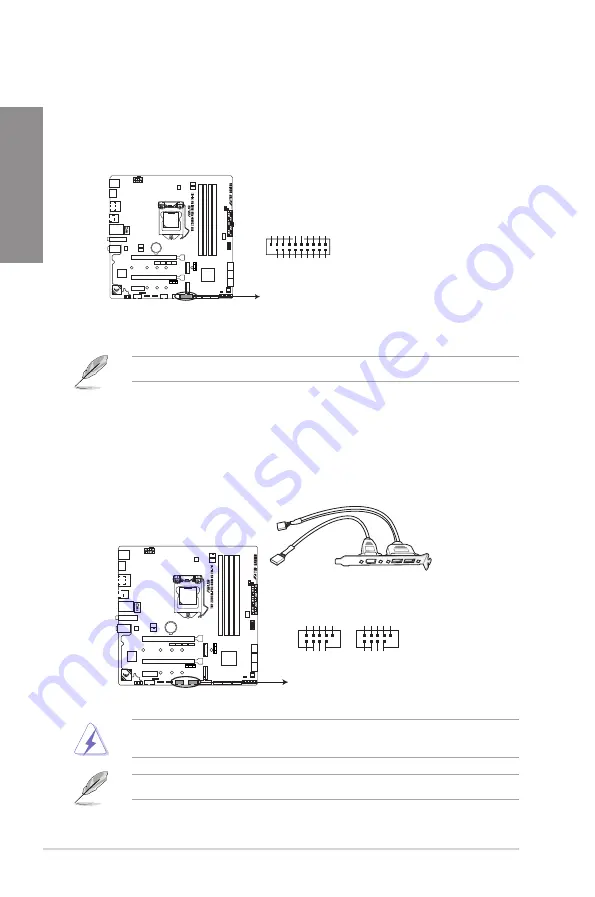
DO NOT connect a 1394 cable to the USB connectors. Doing so will damage the
motherboard!
The USB 2.0 module is purchased separately.
5.
USB 2.0 connectors (10-1 pin USB1112, USB34)
These connectors are for USB 2.0 ports. Connect the USB module cable to these
connectors, then install the module to a slot opening at the back of the system chassis.
These USB connectors comply with USB 2.0 specification that supports up to 480 Mb/s
connection speed.
4.
USB 3.1 Gen1 connector (20-1 pin U31G1_910)
This connector allows you to connect a USB 3.1 Gen1 module for additional USB 3.1
Gen1 front or rear panel ports. With an installed USB 3.1 Gen1 module, you can enjoy
all the benefits of USB 3.1 Gen1 including faster data transfer speeds of up to 5 Gb/s,
faster charging time for USB-chargeable devices, optimized power efficiency, and
backward compatibility with USB 2.0.
The USB 3.1 Gen1 module is purchased separately.
®
TUF Z390M-PRO GAMING (WI-FI) USB 3.1 Gen 1 connector
U31G1_910
PIN 1
Vbus IntA_P1_SSRX- IntA_ GND IntA_P1_SSTX- IntA_ GND IntA_P1_D- In GND
Vbus
IntA_P2_SSRX- IntA_
GND
IntA_P2_SSTX- IntA_
GND
IntA_P2_D- In
®
TUF Z390M-PRO GAMING (WI-FI) USB2.0 connectors
USB+5V USB_P4- GND NC
USB+5V USB_P3-
GND
USB34
PIN 1
USB+5V USB_P12- GND NC
USB+5V
USB_P11-
GND
USB1112
PIN 1
Summary of Contents for TUF Z390M-PRO GAMING WI-FI
Page 1: ...Motherboard TUF Z390M PRO GAMING Wi Fi ...
Page 16: ...xvi ...
Page 36: ...1 20 Chapter 1 Product Introduction Chapter 1 ...
Page 38: ...2 2 Chapter 2 Basic Installation Chapter 2 ...
Page 42: ...2 6 Chapter 2 Basic Installation Chapter 2 2 1 4 DIMM installation To remove a DIMM ...
Page 44: ...2 8 Chapter 2 Basic Installation Chapter 2 2 1 6 SATA device connection OR ...
Page 54: ...2 18 Chapter 2 Basic Installation Chapter 2 ...
Page 82: ...3 28 Chapter 3 BIOS Setup Chapter 3 ...
Page 84: ...4 2 Chapter 4 RAID Support Chapter 4 ...
Page 92: ...A 8 Appendix Appendix ...


