Chapter 2: Hardware setup
2-14
3.
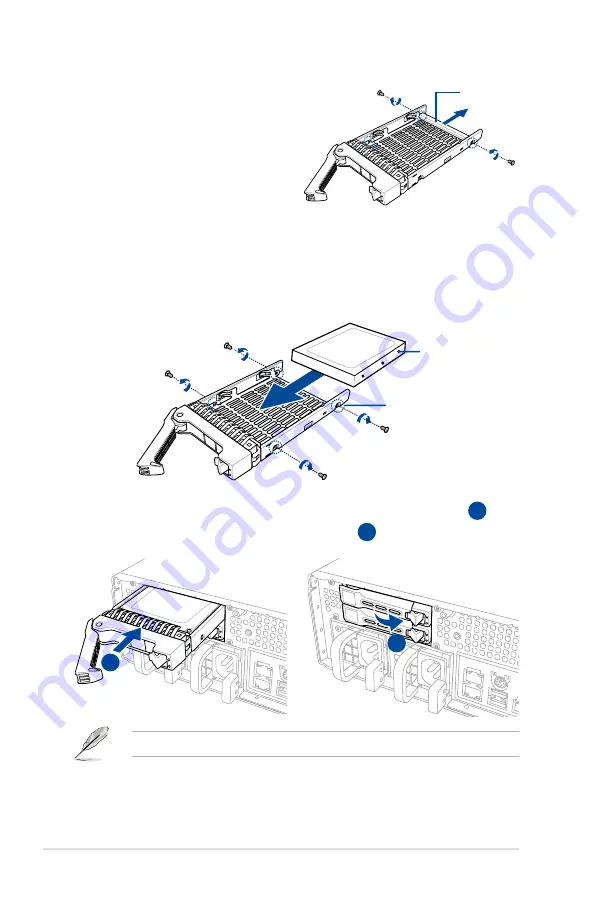
Release the screws on each side of the
drive tray to release the drive tray metal
beam.
support beam
SSD screw hole
Drive tray screw hole
4.
Orient and place the SSD into the tray.
Ensure that the SSD is fitted firmly inside the drive tray and that the four screws of the
SSD matches the four screws holes of the drive tray.
5.
Carefully insert the drive tray and push it all the way to the depth of the bay (
A
).
Lock the secure tab to secure the drive tray in place (
B
).
A
B
When installed, the connector on the drive connects to the connector on the backplane.
6.
Repeat steps 1 to 5 to install other 2.5-inch SSDs.
Summary of Contents for RS520-E8-RS12-E
Page 1: ...Server User Guide RS520 E8 RS8 RS520 E8 RS12 E ...
Page 12: ...xii ...
Page 52: ...Chapter 2 Hardware setup 2 28 ...
Page 78: ...Chapter 4 Motherboard information 4 22 ...
Page 102: ...5 24 Chapter 5 BIOS setup 5 5 IntelRCSetup menu ...
Page 132: ...5 54 Chapter 5 BIOS setup ...
Page 170: ...6 38 Chapter 6 RAID configuration ...
Page 198: ...7 28 Chapter 7 Driver installation ...
Page 199: ...A Contact Information Appendices ...


