Chapter 4: Installing the Gateway
PN 365-095-31279 x.2
SURFboard SVG2482AC Wireless Voice Gateway User Guide
Copyright 2017, ARRIS Enterprises, LLC. All rights reserved
.
18
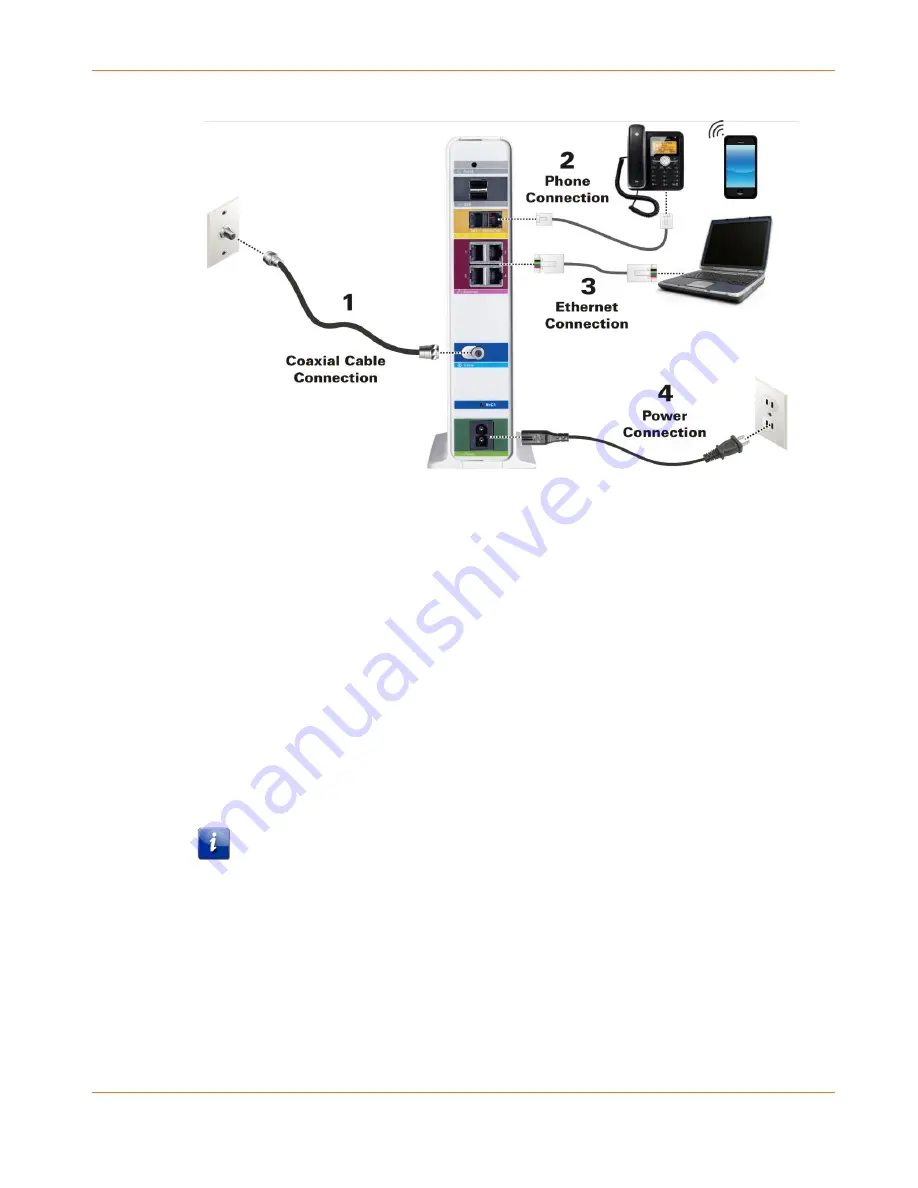
Figure 4:
SVG2482AC Connection Diagram
1.
Check that a coaxial cable is already connected to a cable wall outlet or RF splitter (not
included).
2.
Connect the other end of the coaxial cable to the Cable connector on the rear of the
SVG2482AC.
Use your hand to tighten the connectors to avoid damaging them.
3.
Connect the Ethernet cable (included) to the Ethernet port on your client device.
4.
Connect the other end of the Ethernet cable to an open Ethernet port on the rear of the
SVG2482AC.
Optional: Repeat steps 3 and 4 for an additional client device or other network device that
you want to install as a wired connection on your home network.
5.
Connect the power cord (included) to the Power port on the rear of the SVG2482AC.
6.
Plug the other end of the power cord into an electrical wall outlet that is not controlled by
a wall switch.
Note: This automatically powers ON the SVG2482AC.
Connect Your Telephone
If you are migrating your current XFINITY service from an existing device, your current phone
service and phone number will be transferred to the SVG2482AC when the installation is
finished. Please note, that if you do not currently have Telephony service from Comcast, you
will have to call 1-855-OK-BEGIN (1-855-652-3446) to set up an account that includes
Telephony service.


