507029-03
Page 21 of 68
Issue 1622
NOTE:
Care must be taken to avoid recirculation of exhaust
back into intake pipe.
Details of Intake and Exhaust Piping Terminations for
Direct Vent Installations
NOTE:
In Direct Vent installations, combustion air is taken
from outdoors and flue gases are discharged to outdoors.
Intake and exhaust pipes may be routed either horizontally
through and outside wall or vertically through the roof. In
attic or closet installations, vertical termination through
the roof is preferred. Figures 23 through 29 show typical
terminations.
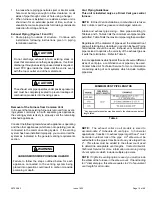
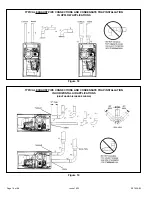
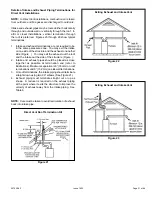
1. Intake and exhaust terminations are not required to be
in the same paressure zone. You may exit the intake
on one side of the structure and the exhaust on another
side (Figure ). You may exit the exhaust out the roof
and the intake out the side of the structure (Figure ).
2. Intake and exhaust pipes should be placed as close
together as possible at termination end (refer to
illustrations). Maximum separation is 3” (76 mm) on roof
terminations and 6” (152 mm) on sidewall terminations.
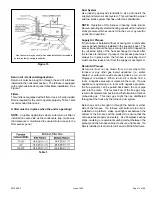
3. On roof terminations, the intake piping should terminate
straight down using two 90° elbows (See Figure 21).
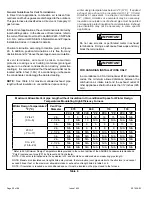
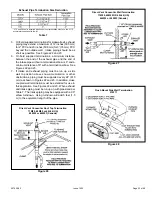
4. Exhaust piping must terminate straight out or up as
shown. A reducer is required on the exhaust piping
at the point where it exits the structure to improve the
velocity of exhaust away from the intake piping. See
Table 6.
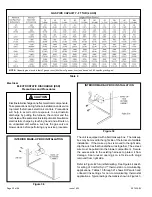
Direct Vent Roof Termination Kit
Figure 21
Figure 22
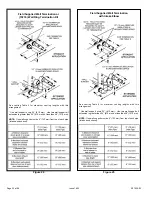
Exiting Exhaust and Intake Vent
Figure 23
Exiting Exhaust and Intake Vent
Summary of Contents for A97DSMV
Page 3: ...507029 03 Page 3 of 68 Issue 1622 A97DSMV Exploded View Figure 1...
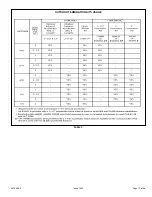
Page 13: ...507029 03 Page 13 of 68 Issue 1622 OUTDOOR TERMINATION KITS USAGE Table 3...
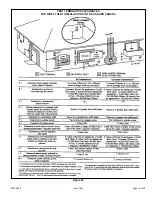
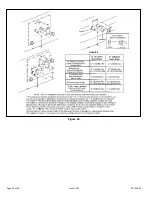
Page 24: ...507029 03 Page 24 of 68 Issue 1622 Figure 29...
Page 27: ...507029 03 Page 27 of 68 Issue 1622 Figure 36 Trap Drain Assembly Using 1 2 PVC or 3 4 PVC...
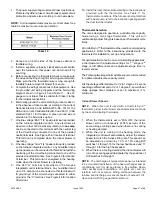
Page 33: ...507029 03 Page 33 of 68 Issue 1622 Figure 43 Typical A97DSMV Wiring Diagram...
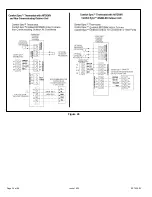
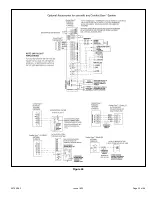
Page 34: ...507029 03 Page 34 of 68 Issue 1622 Figure 45...
Page 35: ...507029 03 Page 35 of 68 Issue 1622 Figure 46...
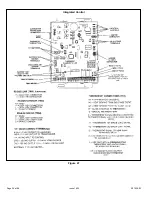
Page 36: ...507029 03 Page 36 of 68 Issue 1622 Figure 47 Integrated Control...
Page 40: ...507029 03 Page 40 of 68 Issue 1622 Low Voltage Field Wiring Table 14 Single Stage 2 Stage...
Page 44: ...507029 03 Page 44 of 68 Issue 1622 BLOWER DATA...
Page 57: ...507029 03 Page 57 of 68 Issue 1622...
Page 58: ...507029 03 Page 58 of 68 Issue 1622...
Page 59: ...507029 03 Page 59 of 68 Issue 1622...
Page 60: ...507029 03 Page 60 of 68 Issue 1622 Configuring Unit Size Codes...
Page 61: ...507029 03 Page 61 of 68 Issue 1622 Troubleshooting Heating Sequence of Operation...
Page 62: ...507029 03 Page 62 of 68 Issue 1622 Troubleshooting Heating Sequence of Operation continued...
Page 63: ...507029 03 Page 63 of 68 Issue 1622 Troubleshooting Heating Sequence of Operation continued...
Page 64: ...507029 03 Page 64 of 68 Issue 1622 Troubleshooting Heating Sequence of Operation continued...
Page 65: ...507029 03 Page 65 of 68 Issue 1622 Troubleshooting Cooling Sequence of Operation...
Page 66: ...507029 03 Page 66 of 68 Issue 1622 Troubleshooting Continuous Fan Sequence of Operation...

