001-11900-EN rev 5 • 08/2019
INSTRUCTIONS FOR USE
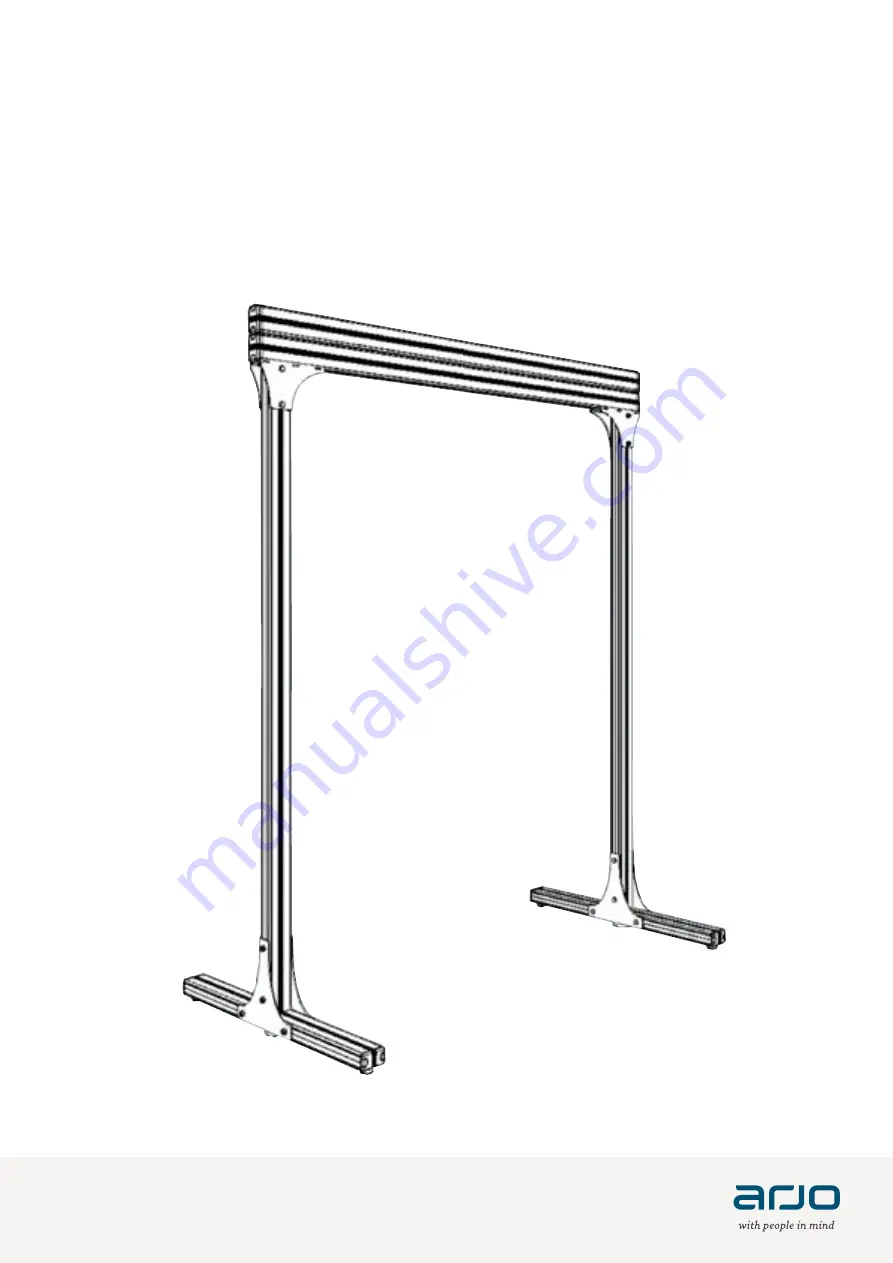
KWIKtrak Semi-Permanent Rack
Model Nº 700.11900
Page 1: ...001 11900 EN rev 5 08 2019 INSTRUCTIONS FOR USE KWIKtrak Semi Permanent Rack Model N 700 11900...
Page 2: ...ing to the Arjo group of companies Arjo 2019 As our policy is one of continuous improvement we reserve the right to modify designs without prior notice The content of this publication may not be copie...
Page 3: ...ce 4 Homecare Environment Considerations 4 Symbols Used 5 General Symbols 5 Product Description 6 Semi Permanent Rack System Requirements 7 Floor Requirements 7 Room Assessment 7 Assembling the Semi P...
Page 4: ...or any accidents incidents or lack of performance that occur as a result of any unauthorized modification to its products The equipment must be installed in accordance with these safety instructions A...
Page 5: ...have an impact on the Semi Permanent Rack life span aging of the unit transfers per day weight of the patient maintenance frequency A transfer is defined as the displacement of a patient from one poi...
Page 6: ...comply with the following safety instructions WARNING The assembling disassembling procedure must be performed by two persons Failure to follow this instruction may result in serious injuries to your...
Page 7: ...REF Points out the manufacturer s catalogue number Indicates a potential risk refer to Instructions for Use IFU for details SN Points out the manufacturer s serial number SWL SWL is the maximum load t...
Page 8: ...250 11460 LEG 2 8 225 11425 TOP STEEL PART 2 9 203 11435 PRESSURE STEEL PART 2 10 700 11005 TRACK END STOPPER 2 11 225 11405 T BRACKET 4 12 250 11470 POST 2 13 200 11060 RAIL END CAP WHITE 4 14 000 04...
Page 9: ...mm 48 10 5 mm 7 16 Semi Permanent Rack System Requirements Room Assessment Before installing the Semi Permanent Rack prepare the installation as follows 1 Survey the room where you plan to install th...
Page 10: ...es orientation Plates mate with track brackets 2 Fasten one track bracket onto top of post using two M10X75 hex zinc bolts and corresponding locknuts 3 Tighten using a 17mm socket tool or hexagonal ke...
Page 11: ...on Fig 6 1 Insert one end stopper into the track lower channel Fig 7 2 Install the track between the Track bracket and the pressure plate onto top of first post Fig 8 3 Make sure the track is flush wi...
Page 12: ...0 socket low head zinc screws with appropriate lock washers Fig 15 3 Secure the end stopper in place Fig 16 4 Install a plastic cap at the of the track Final Adjustments 1 Reposition the end stoppers...
Page 13: ...ine the best suitable location for the lift to be placed when it is not being used 2 Align the bottom hooks of the charger station clip to the lower groove on the track 3 Push on the top portion of th...
Page 14: ...all bolts and nuts are properly tightened Make sure that bases are properly adjusted Make sure track is properly assembled to the posts Make sure that all posts are straight Clean the inside of the t...
Page 15: ...e posts Press up on the track to make sure that it is correctly fixed onto posts Trolley does not roll in track smoothly Is track clean Clean track with damp cloth Is trolley centred in track Re centr...
Page 16: ...king load Material Tracks Aluminium Hardware Steel plastic END OF LIFE DISPOSAL Package Cardboard recyclable The Product Components that are primarily be made up of different kinds of metal containing...
Page 17: ...6 87426222 E mail Italy promo arjo com MIDDLE EAST Arjo Middle East FZ LLC Office 908 9th Floor HQ Building North Tower Dubai Science Park Al Barsha South P O Box 11488 Dubai United Arab Emirates Dire...
Page 18: ...Page intentionally left blank...
Page 19: ...Page intentionally left blank...
Page 20: ...on diagnostics and the effective prevention of pressure ulcers and venous thromboembolism we help professionals across care environments to continually raise the standard of safe and dignified care Ev...