


27
WC110B
2. Turn the left-side and right-side tie rods in equal
increments to achieve the proper toe-out; then
tighten the jam nuts to 10 ft-lb.
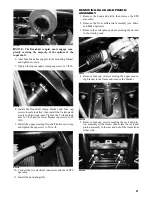
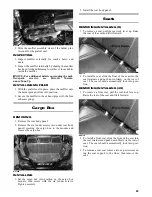
Accelerator Pedal
REMOVING
Dislodge the throttle cable holding grommet from the
actuator arm; then remove two torx-head screws and nuts
securing the accelerator pedal assembly to the splash
panel and remove the accelerator pedal.
PR709
WC933A
INSTALLING
Align the mounting holes with the holes in the splash
panel and secure with the two torx-head screws and nuts;
then snap the throttle cable holding grommet into the
actuator arm.
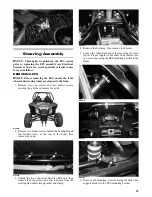
Shift Lever
REMOVING
1. Remove the seats; then remove the battery cover and
shift lever handle.
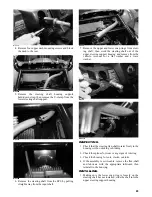
2. Remove the center console leaving the shift lever
boot in the console.
3. Remove the nut from the shift cable pivot bolt; then
remove the four machine screws from the shift lever
axle mounting and remove the shift lever.
WC348A
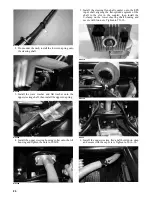
INSTALLING
1. Place the shift lever into position and secure with the
four machine screws (threads coated with blue Loc-
tite #243). Tighten to 20 ft-lb.
2. Connect the shift cable to the shift arm with the pivot
bolt and tighten the nut to 8 ft-lb.
3. Check shift cable adjustment (see Periodic Mainte-
nance/Tune-Up); then install the center console.
Tighten the machine screws securely.
4. Install the shift lever handle onto the shift lever and
tighten the jam nut with the handle correctly aligned.
5. Install the battery cover and seats.
CAUTION
Always use a wrench to hold the tie rod ends when loos-
ening or tightening the jam nuts or damage to the boots
could occur.