4
7
5
6
AngelTrax
| 36
Record Setup (Cont.)
Continuous Record
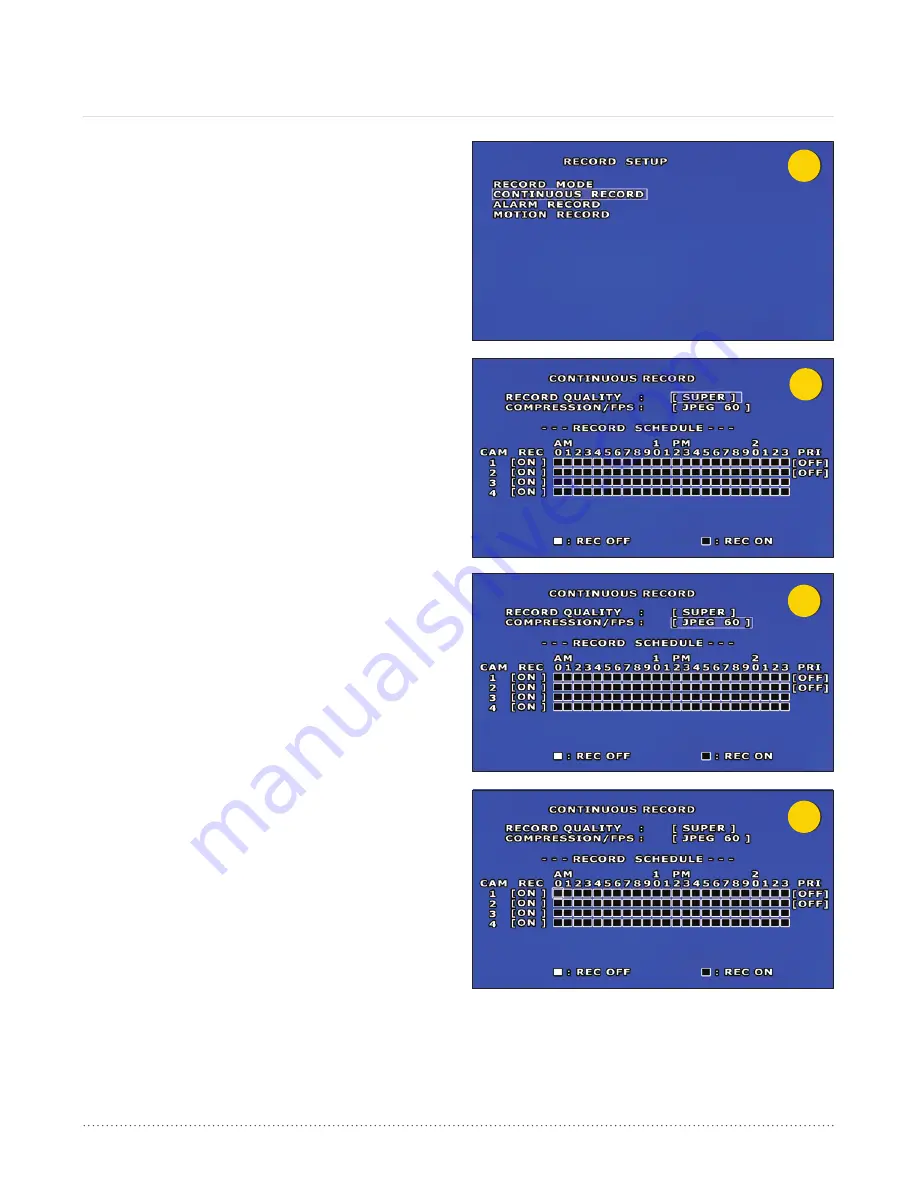
1. From the Record Setup menu, select Continuous Record
(see Figure 4) using the arrow buttons on the remote, and
press ENTER.
2. Depending on your record settings, you have the option
to adjust Record Quality, Compression/FPS and Record
Select options. Leave at the factory setting for best results.
3. Press the plus or minus buttons on your remote to adjust
Record Quality (see Figure 5). There are four settings under
the Record Quality feature. Settings include: Super, High,
Normal and Standard.
4. Press the plus or minus buttons on the remote to adjust
Compression/FPS (Frames Per Second) of your recorded
video data (see Figure 6). There are six settings under the
Compression/FPS feature. Settings include: MJPEG 15, 30
and 60 and H.4L 30, 60 and 120.
5. Press the plus or minus buttons on the remote to turn the
Record Schedule features (Record and Priority) ON or OFF.
Select or de-select the AM/PM timeline using the plus or
minus buttons on the remote. The Record Off feature shows
as a shaded white block when selected. The Record On
feature block is the default setting. (see Figure 7).
6. To save your changes and return to the Record Setup menu,
press the Menu button on the remote.


