UG-061
Evaluation Board User Guide
Rev. 0 | Page 16 of
CREATING A NEW IAR PROJECT
1.
Create a new folder in the location where the new IAR
project is to be placed.
2.
Launch the IAR Embedded Workbench by clicking the
Start
button, then select
Programs
, then
IAR Systems
, and then
IAR Embedded Workbench
. The
Embedded Workbench
Startup
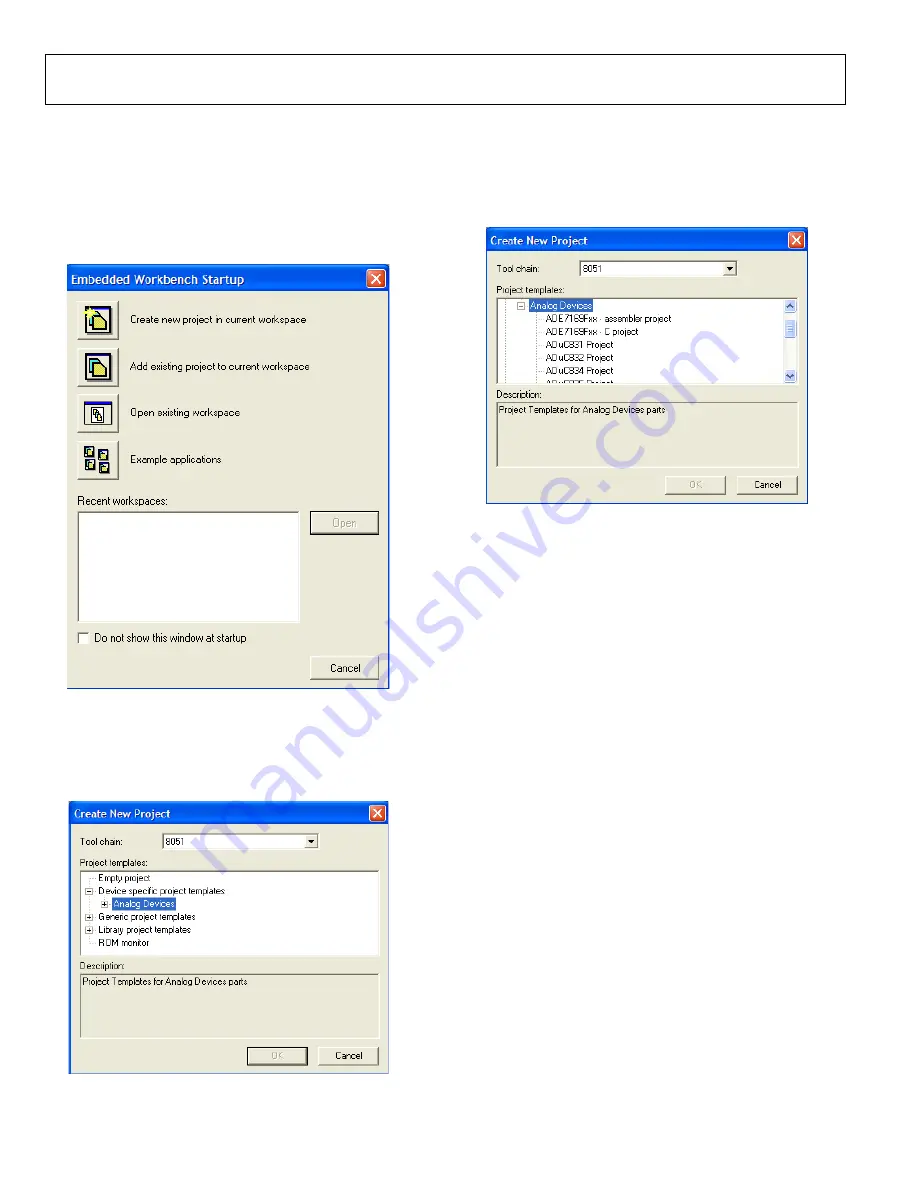
window shown in Figure 21 appears.
08600-
023
Figure 21. Embedded Workbench Startup
3.
Click the
Create new project in current workspace
option.
The
Create New Project
window (shown in Figure 22)
appears.
08600-
024
Figure 22. Create New Project Options
4.
Expand the
Device specific project templates
folder by
clicking the + symbol next to the folder.
5.
Expand the
Analog Devices
folder by clicking the +
symbol next to the folder.
A list of Analog Devices products appears (see Figure 23).
08600-
025
Figure 23. ADE7169 Project
6.
If an assembly language project is required for the
ADE71xx and ADE75xx parts, select the
ADE7169Fxx –
assembly project
. If a C language project is desired, select
ADE7169Fxx – C project
and click the
OK
button. For the
ADE51xx and ADE55xx parts, select
ADE5169Fxx –
assembly project
and
ADE5169Fxx – C project
, respectively.
7.
When prompted, give the project a name and save it in the
desired folder.
IAR copies the template files into the specified folder and
creates a main.c or main.asm file depending on the lan-
guage selection. Figure 24 shows the template for a new C
language project.


