Working With Pages
37
TPDesign4 Touch Panel Design Software (v2.10 or higher)
Working With Pages
Overview
Pages are not only containers for buttons, but can also have up to one address port / address code and up
to one channel port / channel code combination.
Pages cannot have borders and possess only one state.
You may place text directly on a page outside the context of a button.
You can select the name for the page, the page background color, the text color for text applied
directly to the page, and a font for any text specified (including the font size and settings). If
you change any of these properties (except the name) your changes will be saved and future
page creations will carry those selections forward.
Each page must be uniquely named within its respective panel file in order to be accepted by
the program; all name collision checks in the program are case insensitive.
The maximum number of pages in a panel file = 500.
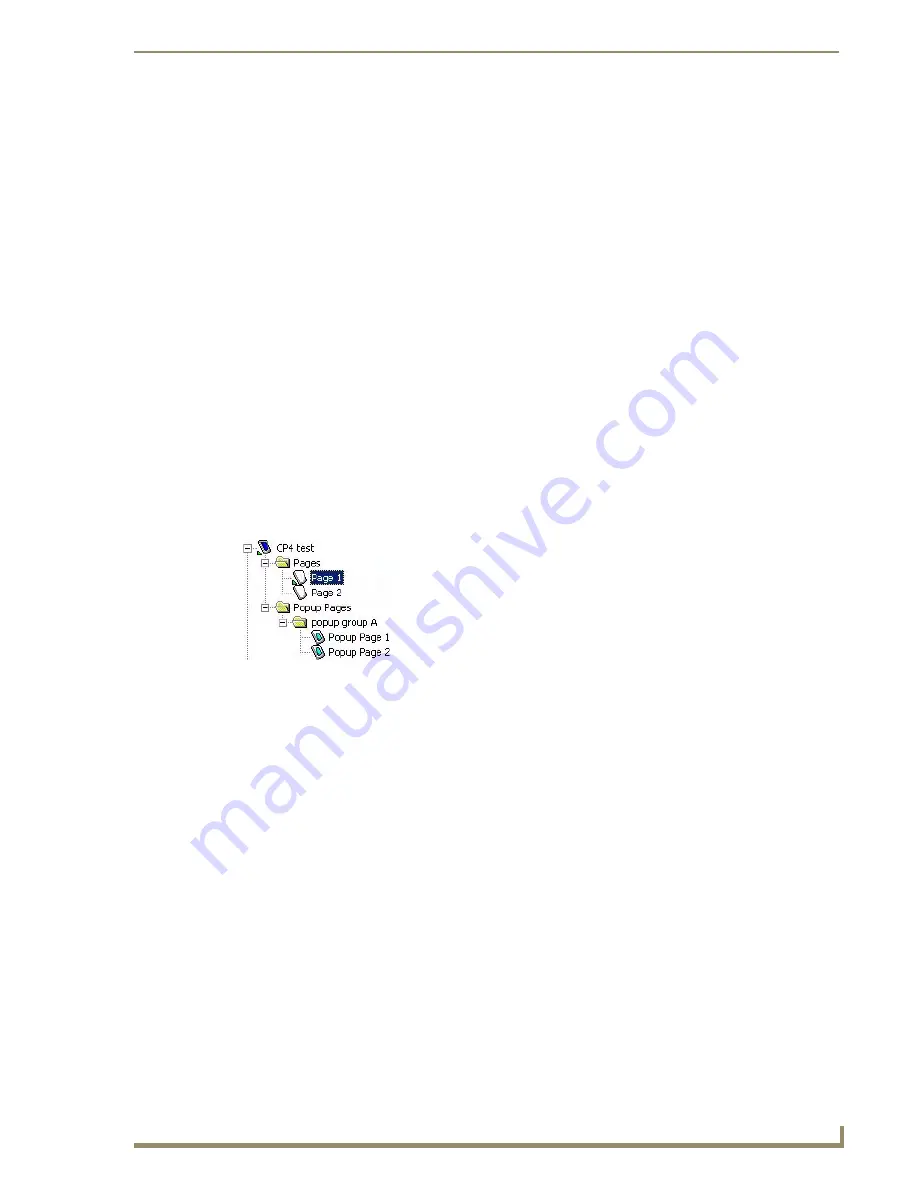
The active project/page is indicated in the Workspace Navigator window by a green wedge to the left of
the panel and page icons. Double-click on any page contained in any open project to set it as the active
project. In the example below, "CP4 test" is the active project, and "Page 1" is the active page in the
project:
Creating a Page
1.
Select
Page > Add Page
(or click the toolbar icon) to open the Add Page dialog.
2.
Enter a descriptive name for the new page in the
Name
field. Avoid using inappropriate file name
characters (see the
Inappropriate File Name Characters
section on page 17).
3.
Set the
Page Background
color:
a.
Click the browse button (...) next to "
Page Background
" to open the Colors dialog.
b.
Single-click to select a new color from the list. Note the current and new color selections are
shown together for comparison on the left side of the dialog.
4.
Set the
Page Text
color (for text applied directly to the page):
a.
Click the browse button (...) next to "
Text
" to open the Colors dialog.
b.
Single-click to select a new color from the list. Note the current and new color selections are
shown together for comparison on the left side of the dialog.
5.
Set the
Font Name
and
Size
. A sample of the selected font type and size is displayed in the window
beneath these fields.
6.
Click
OK
to add the new page to the active project. The new page will be appear in the Workspace
Navigator in the Pages folder, under the project to which the page was added (as the active page).
FIG. 29
CP4 test" is the active project, and "Page 1" is the active page in the project.
Summary of Contents for Modero NXD-1200VG
Page 20: ...xviii TPDesign4 Touch Panel Design Software v2 10 or higher Table of Contents ...
Page 130: ...List Box Buttons 110 TPDesign4 Touch Panel Design Software v2 10 or higher ...
Page 160: ...Working With States 140 TPDesign4 Touch Panel Design Software v2 10 or higher ...
Page 166: ...Working With Function Codes 146 TPDesign4 Touch Panel Design Software v2 10 or higher ...
Page 174: ...Colors and Palettes 154 TPDesign4 Touch Panel Design Software v2 10 or higher ...
Page 186: ...Animations and Tweening 166 TPDesign4 Touch Panel Design Software v2 10 or higher ...
Page 208: ...Working With Templates 188 TPDesign4 Touch Panel Design Software v2 10 or higher ...
Page 236: ...File Transfer Operations 216 TPDesign4 Touch Panel Design Software v2 10 or higher ...
Page 248: ...Program Preferences 228 TPDesign4 Touch Panel Design Software v2 10 or higher ...
Page 266: ...Appendix B G4 PanelBuilder 246 TPDesign4 Touch Panel Design Software v2 10 or higher ...
Page 272: ...Appendix C TakeNote 252 TPDesign4 Touch Panel Design Software v2 10 or higher ...
Page 273: ...Appendix C TakeNote 253 TPDesign4 Touch Panel Design Software v2 10 or higher ...


