Working With States
139
TPDesign4 Touch Panel Design Software (v2.10 or higher)
1.
First select the source states. Hold down the Ctrl key while left-clicking to add states to the
selection. Hold down the Shift key while left-clicking to add a range of states to the selection.
2.
With the source states selected, press and hold the left mouse button while over one of the selected
states.
3.
While continuing to press the left mouse button, move the mouse over the first state to be replaced.
4.
Release the left mouse button. Beginning at the state the drop occurred over, states will be replaced
one-for-one until either the number of source states have been used or the end of the states
collection is reached. The same operation can also be performed with a right mouse button drag-
and-drop, selecting
Copy over…
from the drag-and-drop menu.
Draw Order (Z-Order)
Z-Order, or "Draw Order" refers to the order in which the various visual elements of a Page, Popup Page
or Button are drawn on the screen.
The element at the top of the Z-order overlaps all other elements. The top of the Z-order is like
the top layer in a multi-layer drawing.
The element at the bottom of the Z-order is overlapped by all other elements. The bottom of
the Z-order is like the bottom layer in a multi-layer drawing.
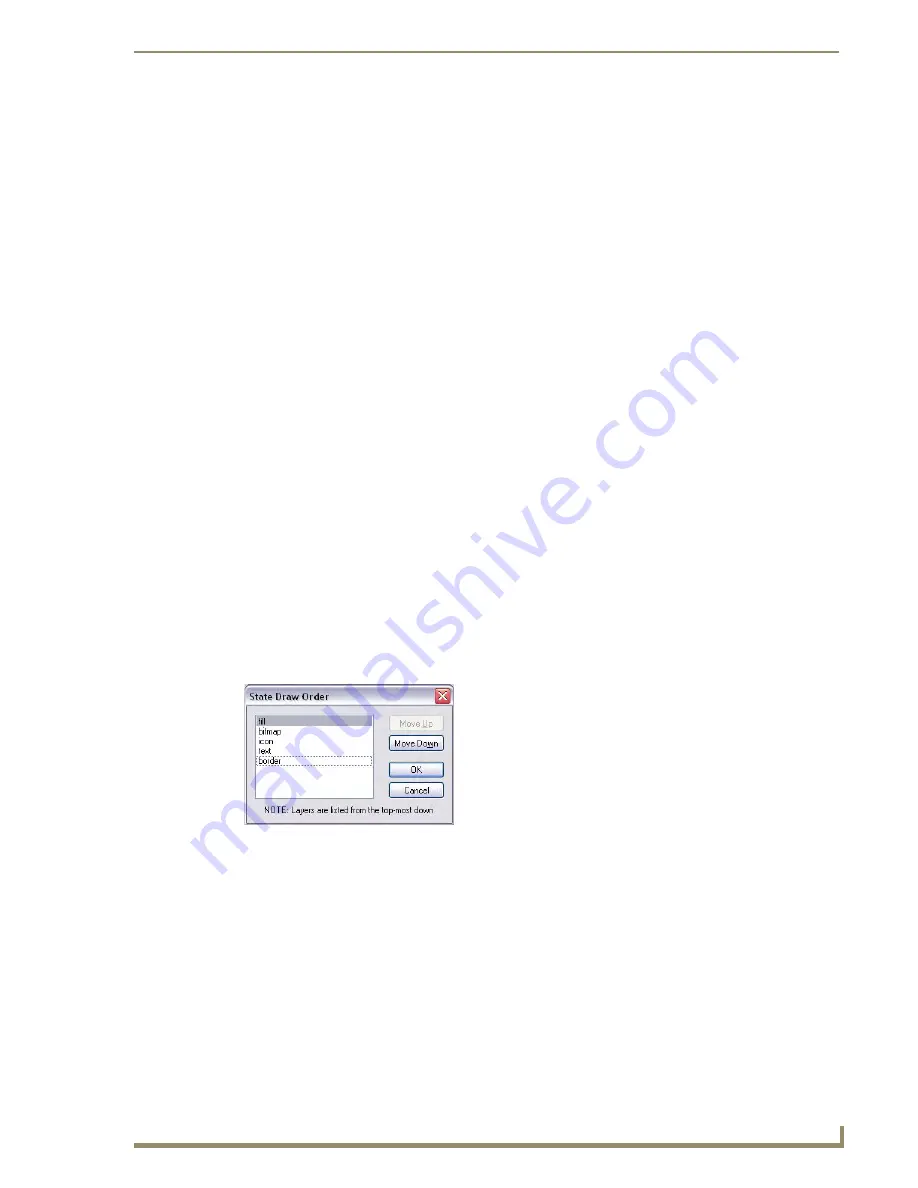
By default, the state draw order is:
1.
fill
2.
bitmap
3.
icon
4.
text
5.
border
Changing the draw order for selected states
Use the State Draw Order dialog (FIG. 65) to specify the draw order for selected states.
1.
Select a button, page or popup page.
2.
In the
States
tab of the Properties Control window, click the
Browse
button (...) in the
Draw Order
field to access the State Draw Order dialog.
3.
Select an element in the list, and use the
Move Up
and
Move Down
buttons to move the element up
or down in the list.
4.
Repeat with the other elements in the list to rearrange the order as desired.
5.
Click
OK
to close the dialog.
Note that the new draw order is indicated in the Draw Order state property.
FIG. 65
State Draw Order dialog
Summary of Contents for Modero NXD-1200VG
Page 20: ...xviii TPDesign4 Touch Panel Design Software v2 10 or higher Table of Contents ...
Page 130: ...List Box Buttons 110 TPDesign4 Touch Panel Design Software v2 10 or higher ...
Page 160: ...Working With States 140 TPDesign4 Touch Panel Design Software v2 10 or higher ...
Page 166: ...Working With Function Codes 146 TPDesign4 Touch Panel Design Software v2 10 or higher ...
Page 174: ...Colors and Palettes 154 TPDesign4 Touch Panel Design Software v2 10 or higher ...
Page 186: ...Animations and Tweening 166 TPDesign4 Touch Panel Design Software v2 10 or higher ...
Page 208: ...Working With Templates 188 TPDesign4 Touch Panel Design Software v2 10 or higher ...
Page 236: ...File Transfer Operations 216 TPDesign4 Touch Panel Design Software v2 10 or higher ...
Page 248: ...Program Preferences 228 TPDesign4 Touch Panel Design Software v2 10 or higher ...
Page 266: ...Appendix B G4 PanelBuilder 246 TPDesign4 Touch Panel Design Software v2 10 or higher ...
Page 272: ...Appendix C TakeNote 252 TPDesign4 Touch Panel Design Software v2 10 or higher ...
Page 273: ...Appendix C TakeNote 253 TPDesign4 Touch Panel Design Software v2 10 or higher ...


