Configuring Metreau Keypads with Ethernet
42
Metreau Keypads Instruction Manual
Configuring Metreau Keypads with Ethernet
Overview
This chapter provides instructions on accessing and configuring the Metreau Keypads with Ethernet. To configure the keypad, you
must have it powered by PoE.
Locating the IP Address of the Keypad
Metreau Keypads with Ethernet are configured for DHCP addressing by default. The keypads use link local addressing as a backup
in case the DHCP server is inaccessible. See the
Toggling Between IP Addressing Modes: DHCP and Static IP
section on page 42 for
information on setting a static IP address. Verify there is an active LAN connection on the controller’s LAN port before beginning
this procedure.
1.
Using category cable, connect the LAN port on the keypad to your external network.
2.
In NetLinx Studio, select the OnLine Tree tab. You should see the Metreau keypad listed among the Unbound Devices.
3.
Right-click the Metreau keypad and select
Network Bind/Unbind Device
from the menu that appears. The
Bind/Unbind Device dialog opens.
4.
By default, the selected keypad appears in the Device to Bind/Unbind menu at the top of the dialog. If there is more than one
Unbound device in the system, click the down arrow to select which device you want to bind.
5.
Select the check box next to the Master to which you want to bind the keypad. If there is more than one Master in the system,
check the specific Master to which you want to bind the keypad.
6.
Click
OK
to save changes and close this dialog.
7.
Select
Refresh System
(in the Online Tree context menu). The device should now appear in the Bound Devices folder.
Simulating the ID Pushbutton
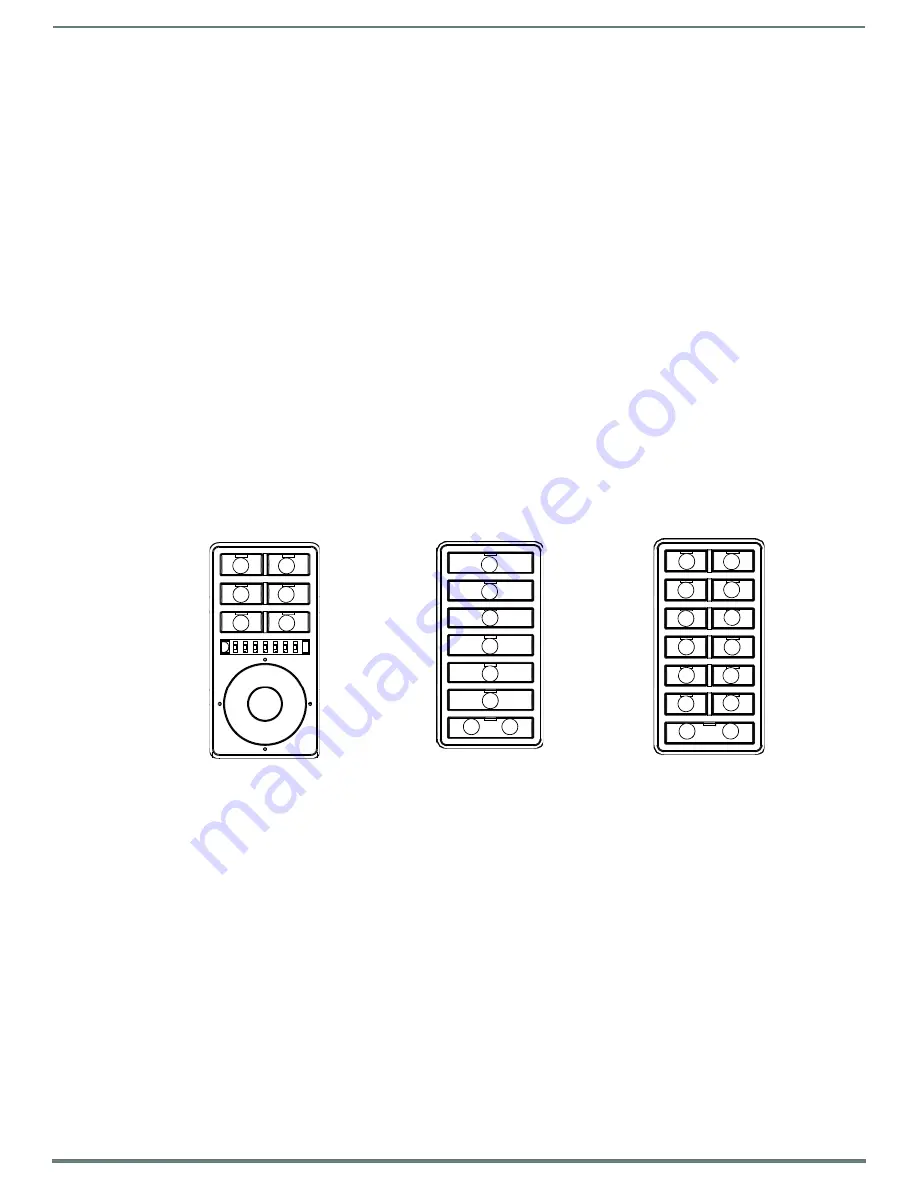
You can press buttons 1 and 2 simultaneously on the keypads to simulate the functions of a NetLinx device’s ID pushbutton (see
FIG. 36 for the button layout for each keypad).
Toggling Between IP Addressing Modes: DHCP and Static IP
Metreau Keypads with Ethernet support both DHCP and static IP addresses. You can use a static IP address which you can set via a
Telnet command (SET IP), or you can use the factory default static IP address (192.168.1.2).
With the keypad powered and booted up (or in ID Mode), you can toggle between the DHCP and Static IP modes by pressing and
holding buttons 1 and 2. The LEDs on buttons 1 and 2 blink while you keep them pressed. Hold them until the LEDs begin blinking
at double the rate (approximately10 seconds), then release the buttons.
When you release the buttons, the keypad toggles either from static to dynamic (DHCP) IP addressing or vice versa and remains in
that mode until the you use the buttons to toggle the IP mode again or you perform a factory reset. The keypad automatically
reboots to complete the process.
NOTE:
You must wait until the keypad is finished booting before toggling the IP address. Pressing the buttons while booting will cause
the keypad to restore its factory default settings.
Assigning a Device ID to a Keypad
When used in conjunction with the ID Mode feature in NetLinx Studio, you can momentarily press buttons 1 and 2 on the keypad to
assign a device address to the keypad. See the NetLinx Studio Instruction Manual or consult the online help tool in NetLinx Studio
for more information.
FIG. 36
Button layouts for Metreau Keypads with Ethernet
MET-6NE
MET-7E
MET-13E
1
2
3
4
5
6
1
2
3
4
5
6
7
8
1
2
3
4
5
6
7
8
9
10
11
12
13
14


