


Installing a CP-10 Remote Control Panel
15
CP-10 Instruction Manual
Rack Installation
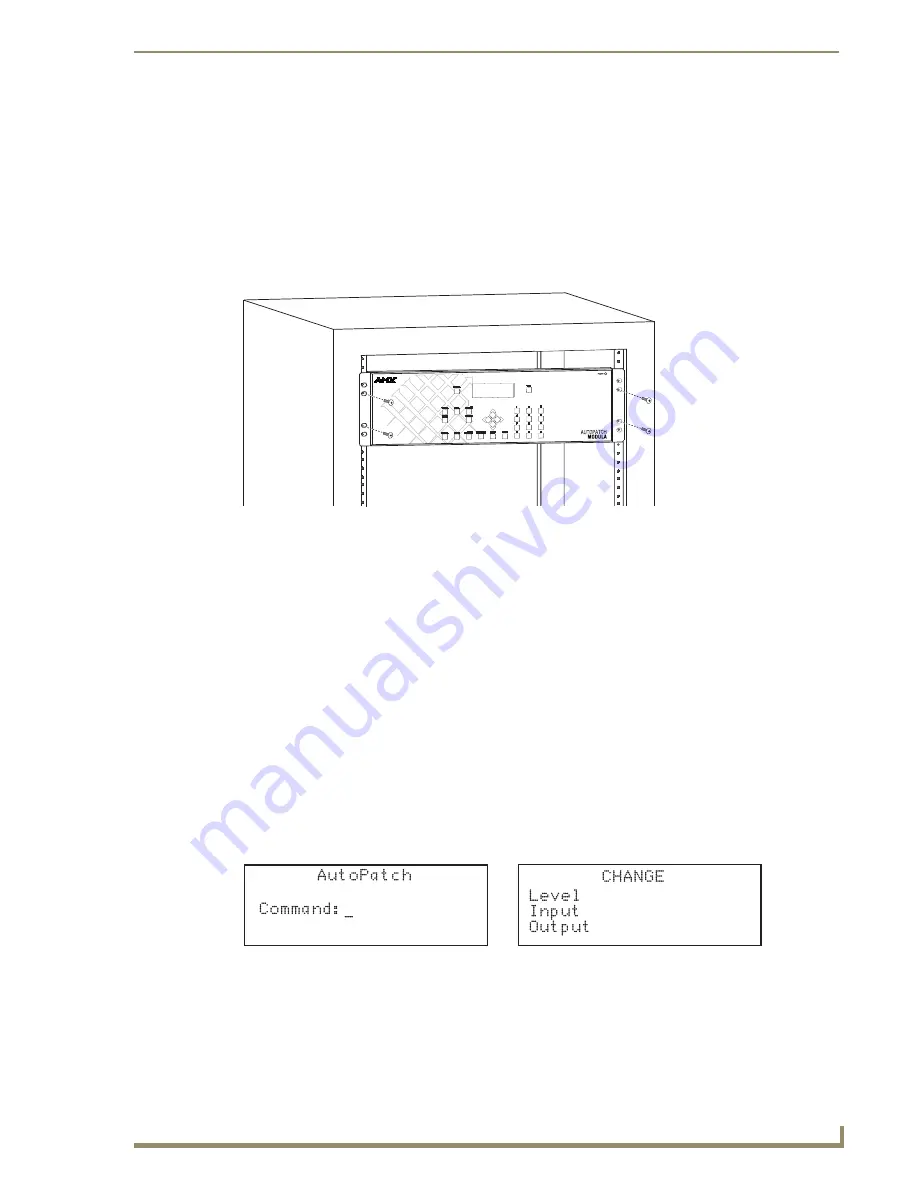
CP-10 Remote Panels are designed to fit in a standard EIA 19 in. (48.26 cm) rack.
Once the CP-10 Remote is wired, follow the rack installation instructions below.
Tip: When placing control panels, keep in mind that the optimal viewing angle is at eye level.
To install the CP-10 Remote in a rack:
1.
Insert the wired panel through the rear of the rack.
2.
Attach with front-mounting screws to hold it firmly in place (FIG. 8).
3.
Apply power to the panel.
4.
Wait briefly for the system to establish communication with the remote panel.
Execute a test switch to make sure the system is working properly (see below). If the system is not
working properly, check all system connections and retry the test switch before contacting technical
support (for contact information, see page 18).
Executing a Test Switch
We recommend completing the installation by executing a test switch routing Input 1 to Output 2 on the
level designated by the enclosure’s “Connector Guide” (the following example uses Level 0).
To execute a test switch:
1.
At the Command screen, press the Change Key.
The Change screen appears.
FIG. 8
Place in rack and fasten with mounting screws


