background image

Introduction

M370185-01

4-5

4

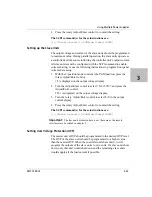
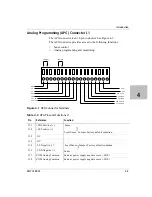
Analog Programming (APG) Connector J1

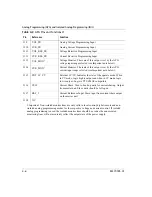
The APG connector is an 18-pin connector. See Figure 4-1.

The APG connector provides access to the following functions:

Sense control

Analog programming and monitoring.

Figure 4-1 

APG Connector Terminals 

1

2

3

4

5

6

7

8

9

10

11

12

13

14

15

16

17

18

Jumper

Jumper

+SNS

+LS

-LS

-SNS

COM

VOL_PR

CUR_PR

CSH

EXT_CC_CV

CUR_MON

VOL_MON

CUR_RES_PR

VOL_RES_PR

REF_I


Table 4-3 

APG Pins and Functions J1

Pin

Reference

Function

J1.1

+SNS Positive (+)

 Sense

Local Sense

}

Jumper. Factory default condition. 

J1.2

+LS Positive (+)

J1.3

–NC

J1.4

–NC

J1.5

–LS Negative (–)

 Local Sense

}

Jumper. Factory default condition. 

Sense 

J1.6

–SNS Negative (–)

J1.7

COM Analog Common

Same as power supply negative sense (–SNS)

J1.8

COM Analog Common

Same as power supply negative sense (–SNS)

Summary of Contents for Soresen XTR 100-8.5

Page 1: ...wer com XTR 850 Watt Series Programmable DC Power Supply Operating Manual firmware v 1 11 and higher Models XTR 6 110 XTR 8 100 XTR 12 70 XTR 20 42 XTR 33 25 XTR 40 21 XTR 60 14 XTR 80 10 5 XTR 100 8 5 XTR 150 5 6 XTR 300 2 8 XTR 600 1 4 ...

Page 2: ......

Page 3: ... Notice of Copyright XTR 850 Watt Series Programmable DC Power Supply Operating Manual firmware v 1 11 and higher 2007 2009 AMETEK Programmable Power Inc All rights reserved Exclusion for Documentation UNLESS SPECIFICALLY AGREED TO IN WRITING AMETEK PROGRAMMABLE POWER INC AMETEK a MAKES NO WARRANTY AS TO THE ACCURACY SUFFICIENCY OR SUITABILITY OF ANY TECHNICAL OR OTHER INFORMATION PROVIDED IN ITS ...

Page 4: ...ary to the instructions of AMETEK is opened modified or disassembled in any way without AMETEK s consent or is used in combination with items articles or materials not authorized by AMETEK The Buyer may not assert any claim that the Products are not in conformity with any warranty until the Buyer has made all payments to AMETEK provided for in the Purchase Order Agreement PRODUCT RETURN PROCEDURE ...

Page 5: ...face Option Operating Manual Part number M370046 06 Audience The Manual is intended for the user who is familiar with electronic power supplies Constant Voltage and Constant Current operating modes and the control of output power The user should be familiar with practicing safe techniques while making supply or pin connections Conventions Used The following conventions are used in this guide WARNI...

Page 6: ...ructions Part number M370046 05 provides information on rack mounting a single or dual XTR 850 Watt More information about AMETEK Programmable as well as its products and services is available at www programmablepower com Acronyms Acronym Definition APG Analog Programming AUX Auxiliary ENET Ethernet FGA Finished Goods Assembly ISOL Isolated Analog Programming OTP Over Temperature Protection OVP Ov...

Page 7: ...horized Service Center See Return Material Authorization Policy on page WA 3 WARNING Limitations on use The XTR 850 Watt Series Programmable DC Power Supply is not intended for use in connection with life support systems or other medical equipment or devices CAUTION For use as a battery charger When you are using a power supply for battery charging applications it is essential to provide an approp...

Page 8: ...tion on page 2 4 3 To avoid a risk of fire and electric shock make sure that the existing wiring is in good condition and the wire is not undersized Do not operate the XTR with damaged or substandard wiring 4 Do not operate the XTR if it has received a sharp blow been dropped or otherwise damaged in any way If the XTR is damaged see Warranty and Product Information on page WA 1 5 Do not disassembl...

Page 9: ... Cleaning 2 3 Step 2 Location and Mounting 2 4 Rack Mounting 2 4 Purchasing Rack Mount Kits 2 4 Ventilation 2 4 Step 3 Connecting AC Input Power 2 5 AC Input Connector 2 5 Step 4 Selecting Load Wires 2 6 Load Wiring 2 6 Step 5 Performing Functional Tests 2 8 Powering the Power Supply On Off 2 8 Voltage and Current Mode Operation Checks 2 9 Step 6 Connecting Loads 2 10 DC Output Connectors 2 10 Ind...

Page 10: ...t 3 16 Enabling the Auxiliary Output 3 17 Output Auto Start Mode Auto Restart 3 17 Auxiliary Auto Start Mode 3 18 Alarms and Errors 3 19 Clearing Alarms 3 20 Front Panel ALARM LED 3 21 Alarm Masking 3 22 Alarm Output Latching 3 23 Setting Foldback Mode 3 24 Resetting Activated Foldback Protection 3 25 Using Over Voltage Protection OVP 3 26 Defining the OVP Set Point 3 27 Using Under Voltage Protec...

Page 11: ... Parallel Control Method 3 49 Connecting to the Load in Remote Sensing Mode Parallel Control Method 3 50 4 Analog Programming APG and Isolated Analog Programming ISOL Introduction 4 2 Analog Programming APG of Output Voltage and Output Current 4 2 Remote Programming Options 4 3 Analog Programming APG Connector J1 4 5 Analog Programming Mode 4 9 Analog Programming With External Voltage Source 4 9 V...

Page 12: ...7 Selecting the Appropriate Communication Port 5 20 Multichannel Address Setting 5 21 Remote Interface Addressing 5 22 Multichannel Commands Explained 5 23 Status Reporting in SCPI 5 25 Status Registers Model from IEEE 488 2 5 27 Status Byte 5 28 Error Event Queue ERR 5 28 Questionable Status Register Summary QSR 5 28 Message Available MAV 5 29 Standard Event Status Summary ESB 5 29 Master Summary...

Page 13: ...Panel 5 58 Auto Sequence Programming 5 58 Configure Other Protection Mechanisms 5 65 Foldback Protection 5 65 Over Temperature Protection 5 66 Interlock Enable Disable 5 66 Save and Recall 5 67 Set Analog Programming Level 5 67 Set Remote Programming Interface 5 67 Protection Mask Enable Alarms 5 69 6 Calibration and Troubleshooting Introduction 6 2 Main Voltage and Current Calibration Principle 6...

Page 14: ...g of Voltage Calibration 6 18 Isolated Resistive Programming of Voltage Calibration 6 19 Isolated Voltage Programming of Current Calibration 6 20 Isolated Resistive Programming of Current Calibration 6 21 Calibrating the Input Voltage APG Signal 6 22 Calibrating the Input Current APG Signal 6 23 Storing and Loading Calibration Parameters 6 25 Restore Factory Calibration 6 26 Restore Default Calibr...

Page 15: ...Device Specific Error List B 5 Query Error List B 6 C Specifications Electrical Specifications for XTR 850 Watt C 2 AC Line Input Specifications for XTR 850 Watt C 3 Remote Operation C 4 Common Specifications for All Models C 5 ...

Page 16: ...xiv ...

Page 17: ...g Mode Parallel Control Method 3 50 Figure 4 1 APG Connector Terminals 4 5 Figure 4 2 Inserting Screwdriver into Spring Terminal Block 4 7 Figure 4 3 APG and DC Output Connector 4 7 Figure 4 4 Programming Output Voltage using an External Voltage Source 4 9 Figure 4 5 Programming Output Current using an External Voltage Source 4 9 Figure 4 6 Programming Output Voltage using an External Resistor 4 1...

Page 18: ...OM1 Properties 5 13 Figure 5 12 Completing the new hardware wizard 5 13 Figure 5 13 Multi Power Supply Connection to RS 485 Bus 5 15 Figure 5 14 USB Settings 5 18 Figure 5 15 ASCII Setup 5 19 Figure 5 16 SCPI Status Reporting Model 5 26 Figure 5 17 IEEE 488 2 Register Model 5 27 Figure 5 18 Summary of Standard Event Status Register 5 32 Figure 5 19 SCPI Register Model 5 34 Figure 5 20 Operation St...

Page 19: ...ming Options 4 4 Table 4 3 APG Pins and Functions J1 4 5 Table 4 4 AUX Output and ISOL Connector Pins and Functions J3 4 21 Table 5 1 Remote Control Connector Pins and Functions J4 and J6 5 3 Table 5 2 DB 9 Pinouts 5 4 Table 5 3 RJ 45 Pinouts 5 4 Table 5 4 DB 25 Pinouts 5 5 Table 5 5 DB 9 Pinouts 5 7 Table 5 6 RJ 45 Plug Pinouts 5 7 Table 5 7 RJ 45 Plug on Slave Unit 5 8 Table 5 8 Rules for Multic...

Page 20: ... SCPI Commands to Clear All Protection Mechanisms A 21 Table A 6 SCPI Commands for Foldback Protection A 21 Table A 7 SCPI Commands for Power A 22 Table A 8 SCPI Commands for Triggering A 22 Table A 9 System Commands A 23 Table A 10 Status Commands A 26 Table A 12 Auto Sequence Commands A 33 Table A 11 Protection Commands A 33 Table B 1 Command Error List B 3 Table B 2 Execution Error List B 4 Tab...

Page 21: ...1 Introduction Chapter 1 Introduction describes the features of the XTR 850 Watt Series Programmable DC Power Supply ...

Page 22: ...nter knob permitting high resolution output setting Active Power Factor Correction PFC reduces input current and input current harmonics Automatic crossover system allowing the power supply to switch between Constant Current and Constant Voltage operating modes Parallel or series connection among multiple units to produce greater diversity or to use in higher power applications Short circuit prote...

Page 23: ...s covered by this Manual Table 1 1 XTR 850 Watt Series Voltage and Current Ranges Model Output Voltage Output Current 6 110 0 6 V 0 110 A 8 100 0 8 V 0 100 A 12 70 0 12 V 0 70 A 20 42 0 20 V 0 42 A 33 25 0 33 V 0 25 A 40 21 0 40 V 0 21 A 60 14 0 60 V 0 14 A 80 10 5 0 80 V 0 10 5 A 100 8 5 0 100 V 0 8 5 A 150 5 6 0 150 V 0 5 6 A 300 2 8 0 300 V 0 2 8 A 600 1 4 0 600 V 0 1 4 A ...

Page 24: ...Introduction 1 4 M370185 01 Front Panel Figure 1 1 XTR 850 Watt Front Panel Item Description 1 Front panel power switch 2 Front panel display See Figure 1 2 for details 3 Air Intake Vents ...

Page 25: ...ntrol 2 Constant Voltage CV Mode LED green 3 Model Identification Label 4 Output Voltage Display 5 Constant Current CC Mode LED green 6 Output Current Display 7 Alarm Indicator LED red 8 OUTPUT ENABLE Main button 9 OUTPUT ENABLE Aux button 10 9 Position Mode Control For detailed information see Configuring Settings from the Front Panel on page 3 2 ...

Page 26: ...MADE IN CANADA J5 J6 J3 J1 J2 J4 1 2 3 4 5 7 8 9 10 11 6 Figure 1 4 Rear Panel 60 V to 150 V Models 47 63 Hz 11 5 6A MADE IN CANADA 100 240 Vac SN J3 J1 J6 J5 J2 J4 2 3 5 6 11 10 8 7 9 4 1 Figure 1 5 Rear Panel 300 V to 600 V Models 47 63 Hz 11 5 6A MADE IN CANADA 100 240 Vac SN J3 J1 J6 J5 J2 J4 1 2 3 5 6 11 4 10 9 8 7 ...

Page 27: ...ole diameter 300 V 600 V Models DC Output Connectors Negative 6 5 mm hole diameter 3 J2 Ethernet ENET or GPIB Connector optional 4 J4 RS 232 RS 485 Connector In Port 5 AC Input Connector IEC Type 6 Chassis Ground Stud 7 J1 Analog Programming APG Connector For pin information see page 4 5 8 J3 AUX Output and Isolated Analog Programming ISOL Connector For pin information see page 4 20 9 J5 USB Conne...

Page 28: ...1 8 ...

Page 29: ...2 Installation Chapter 2 Installation provides information and procedures for inspecting installing and testing the power supply ...

Page 30: ...op or rack mount Ensure adequate ventilation Step 2 Location and Mounting on page 2 4 3 Connect Input Power Connect AC input power Step 3 Connecting AC Input Power on page 2 5 4 Select Wires Select wires that are correctly rated for the maximum DC output current Step 4 Selecting Load Wires on page 2 6 5 Test Perform functional tests for voltage mode operation current mode operation and front panel...

Page 31: ...contains the 7 5 foot 2 5 m power cord 3 If you see external damage or suspect internal damage contact the carrier immediately Periodic Cleaning The power supply only requires periodic cleaning not routine servicing Whenever a unit is removed from operation clean the metal surfaces with naptha or an equivalent solvent and clean the front panel with a weak solution of soap and water Use low pressur...

Page 32: ... the Rack Mount Kit options for XTR 850 Watt For a list of the part numbers see Part Numbers for Rack Mount Kits on page iii Installation information for the different rack mount options are provided with the rack mount kits For XTR product support visit www programmablepower com and navigate to the XTR home page Ventilation Whether operating the power supply in a rack or on a bench allow air to r...

Page 33: ...the safety ground in the AC input connector Ensure that the power supply is connected to a grounded AC outlet with the recommended AC input cord configured for the available line voltage as described in this section WARNING Shock hazard The AC input cord is the disconnect device for the power supply The plug must be a non locking plug which is readily identifiable by and accessible to the operator...

Page 34: ...nt carrying capacity greater than the output rating of the power supply to ensure that the load wiring will not be damaged if the load is shorted Table 2 2 shows the maximum current rating for various gauges of wire rated for 105 C operation based on a maximum current density of 450 A cm2 Operating at the maximum current rating shown in Table 2 2 results in an approximately 30 C temperature rise f...

Page 35: ...Length for 1 V Line Drop Noise and Impedance Effects To minimize noise pickup or radiation use shielded twisted pair wiring of the shortest possible length for load sense wires Connect the shield to the power supply chassis Where shielding is impossible or impractical simply twisting the wires together will offer some noise immunity ...

Page 36: ...ont panel power switch is in the Off position 2 Ensure that the AC line voltage is within operating range 3 Connect the line cord to a grounded AC outlet 4 Turn the front panel power switch to the On position After a short power on delay 8888 8888 illuminates on the output voltage and current displays followed by PSU On After approximately 1 second the display returns to normal status To power off...

Page 37: ...o check current mode operation turn the 9 position mode control to AMPS position Verify that the current set point is blinking in the output current display 6 Adjust the current to 1 A 7 Press the OUTPUT ENABLE Main button to turn On 8 Turn the front panel power switch to the Off position 9 Turn the front panel power switch to the On position 10 Connect a short circuit across the output terminals ...

Page 38: ...h strain relief DC Output Connectors WARNING Shock hazard Disconnect the AC input before making any connections A shock hazard may be present at the output terminals Allow 15 seconds after the AC power has been removed before making any connections 6 V 40 V Models The 6 V 40 V models are equipped with output terminals as shown in Figure 1 3 60 V 150 V Models The 60 V 150 V models are equipped with...

Page 39: ... than the power supply s output voltage and have a current rating greater than or equal to the power supply s output rating Connect the cathode to the positive output and the anode to the return Where positive load transients such as back EMF from a motor may ocAMPS connect a Transient Voltage Suppressor TVS or a varistor across the output to protect the power supply The breakdown voltage rating f...

Page 40: ...e Step 7 Connecting Remote Sensing on page 2 13 for more information Figure 2 3 Connecting Single Loads Output Output J1 1 J1 2 J1 5 J1 6 Load Terminal Terminal Power Supply Local Sense Local Sense Connecting Multiple Loads The proper connection of distributed loads is an important aspect of power supply use The common method of connection is a radial load connection Power is connected to each loa...

Page 41: ...her distribution terminals Use shielded twisted pair wiring of 20 to 26 AWG for best noise performance Make sure that the shielded twisted pair wiring insulation is rated higher than the maximum output voltage of the power supply If possible one end of the shield of the sense lines should be attached to the chassis ground of the power supply Figure 2 4 Remote Sense Connection SNS SNS output output...

Page 42: ... power supply regulates the voltage at the output terminals CAUTION Equipment damage Do not operate the power supply with sense lines connected to the load without also connecting the load power leads to the output terminals CAUTION Reverse polarity Avoid reversing positive and negative sense connections When using remote sense to compensate for load line losses ensure that the positive sense line...

Page 43: ...r 3 Local Operation provides the procedures for local front panel operation such as Configuring settings Operating in constant voltage mode and constant current mode Using the protection features Using multiple power supplies ...

Page 44: ...ntrol to configure settings in local operation See Figure 1 2 Front Panel Display and Controls on page 1 5 for location of the front panel features Using the 9 position mode control select one of nine modes VOLTS AMPS FLD PRT SAV RCL CAP and VAP See Figure 3 1 and Table 3 1 for detailed information on the nine modes Using the Rotary Adjust Enter Control The rotary Adjust Enter control is used to c...

Page 45: ... control lets you Pressing the rotary Adjust Enter control lets you VOLTS Voltage Programming Select the voltage set point in coarse or fine adjustment modes See Automatic Mode Crossover on page 3 13 Set the value selected and cycle to the next setting AMPS Current Programming Select the current set point in coarse or fine adjustment modes See Constant Current Mode Operation on page 3 13 Set the v...

Page 46: ...ource and select the range Set the value selected and cycle to the next setting PGM Programming Options Select the remote interface to be used for control local lockout or current sharing Select interface Option and cycle to the next setting Table 3 1 Select and Set from the Front Panel 9 Positions on the Mode Control Knob Turning the rotary Adjust Enter control lets you Pressing the rotary Adjust...

Page 47: ... each value using the rotary Adjust Enter control When the value has been selected press the rotary Adjust Enter control to commit the updated value Additional values may become available depending on the setting that is being configured Setting VOLTS and AMPS Modes The only exceptions to the select and set model are the VOLTS and AMPS modes which do not allow the selection of tracking and select ...

Page 48: ...rotary Adjust Enter control to enter fine adjust tracking mode The set point blinks faster when the unit is in fine adjust tracking mode 4 Use the rotary Adjust Enter control to fine tune the set point 5 Once the set point has been selected press the rotary Adjust Enter control to exit tracking mode and return to normal display mode To access the select and set entry mode for the voltage and curre...

Page 49: ...e output voltage and current values If a timeout occurs before the changes made to the value have been set the changes will not be saved and you will have to re enter the changes The inactivity timeout is variable from 1 to 20 seconds and can only be changed using the SCPI command The SCPI command s for these instructions are SYSTem channel FPANel TIMeout Important Each user memory setting locatio...

Page 50: ...Local Operation 3 8 M370185 01 Figure 3 3 Front Panel Menu System ...

Page 51: ...C Alternating Current ADDr RS 485 Address ANPR Analog Programming AS Power On Autostart AvAS Auxiliary Autostart CAPr Current Analog Programming CLr Clear CC Constant Current COn7 Controller CU Constant Voltage CrPC Coarse Current Pre set Mode CrPU Coarse Voltage Pre set Mode CShr Current Share same as CUrrShAr CUrr Current CUrrShAr Current Share same as CShr deLa Fold Delay done Done Err Error de...

Page 52: ...e Analog Programming rCL Recall Preset rE Remote Programming Interface rnIS Non Isolated Resistive Analog Programming Con7 Controller current share controller 5hAr Share current share ChAn Multichannel Remote Interface S rS Soft reset SAUE Save Preset Sd Shutdown SLA Slave current share slave U IS Isolated Analog Voltage Programming UN IS Non Isolated Analog Voltage Programming USb USB Interface U...

Page 53: ... M370185 01 3 11 3 A blinking numeric value is either a voltage or current set point in tracking mode The display in which the set point appears output voltage or output current display indicates the type of set point voltage or current ...

Page 54: ...rent CC mode see page 3 13 Both of the operating modes are available regardless of which control method local or remote is used Operating Modes The output mode in which the power supply operates at any given time depends on the following factors Output voltage set point VSET Note the M10 Option includes a preset function to automatically reset the output voltage to zero Volts at both power on and ...

Page 55: ...es the value of the output current setting the unit will switch to CC mode and not allow any additional current to be drawn above the value of ISET The unit is now operating in CC mode The voltage will still vary to meet any changes in required output voltage resulting from a change in the attached load Automatic Mode Crossover Mode crossover occurs when the unit makes the switch between operating...

Page 56: ...djust Enter control if the 9 position mode control is already at the VOLTS position The voltage set point is blinking in the output voltage display The output current will be displayed in the output current display 2 Set the desired voltage value using the rotary Adjust Enter control 3 Press the rotary Adjust Enter control to transition to Fine Adjust mode The set point will blink faster to indica...

Page 57: ...set point blinks faster to indicate fine adjust tracking mode 4 Set the desired current value using the rotary Adjust Enter control 5 Once the desired value has been set press the rotary Adjust Enter control to commit the setting The SCPI command s for these instructions are SOURce channel CURRent LEVEl IMMediate AMPLitude Important The control circuits have been designed to allow you to set the o...

Page 58: ...he OUTPUT ENABLE Main button is illuminated The output will be disabled and the LEDs will not be illuminated Quick Tip Remote Operation uses these commands See page 5 1 The SCPI command s for these instructions are OUTPut channel POWer STATe Table 3 3 Shipped Configuration Local Control Configuration Additional References Use the front panel controls to adjust the output voltage and current set po...

Page 59: ... Auto Start Mode Auto Restart The Auto Start mode establishes the state of the output of the power supply after recovery from a complete power cycle all front panel LEDs are not illuminated If Auto Start mode is set to On the power supply output will return to its previous value when the power supply is powered up again If Auto Start mode is set to Off the power supply output will remain off after...

Page 60: ... Auxiliary Auto Start mode turned to On the auxiliary output will be activated after the power supply is powered up again To define the Auxiliary Auto Start mode 1 Press and hold the OUTPUT ENABLE Aux button for 1 second AuAS On or AuAS Off is displayed 2 To change to status to On or Off press the OUTPUT ENABLE Aux button The SCPI command s for these instructions are OUTPut channel AUXiliary Power...

Page 61: ...orrected then the alarm may trigger again immediately Fix the reason for the alarm before you clear it Table 3 4 Alarm Order of Precedence Alarm Precedence Output Latch Maskable Display AC Fail 1 Highest Yes No AC Fail Over Temperature Protection OTP 2 Yes No O7P Pro Fan 4 No Yes FAn Pro Interlock 6 No No In Loc Over Voltage Protection OVP 7 Always No OVP Pro Over Current Protection OCP 8 Always N...

Page 62: ...y power cycling the unit If a checksum error is detected when recalling a user slot no modification of settings will occur and an error will be pushed to the SCPI error queue The alarm will clear after a duration per the currently configured front panel timeout setting To clear a triggered alarm use one of the following methods Turn the power supply Off and then On For failures that occur during a...

Page 63: ...XTR was temporarily blocked causing a Fan alarm then the blockage was cleared and the fans restarted the alarm would clear The output voltage and current displays would be in normal mode but the ALARM LED would be illuminated See Front Panel ALARM LED on page 3 21 for information on other events that affect the ALARM LED Alarms status is tracked in the SCPI status registers For more details on how...

Page 64: ...he bit position 0 of an alarm will result in the alarm being masked disabled For Example If you wanted to enable the OTP Foldback and UVP alarms you would take the foldback value of 256 and the UVP value of 1024 to get a mask of 1280 This is the value you would send with the SCPI command Control of the alarm mask is only available using the SCPI command The SCPI command s for these instructions ar...

Page 65: ...r this bit position from Table 3 6 and sum them together The result is the alarm last mask Which you should send with the SCPI command For Example If you wanted to enable latching for OTP and Foldback you would take the OTP value of 2 and add it to the foldback value of 256 to get a mask of 258 This is the value you would send with the SCPI command The output latches are accessible through the SCP...

Page 66: ...e the foldback delay timer will start on a transition into the selected mode If the mode selected is none foldback is not enabled 3 Press the rotary Adjust Enter control when the desired mode has been selected The FLD LED will illuminate and DELA will be displayed in the output voltage display 4 Adjust the desired delay time using the rotary Adjust Enter control The range can be set from 0 50 seco...

Page 67: ...ack MODE OUTPut channel PROTection FOLDback LATCh Resetting Activated Foldback Protection To reset activated and latched foldback protection press and hold the rotary Adjust Enter control for approximately 3 seconds The SCPI command s for these instructions are OUTPut channel PROTection CLEar Important If you set foldback while the output is enabled and the trigger you select is the same as the cu...

Page 68: ... while setting up the firmware will prevent the OVP set point from being less than 105 of the voltage set point when in local set point control mode When the XTR is in VAP mode for defining voltage set point the set point limitation will be based on the VAP input signal level The user should note it is possible to trip OVP in this mode if the OVP is configured when the analog programming source is...

Page 69: ...position Pro OUP is displayed 4 Press the rotary Adjust Enter control 5 Turn the rotary Adjust Enter control to set the upper limit protection See Coarse and Fine Adjustment Modes on page 3 3 6 Once the desired value has been set press the rotary Adjust Enter control to commit the setting The SCPI command s for these instructions are SOURce channel VOLTage PROTection OVERvoltage LEVel If the outpu...

Page 70: ... point then UVP Safe will trigger to warn the user that they are about to trigger the UVP alarm The period of time before the UVP monitoring is active after the output is enabled is determined by the rise time delay for the model as listed in Table C 2 Remote Operation on page C 4 on the row called Up prog Response Time 0 Vmax Since the rise time is based on a purely resistive load the user should...

Page 71: ...l to commit the setting See Coarse and Fine Adjustment Modes on page 3 3 The SCPI command s for these instructions are SOURce channel VOLTage PROTection UNDer LEVel Over Current Protection OCP The OCP alarm is a firmware alarm that is only configurable using the SCPI interface The OCP triggers if the output current exceeds the OCP set point Because the OCP alarm is a firmware based alarm it has a ...

Page 72: ...t will auto recover when the temperature falls back into normal bounds Defining the OTP Mode To define the OTP lock 1 Turn the 9 position mode control to the PRT position PrO OUP is displayed 2 Turn the rotary Adjust Enter control until PRO O7P is displayed 3 Press the rotary Adjust Enter control to display O7P ON or OFF 4 Turn the rotary Adjust Enter control to change to On or Off 5 Press the rot...

Page 73: ...patible with the use of dry contacts where a short is logic low and an open is logic high The input lines of the shutdown circuit are fully optically isolated See page C 4 for specifications Once the External Shutdown has been triggered the display will blink the SD POL Controlling the External Shutdown Function The external shutdown circuit accepts a voltage or dry contact control high or low log...

Page 74: ...ogic 1 4 Press the rotary Adjust Enter control to commit the desired polarity setting For example If you set the shutdown logic to 1 SD1 and apply a logic high greater than 1 2 Vdc to pin J3 12 relative to pin J3 6 on the ISOL connector the power supply will shut down Conversely if you set the shutdown logic to 0 SD0 the power supply will only operate when you have a logic high greater than 1 2 Vd...

Page 75: ...he switch between pins J3 14 and J3 15 on the AUX Output and Isolated Analog Programming Connector Defining the Interlock Mode The Interlock mode is controlled via SCPI commands There is no front panel access for enabling or disabling the Interlock functionality See Interlock Enable Disable on page 5 66 The SCPI command for setting the Interlock mode to On and Off is SENSe channel PROTection INTer...

Page 76: ...OLTage ON OFF Programming Current Output Preset To Enable Disable automatic reset to 0 Amps 1 Turn the rotary Adjust Enter control to PRT and press 2 Turn again until Pr0 0U7P is displayed 3 Press to display 0U7P CUrr 4 Turn to display CUrr 0n or Curr OFF 5 Press to commit the selected setting Important This single front panel operation affects both power on and output enable However when using SC...

Page 77: ...er On Status to a low level AC fail Over Voltage protection OVP Under Voltage Protection UVP Over Current Protection OCP Over Temperature protection OTP Foldback protection Interlock Output Off Shutdown activated rear panel shutdown Internal hardware malfunction Fan failure Hardware Malfunction Alarms The power supply will turn off the output An error message will be displayed in the event that OV...

Page 78: ...ved Recalled Settings Voltage Setpoint Current Setpoint Voltage Output Protection Current Output Protection Over Voltage Protection OVP Under Voltage Protection UVP Over Temperature Protection OTP Autostart OUTPUT ENABLE Main Autostart OUTPUT ENABLE Aux Foldback Mode Foldback Delay Shutdown Logic Voltage Analog Programming VAP Mode Voltage Analog Programming VAP Level Current Analog Programming CA...

Page 79: ...ry locations 1 Turn the 9 position mode control to the SAV position SAUE is displayed on the output voltage display with a number indicating a preset position which is displayed on the output current display Table 3 8 User Accessible Saved Recalled Settings Voltage Setpoint Current Setpoint Voltage Output Protection Current Output Protection Over Voltage Protection OVP Over Temperature Protection ...

Page 80: ...n mode control to the RCL position RCL is displayed on the output voltage display with a number indicating a preset position on the output current display 2 Turn the rotary Adjust Enter control to select a preset position from 1 to 3 3 Press the rotary Adjust Enter control rCL done is displayed on the output voltage display The settings in the selected user setting memory locations have now been a...

Page 81: ... display 2 Turn the rotary Adjust Enter control until the display shows LOCLLoc 3 Press the rotary Adjust Enter control 4 Turn the rotary Adjust Enter control until the display shows LOCL On 5 Press the rotary Adjust Enter control Local lockout has been enabled The SCPI command s for these instructions are SYSTem REMote STATe Disabling Local Lockout To disable local lockout 1 Turn the 9 position m...

Page 82: ...for 3 seconds in order to execute If the flash fail alarm triggers it is also possible to reset the power supply The front panel should display P5U S rS 3 Once a reset has been triggered the output voltage display shows P5U CLr for 1 second The model number will be displayed for 1 second and then return to normal mode After executing a reset the power supply s settings are restored to the default ...

Page 83: ...7 all latches enabled Alarms Mask 2047 0 7FF all enabled Interlock Disabled Voltage Analog Programming Off Voltage APG Scale 10 V Current Analog Programming Off Current APG Scale 10 V Voltage Output Protection Off except M10 Option always On Current Output Protection Off except M10 Option always On Table 3 9 Power Supply Default Settings Parameter Setting ...

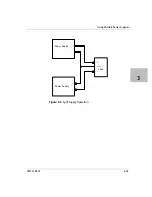
Page 84: ...en using a power supply at an output of greater than 40V or a combined output of greater than 40V To protect personnel against accidental contact with hazardous voltages created by a series connection ensure that the load including connections has no live parts which are accessible Also ensure that the insulation rating of the load wiring and circuitry is greater than or equal to the maximum or co...

Page 85: ...Using Multiple Power Supplies M370185 01 3 43 3 Figure 3 5 Split Supply Operation V V Common Power Supply Power Supply Load ...

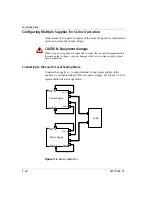
Page 86: ...put terminal of one power supply to the positive output terminal of the next power supply See Figure 3 6 for a representation of series operation CAUTION Equipment damage When two power supplies are connected in series they should be programmed to the same output voltage to prevent damage to the lower voltage supply at short circuit condition Figure 3 6 Series Operation J1 1 S J1 6 S J1 5 LS J1 2 ...

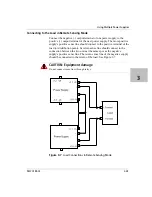
Page 87: ...ense line should connect to the positive terminal of the load or distribution point Its return sense line should connect to the connection between the two units at the same spot as the negative supply s positive sense line The return sense line of the negative supply should be connected to the return of the load See Figure 3 7 CAUTION Equipment damage Do not connect sense lines through relays Figu...

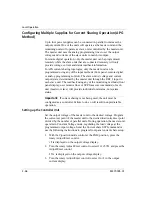
Page 88: ... of the monitoring methods front panel display user monitor lines or SCPI measure commands of each unit master or slave will provide individual unit status not system status Setting up the Controller Unit Set the output voltage of the master unit to the desired voltage Program the current set point of the master unit to the desired load current set point divided by the number of parallel units Dur...

Page 89: ...output voltage display 2 Turn the Adjust Enter conrol to select CurrShAr and press the Adjust Enter control C5hr is displayed on the output voltage display 3 Turn the rotary Adjust Enter control to select SlA in the output current display 4 Press the rotary Adjust Enter control to commit the setting The SCPI command s for these instructions are SOURce channel COMBine CSHare MODE Setting Over Volta...

Page 90: ...ly available on the master units as the slaves operate in constant current mode They should never crossover into constant voltage mode If foldback is triggered on the master unit when its output shuts down it will program the slave unit s output to zero volts ...

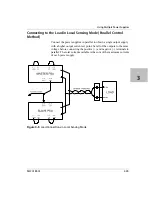
Page 91: ... supplies in parallel to obtain a single output supply with a higher output current set point Set all of the outputs to the same voltage before connecting the positive and negative terminals in parallel The total current available is the sum of the maximum currents of each power supply Figure 3 8 Load Connections in Local Sensing Mode ...

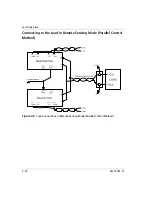
Page 92: ...Local Operation 3 50 M370185 01 Connecting to the Load in Remote Sensing Mode Parallel Control Method Figure 3 9 Load Connections in Remote Sensing Mode Parallel Control Method ...

Page 93: ...Using Multiple Power Supplies M370185 01 3 51 3 ...

Page 94: ...Local Operation 3 52 M370185 01 ...

Page 95: ...amming APG and Isolated Analog Programming ISOL Chapter 4 Analog Programming APG and Isolated Analog Programming ISOL provides information and procedures for analog and isolated analog programming of the power supply ...

Page 96: ...s proportionally over its output range For example if you set the programming scale to 10 V voltage source and apply 5 V to the programming pins the power supply will be programmed to 50 of the output capability for your power supply While analog programming mode is configured you will not be able to make adjustments to the set points from the front panel or through the remote interfaces The front...

Page 97: ...d APG Mode Reference Line Name Connector Non Isolated Voltage Analog Programming VOL_MON J1 13 Isolated Voltage Analog Programming IS_MON_VOL J3 5 Non Isolated Current Analog Programming CUR_MON J1 14 Isolated Current Analog Programming IS_MON_CUR J3 10 Important Analog control monitor lines will reflect the output of the power supply even when the unit is not set to operate in analog programming ...

Page 98: ...so has the ability to Autostart at power up See Output Auto Start Mode Auto Restart on page 3 17 and Auxiliary Auto Start Mode on page 3 18 for details on controlling this feature Table 4 2 provides a summary of the options available for programming output voltage and current set point using an analog source Table 4 2 Remote Programming Options Control of Programming Scale 1 The resolution can be ...

Page 99: ...13 14 15 16 17 18 Jumper Jumper SNS LS LS SNS COM VOL_PR CUR_PR CSH EXT_CC_CV CUR_MON VOL_MON CUR_RES_PR VOL_RES_PR REF_I Table 4 3 APG Pins and Functions J1 Pin Reference Function J1 1 SNS Positive Sense Local Sense Jumper Factory default condition J1 2 LS Positive J1 3 NC J1 4 NC J1 5 LS Negative Local Sense Jumper Factory default condition Sense J1 6 SNS Negative J1 7 COM Analog Common Same as ...

Page 100: ... state of the operate mode When in CV mode logic high is output and when in CC mode logic low is output Logic is TTL CMOS compatible J1 16 CSH Current Share Used to hook up units for current sharing Output from master unit Slave units should be left open J1 17 REF_I Current Reference Input Slave input from current share output on the master unit J1 18 NC 1 Important Non isolated monitor lines are ...

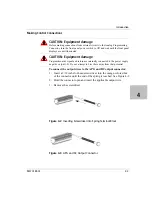
Page 101: ...nd return are internally connected to the power supply negative output S Do not attempt to bias these away from that potential To connect the output wires to the APG and DC output connector 1 Insert a 3 32 inch slot head screwdriver into the orange colored box of the connector until the end of the spring is reached See Figure 4 2 2 Hold the connector open and insert the applicable output wire 3 Re...

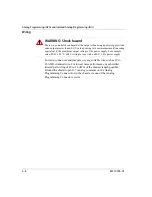
Page 102: ...o the maximum output voltage of the power supply For example select TEW 105 C 600 V wiring for use with a 600 V 1 4 A power supply For most connectors and jumpers use any suitable wire such as 20 to 26 AWG stranded wire For lowest noise performance use shielded twisted pair wiring of 20 to 26 AWG of the shortest length possible Ground the shield to pin J1 7 analog common on the Analog Programming ...

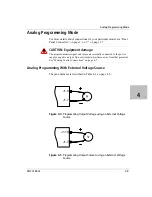
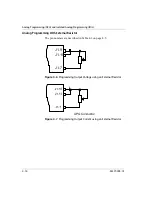
Page 103: ...d return are internally connected to the power supply s negative output Do not attempt to bias these away from that potential See Making Control Connections on page 4 7 Analog Programming With External Voltage Source The pin numbers are described in Table 4 3 on page 4 5 Figure 4 4 Programming Output Voltage using an External Voltage Source J1 9 J1 7 Figure 4 5 Programming Output Current using an ...

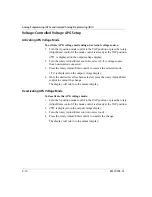
Page 104: ...ctor 3 Press the rotary Adjust Enter control to commit the selected mode LE U is displayed on the output voltage display 4 Once the desired level has been selected press the rotary Adjust Enter control to commit the change The display will return to the normal display Deactivating APG Voltage Mode To deactivate the APG voltage mode 1 Turn the 9 position mode control to the VAP position or press th...

Page 105: ...rwise do not rotate the rotary Adjust Enter control to keep the current APG mode 3 Press the rotary Adjust Enter control to select the APG mode The output voltage display should read LE U and the output current display will display APG level 4 Press the rotary Adjust Enter control to return to normal mode 5 If the APG mode was modified in step 2 execute the procedure to deactivate the APG voltage ...

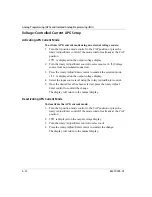
Page 106: ...Enter control to commit the selected mode LE C is displayed on the output voltage display 4 Select the input source level using the rotary Adjust Enter control 5 Once the desired level has been selected press the rotary Adjust Enter control to commit the change The display will return to the normal display Deactivating APG Current Mode To deactivate the APG current mode 1 Turn the 9 position mode ...

Page 107: ...rwise do not rotate the rotary Adjust Enter control to keep the current APG mode 3 Press the rotary Adjust Enter control to select the APG mode The output voltage display should read LE C and the output current display will display APG level 4 Press the rotary Adjust Enter control to return to normal mode 5 If the APG mode was modified in step 2 execute the procedure to deactivate the APG voltage ...

Page 108: ... 4 14 M370185 01 Analog Programming With External Resistor The pin numbers are described in Table 4 3 on page 4 5 Figure 4 6 Programming Output Voltage using an External Resistor J1 9 J1 11 J1 7 Figure 4 7 Programming Output Current using an External Resistor t ...

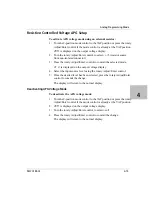
Page 109: ... mode LE U is displayed on the output voltage display 4 Select the input source level using the rotary Adjust Enter control 5 Once the desired level has been selected press the rotary Adjust Enter control to commit the change The display will return to the normal display Deactivating APG Voltage Mode To deactivate the APG voltage mode 1 Turn the 9 position mode control to the VAP position or press...

Page 110: ...n is complete Otherwise do not rotate the rotary Adjust Enter control to keep the current APG mode 3 Press the rotary Adjust Enter control to select the APG mode The output voltage display should read LE U and the output current display will display APG level 4 Press the rotary Adjust Enter control to return to normal mode 5 If the APG mode was modified in step 2 execute the procedure to deactivat...

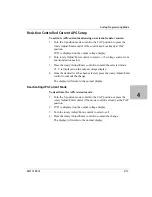
Page 111: ...ter control to commit the selected mode LE C is displayed on the output voltage display 4 Once the desired level has been selected press the rotary Adjust Enter control to commit the change The display will return to the normal display Deactivating APG Current Mode To deactivate the APG current mode 1 Turn the 9 position mode control to the CAP position or press the rotary Adjust Enter control if ...

Page 112: ...n is complete Otherwise do not rotate the rotary Adjust Enter control to keep the current APG mode 3 Press the rotary Adjust Enter control to select the APG mode The output voltage display should read LE C and the output current display will display APG level 4 Press the rotary Adjust Enter control to return to normal mode 5 If the APG mode was modified in step 2 execute the procedure to deactivat...

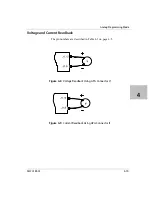
Page 113: ...mming Mode M370185 01 4 19 4 Voltage and Current Readback The pin numbers are described in Table 4 3 on page 4 5 Figure 4 8 Voltage Readback Using APG Connector J1 Figure 4 9 Current Readback Using APG Connector J1 ...

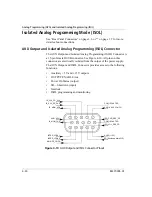
Page 114: ...e Figure 4 10 All pins on this connector are electrically isolated from the output of the power supply The AUX Output and ISOL Connector provides access to the following functions Auxiliary 5 V and 15 V outputs OUTPUT ENABLE Aux Power On Status output SD Shutdown input Interlock ISOL programming and monitoring Figure 4 10 AUX Output and ISOL Connector Pinout COM_ISOLATED AUX1 AUX2 On Off ISO_CUR_R...

Page 115: ... 6 COM_ISOLATED Isolated Common Isolated from Main Output and Communication Return wire for control signals monitoring and programming J3 7 ISO_CUR_RES_PR Isolated Current Resistive Programming J3 8 ISO_VOL_RES_PR Isolated Voltage Resistive Programming J3 9 AUX 12 5 V Isolated Output J3 10 IS_MON_CUR1 Isolated Current Monitor Scaled to the value of the Voltage Analog Programming Level J3 11 AUX 2 ...

Page 116: ...CAUTION Equipment damage Do not drive or apply a voltage to pins J3 14 Inter_Lock 1 or to pins J3 15 Inter_Lock 2 Analog Programming APG and Isolated Analog Programming ISOL 4 22 M370185 01 ...

Page 117: ...d jumpers use any suitable wire such as 22 AWG stranded wire For lowest noise performance use shielded twisted pair wiring of 22 AWG Use the shortest leads possible 5 V and 15 V Auxiliary Output reference to pin 2 and 6 isolated common on the ISOL Connector ISOL Programming With External Voltage Source The pin numbers are described in Table 4 4 on page 4 21 Figure 4 11 Programming Output Voltage u...

Page 118: ...ust Enter control to commit the selected mode LE U is displayed on the output voltage display 4 Select the input source level using the rotary Adjust Enter control 5 Once the desired level has been selected press the rotary Adjust Enter control to commit the change The display will return to the normal display Deactivating ISOL Voltage Mode To deactivate the ISOL voltage mode 1 Turn the 9 position...

Page 119: ...rwise do not rotate the rotary Adjust Enter control to keep the current ISOL mode 3 Press the rotary Adjust Enter control to select the ISOL mode The output voltage display should read LE U and the output current display will display ISOL level 4 Press the rotary Adjust Enter control to return to normal mode 5 If the ISOL mode was modified in step 2 execute the procedure to deactivate the ISOL vol...

Page 120: ...ected mode LE C is displayed on the output voltage display 4 Select the input source level using the rotary adjust Enter control 5 Once the desired level has been selected press the rotary adjust Enter control to commit the change The display will return to the normal display Deactivating ISOL Current Mode To deactivate the ISOL current mode 1 Turn the 9 position mode control to the VAP position o...

Page 121: ...rwise do not rotate the rotary Adjust Enter control to keep the current ISOL mode 3 Press the rotary adjust Enter control to select the ISOL mode The output voltage display should read LE C and the output current display will display ISOL level 4 Press the rotary adjust Enter control to return to normal mode 5 If the ISOL mode was modified in step 2 execute the procedure to deactivate the ISOL vol...

Page 122: ... 28 M370185 01 Analog Programming With External Resistor The pin numbers are described in Table 4 4 on page 4 21 Figure 4 13 Programming Output Voltage using an Isolated External Resistor Figure 4 14 Programming Output Current using an Isolated External Resistor ...

Page 123: ... control to commit the selected mode LE U is displayed on the output voltage display 4 Select the input source level using the rotary adjust Enter control 5 Once the desired level has been selected press the rotary Adjust Enter control to commit the change The display will return to the normal display Deactivating ISOL Voltage Mode To deactivate the ISOL voltage mode 1 Turn the 9 position mode con...

Page 124: ...tary Adjust Enter control to keep the current ISOL mode 3 Press the rotary adjust Enter control to select the ISOL mode The output voltage display should read LE U and the output current display will display ISOL level 4 Press the rotary adjust Enter control to return to normal mode 5 If the ISOL mode was modified in step 2 execute the procedure to deactivate the ISOL voltage mode Quick Tip Remote...

Page 125: ...mode LE C is displayed on the output voltage display 4 Select the input source level using the rotary Adjust Enter control 5 Once the desired level has been selected press the rotary Adjust Enter control to commit the change The display will return to the normal display Deactivating ISOL Current Mode To deactivate the ISOL current mode 1 Turn the 9 position mode control to the CAP position or pres...

Page 126: ...plete Otherwise do not rotate the rotary Adjust Enter control to keep the current ISOL mode 3 Press the rotary Adjust Enter control to select the ISOL mode The output voltage display should read LE C and the output current display will display ISOL level 4 Press the rotary Adjust Enter control to return to normal mode 5 If the ISOL mode was modified in step 2 execute the procedure to deactivate th...

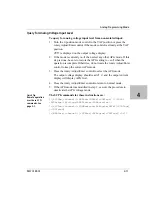
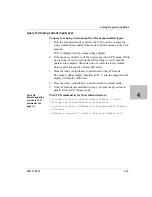
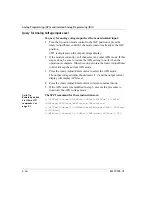
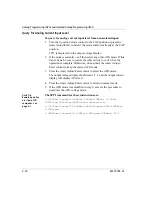
Page 127: ...in Table 4 4 on page 4 21 Figure 4 15 Isolated Voltage Monitoring V Figure 4 16 Isolated Current Monitoring V Query Remote Control Source State Quick Tip Remote operation uses these SCPI commands See page 5 1 The SCPI command for these instructions are SYSTem channel REMote SOURce VOLTage SYSTem channel REMote SOURce CURRent ...

Page 128: ...Analog Programming APG and Isolated Analog Programming ISOL 4 34 M370185 01 ...

Page 129: ...5 Remote Operation Chapter 5 Remote Operation describes the remote operation of the XTR power supply via the communication ports ...

Page 130: ...mands has been provided for ease of use and backwards compatibility All of the remote interfaces use the same command line interface This chapter is divided into two parts Hardware and Connection Setup provides information on how to setup a connection to the different remote interfaces available on the XTR The remote interfaces covered include RS 232 RS 485 USB GPIB and ENET Command Line Interface...

Page 131: ... using RS 232 1 Use the top J4 connector of the two 8 pin RJ 45 jacks as shown in Figure 5 1 to connect to the RS 232 remote interface 2 Connect from PC to power supply using a cable that meets the cabling specifications listed in Table 5 1 Figure 5 1 Remote Control Connectors J4 RS 232 and RS 485 connector in port J6 RS 232 and RS 485 connector out port Table 5 1 Remote Control Connector Pins and...

Page 132: ...NC No connection 5 GND Ground 6 7 8 9 NC No connection Table 5 3 RJ 45 Pinouts Pin Name Description 1 RX Receive data Twisted pair 2 TX Transmit data 3 4 5 6 NC No connection 7 GND Ground 8 NC No connection J6 10 NC J6 11 RXD Input RS 485 receiving J6 12 RXD Input RS 485 receiving J6 13 TXD Output RS 485 transmitting J6 14 TXD Output RS 485 transmitting J6 15 GND Ground J6 16 NC 1 All references a...

Page 133: ...h RJ 45 to DB 25 Communication control cable with DB 25 pinout male on the PC side and RJ 45 shielded connector on the power supply The cable length should be 9 84 feet 3 m or longer Figure 5 3 DB 25 Pinout Table 5 4 DB 25 Pinouts Pin Name Description 1 NC No connection 2 TX Transmit data Twisted pair 3 RX Receive data 4 5 6 NC No connection 7 GND Ground 8 9 NC No connection ...

Page 134: ... 6 M370185 01 Completing the Setup To complete the setup Configure the XTR to use the 232 remote interface and set up the terminal that will be used on the connected PC See the sections entitled Selecting the Appropriate Communication Port on page 5 20 and Terminal Configuration on page 5 17 for more details ...

Page 135: ...3 m or longer Table 5 5 DB 9 Pinouts Pin Name Description 1 GND Ground 2 3 NC No connection 4 RXD Receive data Twisted pair 5 RXD Receive data 6 7 NC No connection 8 TXD Transmit data Twisted pair 9 TXD Transmit data Table 5 6 RJ 45 Plug Pinouts Pin Name Description 1 2 NC No connection 3 TXD Transmit data Twisted pair 4 TXD Transmit data 5 RXD Receive data Twisted pair 6 RXD Receive data 7 GND Gr...

Page 136: ...as described in Table 5 7 Table 5 7 RJ 45 Plug on Slave Unit Pin Name Description 1 2 NC No connection 3 RXD Receive data Twisted pair 4 RXD Receive data 5 TXD Transmit data Twisted pair 6 TXD Transmit data 7 GND Ground 8 NC No connection Figure 5 6 RS 485 Communication Cable from Master to Slave Unit Master unit J6 Slave unit J4 Completing the Setup To complete the setup Configure the XTR to use ...

Page 137: ...p the USB connection you ll need to download the latest driver from Future Technology Devices International Ltd or from www programmablepower com To download and install a virtual COM port VCP driver 1 Go to www programmablepower com and navigate to the XTR product web page 2 Click the download link to download the driver 3 Download the appropriate virtual COM port VCP drivers for your operating s...

Page 138: ...izard Remote Operation 5 10 M370185 01 7 Click Next 8 On the Install Hardware Device Driver screen select Search for a suitable driver for my device recommended and click Next See Figure 5 8 Figure 5 8 Install Hardware Device Drivers ...

Page 139: ...the New Hardware Wizard This completes the first part of the installation during which the USB to serial converter is installed The second part involves the installation of a serial port which should follow automatically once the converter installation is complete Installation of the serial port does not require any user intervention Verifying Installation Once the installation of the serial port ...

Page 140: ...he View menu select Devices by Type 3 To change the virtual COM port properties select the USB Serial Port and then Click Properties This allows you to change serial port properties such as data rate bps and data bits You are also able to change the COM port which is assigned to your device 4 Click the Port Settings tab then click Advanced Figure 5 10 Device Manager ...

Page 141: ... 5 5 In the COM port list scroll to the required COM port Figure 5 12 Completing the new hardware wizard 6 Click OK Ensure that you do not select a COM port which is already in use This selection is particularly useful for programs such as HyperTerminal which only work with COM1 through to COM4 ...

Page 142: ... To complete the setup Configure the XTR to use the USB remote interface and set up the terminal that will be used on the connected PC See Selecting the Appropriate Communication Port on page 5 20 and Terminal Configuration on page 5 17 for more details ...

Page 143: ...ble up to 3 metres length For connecting the power supply to ENET use a LAN RJ 45 and RJ 45 STP Cat 5 cross cable 9 84 feet 3 m in length or longer Use a standard RJ 45 and RJ 45 cross cable Multiple Power Supply Connections to RS 485 Bus Up to 30 units may be connected to the RS 485 bus The first unit master unit connects to the controller via any appropriate port and the other units slave units ...

Page 144: ...r Important If either RS 232 or RS 485 are used for communication with the master the data rate must be configured for 9600 bps to properly communicate with the slave units Slave Setup 1 Turn the 9 position mode control to PGM rE is displayed in the output voltage display 2 Turn the rotary Adjust Enter control to select ChAn and press the control to enter the setting 3 Set a unique address See Mul...

Page 145: ...Feed ASCII 10 0x0A character HyperTerminal The HyperTerminal program is a standard windows program and can be found in Start All Programs Accessories Communications HyperTerminal Setting up a HyperTerminal connection To set up a HyperTerminal connection 1 When HyperTerminal opens it will immediately enter the New Connection wizard If you don t already have a connection saved continue If you do cli...

Page 146: ... Data Format on page 5 17 for details 7 Set up the Hyper terminal you will need to configure the properties 8 Click File Properties to bring up the connection properties dialog and click on the Settings tab Figure 5 14 USB Settings 9 Fill out the following selections in the connection properties dialog Terminal keys Ctrl H Space Ctrl H On the Emulation list select ANSI 10 Click on the ASCII Setup ...

Page 147: ... with line feeds Echo typed characters locally Append line feeds to incoming line ends Wrap lines that exceed terminal width 12 Change the Line delay to 30 milliseconds 13 Click OK in the ASCII Setup window 14 Click OK in the Properties window HyperTerminal has now been configured to communicate with the XTR ...

Page 148: ... activated will still be available for remote control while the front panel is locked Data Rate Setting Kbps The data rate setting is available for RS 232 and RS 485 protocols only Five optional rates are possible 1 2 2 4 4 8 9 6 default 19 2 38 4 and 57 6 kilo bits per second Kbps To select the desired rate 1 Turn the 9 position mode control to PGM rE is displayed in the output voltage display 2 ...

Page 149: ...mmunication port as described Selecting the Appropriate Communication Port on page 5 20 If more than one unit has the same multichannel address when connected through the RS 485 connector then collisions are possible resulting in garbled responses to queries 2 Press the rotary Adjust Enter control ADDR is displayed on the output voltage display 3 Turn the rotary Adjust Enter control to select the ...

Page 150: ...esponses see Table 5 8 To change the selected device simply issue the adr or SYST channel COMM MCH ADDR command with a different multichannel address The previously selected device will be deselected and the new device will be selected From that point on all messages without a multichannel address will be destined for the newly selected device It is possible to deselect all devices by using the af...

Page 151: ...esponses will be sent according to the conditions set out in Table 5 8 Table 5 8 Rules for Multichannel Responses Condition Response Example No multichannel address used Only the device selected using the adr or SYST address COMM MCH ADDR commands will respond SYSTem VERSion Single multichannel address specified The device addressed in the command will respond regardless of if it has been selected...

Page 152: ...rly useful for configuring groups of devices that require identical configurations The SCPI Commands for these instructions are root command ALL addr1 addr2 addr3 command parameter For example sour 1 2 3 7 volt 4 5 syst4 5 6 oper enab 255 syst ALL clear output0 stat on ...

Page 153: ...requirements for a SCPI compliant device Throughout this chapter figures are used to explain the relationship between the registers enable disabling register and their summary bits The figures use four logical symbols to demonstrate the relationship between the register The block represents logical not or complement of the input signal The block represents the logical AND operator The block repres...

Page 154: ...Suring SETTing RANGing SWEeping INSTrument Summary Waiting for ARM Summary CORRecting Available to designer Waiting for TRIGger Summary Available to designer Available to designer Available to designer PROGram Running Available to designer 0 1 2 3 4 5 6 7 8 9 10 11 12 13 14 15 Not Used VOLTage TEMPerature CURRent TIME POWer INSTrument Summary PHASe MODulation CALIbration FREQuency Available to des...

Page 155: ...ows the details on the relationship between the mask enable registers and the summary bits Sections describing the bits for both registers will follow Figure 5 17 Figure 5 17 IEEE 488 2 Register Model SERS Enable Register 0 1 2 3 4 5 6 7 Standard Event Status Register SESR SESR Summary Bit 0 1 2 3 4 5 6 7 0 1 2 3 4 5 6 7 Status Byte Enable Register 0 1 2 3 4 5 6 7 Status Byte Register MSS Summary ...

Page 156: ...Register QSR Set if any bits are set in the Questionable Status Event register 4 16 Message Available MAV Indicates whether the output queue is empty MAV is TRUE if the device is ready to accept a request from the controller 5 32 Standard Event Status Bit Summary ESB A summary of the Standard Event Status Register 6 64 Request Service RQS Master Status Summary MSS Not Implemented MSS indicates tha...

Page 157: ...by one of the following Status Byte bit 0 AND Service Request Enable Register bit 0 Status Byte bit 1 AND Service Request Enable Register bit 1 Status Byte bit 2 AND Service Request Enable Register bit 2 Status Byte bit 3 AND Service Request Enable Register bit 3 Status Byte bit 4 AND Service Request Enable Register bit 4 Status Byte bit 5 AND Service Request Enable Register bit 5 Status Byte bit ...

Page 158: ...he Service Request Enable Register This will cause the Summary bit of the Questionable Status register bit 3 in the Status Byte to generate a service request message whenever it gets set See Status Byte on page 5 28 for details Command SRE Service Request Enable SRE The SCPI equivalent for multichannel use STATus channel SREQuest ENABle status enable STATus channel SREQuest ENABle Query the Status...

Page 159: ...sum of all values for the events that you to be reported and send this parameter in decimal format See Table 5 9 for values for the events to be enabled in status enable parameter For example sending ESE 16 sets bit 4 of the Standard Event Status Enable Register This will cause the Event Summary bit ESB in the Status Byte to be set whenever the Execution Error bit bit 4 in the Standard Event Statu...

Page 160: ...ion 0 1 Operation Complete OPC Set if OPC command has been received and all pending operations have been completed 1 2 Request Control RQC Not implemented Always set to 0 2 4 Query Error QYE Not implemented 3 8 Device Dependent Error DDE Set if there is a device specific error See Device Specific Error List on page B 5 for a list possible error codes and descriptions 4 16 Execution Error EXE Set i...

Page 161: ...eries until the no operation pending flag is TRUE Command WAI 5 32 Command Error CME Set if an IEEE488 2 syntax error has been detected by the parser an unrecognized header was received or a group Execute Trigger was entered into the input buffer inside an IEEE 488 2 program message See Command Error List on page B 3 for a list of possible error codes and descriptions 6 64 User Request URQ Not Imp...

Page 162: ...control how they report status information In all subsequent figures that have SCPI registers this structure will be condensed down into a single block to simplify the figures The simplified block will show a 16 bit register and the summary bit See Figure 5 19 for details on the structure used for each standard SCPI register Figure 5 19 SCPI Register Model ...

Page 163: ...ating M EASuring W aiting for TRIGger Not Used Not Used Not Used SHUTdown Sum mary Local Lock Constant Voltage M ode Constant Current M ode PROGram Running Not Used Not Used Not Used 0 1 2 3 4 5 6 7 8 9 10 11 12 13 14 15 Not Used PROTection Summ ary Not Used INTerlock Not Used External Shutdown Not Used Not Used Not Used Not Used Not Used Not Used Not Used Not Used Not Used Not Used 0 1 2 3 4 5 6 ...

Page 164: ...ocal Lockout Front panel lockout 11 2048 Current Share Summary Reflects the summary of the CSHare Sub Register 12 4096 Constant Voltage Mode Reflects the output mode of the supply 13 8192 Constant Current Mode Reflects the output mode of the supply 14 16384 Program Running Indicates if an Autosequence program is currently running Remote Operation 5 36 M370185 01 The operation shutdown status regis...

Page 165: ... signal Table 5 13 OPERation SHUTdown PROTection Status Register Bit Bit Weight Bit Name Description 0 1 OVP Over Voltage protection has tripped 1 2 UVP Under Voltage protection has tripped 2 4 OCP Over Current protection has tripped 3 8 Not Used Not Used 4 16 AC Off AC failure protection has tripped 5 32 OTP Over Temperature protection has tripped 6 64 Not Used Not Used 7 128 Foldback Foldback pr...

Page 166: ... If current sharing is not being used the unit must be configured as a controller Failure to do so will result in unpredictable operation The SCPI command s for these instructions are SOURce COMBine CSHare MODE Table 5 14 OPERation CSHare Status Register Bit Bit Weight Bit Name Description 0 1 CONTroller The power supply is configured to be a Current Share CONTroller 1 2 SLAVe The power supply is ...

Page 167: ...ATus channel OPERation CONDition Enable Operation Status Register SCPI command STATus channel OPERation ENABle status enable Query Format STATus channel OPERation ENABle Set Operation Status Positive Transition Filter SCPI command STATus channel OPERation PTRansition status enable Query Format STATus channel OPERation PTRansition Set Operation Status Negative Transition Filter SCPI command STATus ...

Page 168: ...er SCPI command STATus channel OPERation CSHare ENABle statusenable Query format STATus channel OPERation CSHare ENABle Set Current Share Positive Transition Filter SCPI command STATus channel OPERation CSHare PTRansition status enable Query format STATus channel OPERation CSHare PTRansition Set Current Share Negative Transition Filter SCPI command STATus channel OPERation CSHare NTRansition statu...

Page 169: ...PI command STATus channel OPERation SHUTdown ENABle status enable Query format STATus channel OPERation SHUTdown ENABle Set Shutdown Positive Transition Filter SCPI command STATus channel OPERation SHUTdown PTRansition status enable Query format STATus channel OPERation SHUTdown PTRansition Set Shutdown Negative Transition Filter SCPI command STATus channel OPERation SHUTdown NTRansition status en...

Page 170: ... OPERation SHUTdown PROTection ENABle status enable Query format STATus channel OPERation SHUTdown PROTection ENABle Set Protection Positive Transition Filter SCPI command STATus channel OPERation SHUTdown PROTection PTRansition stats enable Query format STATus channel OPERation SHUTdown PROTection PTRansition Set Protection Negative Transition Filter SCPI command STATus channel OPERation SHUTdown...

Page 171: ...that the output of the supply is of undesirable or questionable quality The Questionable Status data structure consists of a questionable status register and two sub registers representing the status of the voltage outputs and temperature Figure 5 21 gives an overview of the Questionable Status data structure The represents the logical summation of bits in a register Table 5 15 Table 5 16 and Tabl...

Page 172: ...ed Not Used Not Used Not Used 0 1 2 3 4 5 6 7 8 9 10 11 12 13 14 15 Never Used Not Used Not Used Not Used Not Used Not Used Not Used Not Used Not Used Not Used Not Used Not Used Not Used Not Used Over Temperature Protection OTP Not Used Never Used Never Used To Status Byte Bit 3 STATus QUEStionable TEMPerature STATus QUEStionable VOLTage STATus QUEStionable Not Used TEMPerature Not Used Not Used N...

Page 173: ...6 TEMPerature Summary of Temperature Register 5 32 FREQuency Not Implemented 6 64 PHASe Not Implemented 7 128 MODulation Not Implemented 8 256 CALibration Not Implemented 9 512 Not Used Not Used 10 1024 Not Used Not Used 11 2048 Not Used Not Used 12 4096 Not Used Not Used 13 8192 Not Used Not Used 14 16384 Not Used Not Used 15 32768 Not Used Not Used QUEStionable Status Register M370185 01 5 45 5 ...

Page 174: ... Status Register Bit Bit Weight Bit Name Description 0 1 OVP Over Voltage Protection 1 2 UVP Under Voltage Protection TEMPerature Sub Register This shows whether the temperature of critical components is near or over the maximum operating temperature Table 5 17 QUEStionable TEMPerature Status Register Bit Bit Weight Bit Name Description 0 1 OTP Over Temperature Protection ...

Page 175: ...uestionable Status Register SCPI command STATus channel QUEStionable ENABle status enable Query Format STATus channel QUEStionable ENABle Set Questionable Status Positive Transition Filter SCPI command STATus channel QUEStionable PTRansition status enable Query Format STATus channel QUEStionable PTRansition Set Questionable Status Negative Transition Filter SCPI command STATus channel QUEStionable...

Page 176: ...SCPI command STATus channel QUEStionable VOLTage ENABle status enable Query Format STATus channel QUEStionable VOLTage ENABle Set Voltage Status Positive Transition Filter SCPI command STATus channel QUEStionable VOLTage PTRansition status enable Query Format STATus channel QUEStionable VOLTage PTRansition Set Voltage Status Negative Transition Filter SCPI command STATus channel QUEStionable VOLTa...

Page 177: ...STATus channel QUEStionable VOLTage TEMPerature ENABle status enable Query Format STATus channel QUEStionable VOLTage TEMPerature ENABle Set Temperature Status Positive Transition Filter SCPI command STATus channel QUEStionable VOLTage TEMPerature PTRansition status enable Query Format STATus channel QUEStionable VOLTage TEMPerature PTRansition Set Temperature Status Negative Transition Filter SCP...

Page 178: ...ent_description followed by optional Device dependent info text Each Error event_number has a unique and fixed Error event_description associated with it The maximum string length of Error event_description plus Device dependent_info is 255 characters As errors and events are detected they are placed in a queue This queue is first in first out If the queue overflows the last error event in the que...

Page 179: ...l be the numeric error code only no additional description will be given The error queried will be removed from the queue Command SYSTem ERRor CODE EVENt Example SYST ERR CODE SYST ERR CODE EVENT Responses might be 102 0 Querying For the Number of Errors in the Queue To query the device for the number of errors currently stored in the error queue you should use the following command Command SYSTem...

Page 180: ...or details 2 Force the device into the OCIS state see IEEE 488 2 standard section 12 5 2 3 Force the device into the OQIS state see IEEE 488 2 standard section 12 5 3 The reset command explicitly shall NOT affect the following 1 The state of the IEEE 488 1 interface 2 The selected IEEE 488 1 address of the device 3 The Output Queue 4 The Standard Status Register Enable setting 5 The Standard Event...

Page 181: ...r Event Queue M370185 01 5 53 5 Clear All Status Registers Clear Status Command Clears all Event Registers including the Status Byte the Standard Event Status and the Error Queue Command CLS STATus channel CLEar ...

Page 182: ...1s and the transition filter register to report only positive transitions For the SCPI mandatory status data structures the PRESet command sets the transition filter registers to recognize only positive transitions and sets the enable register to 0s The following will not be affected by this command Service Request Enable Register Parallel Poll Enable Register the memory register associated with t...

Page 183: ...s implemented No single line will be longer than 80 characters long The full path for every command and query shall be returned separated by line feeds A SCPI header is defined as It shall contain all the nodes from the root The SCPI program mnemonic contains the node in standard SCPI format The short form shall use uppercase characters while the additional characters for the long form shall be in...

Page 184: ...ut AUXilliary PON STATe MEASure SCALar VOLTage DC qonly MEASure SCALar CURRent DC qonly MEASure SCALar APRogram VOLTage DC qonly MEASure SCALar APRogram VOLTage ISOLated DC qonly MEASure SCALar APRogram CURRent DC qonly MEASure SCALar APRogram CURRent ISOLated DC qonly INITiate IMMediate nquery CALibration RESTore nquery CALibration VOLTage PROTection OVER DATA nquery CALibration OUTPut VOLTage DA...

Page 185: ... by page basis No single line will be longer than 80 characters and each page will be 23 lines long The full path for every command and query shall be returned separated by line feeds After a full page of headers has been displayed you will be prompted to press any key to continue or the ESC key to stop any further listing of the command headers Command SYSTem channel HELP LEGacy For example SYST2...

Page 186: ...nly SYST REM STAT LOC Front panel is unlocked SYST REM STAT Query for status Auto Sequence Programming Auto Sequence programming lets you execute a program stored in the power supply s memory The program that can be stored in memory can be composed of any of the SCPI commands described in this Manual For example Auto Sequence programming allows you to set the timer to turn the power output of the ...

Page 187: ...esults in 12 seconds of wait time after each command is executed Storing an Auto Sequence Program Loading a program into memory is done by using the PROGram channel RECord STARt command After the start command has been issued the XTR will record all subsequent commands into the auto sequence program buffer The commands will be recorded into the buffer until the PROGram channel RECord STOP command ...

Page 188: ...fer Capture Text Stop from the Hyper Terminal program 6 Using any text editor open the file which you captured the Auto Sequence program to 7 Remove the first line which should read PROG channel READ and the first blank line This makes the first line of the program the first line of the file 8 Save the file and exit the text editor The Auto Sequence program has not been stored and can be sent to a...

Page 189: ...5 4 CURR 0 25 IDN PROG STOP Reloading an Auto Sequence Program The following procedure will demonstrate how to store a command beyond a power cycle of the unit Important This functionality is only available through USB RS 232 and RS 485 It is not possible to reload an auto sequence program over the GPIB and ENET cards To reload Auto Sequence program from file 1 Set the data rate of the device to b...

Page 190: ...iginal speed Running an Auto Sequence Program Once an auto sequence program has been stored there are a few commands that can be used to run the program Once a program begins running it will continue running until completion and then repeat the number of times specified by the repeat command The default at power on is to have repeat set to 1 Commands TRG INITiate channel IMMediate PROGram channel ...

Page 191: ... to delete the current Auto Sequence Program using the SCPI noted below Command PROGram channel DELete ALL Repeating an Auto Sequence Program An Auto Sequence Program can be configured to repeat any number of times or infinitely The default at power up is to have the repeat count default to once The program will repeat if the repeat count can be changed using the PROGram channel REPeat command If ...

Page 192: ...after the last command might be as follows AMETEK XTR 150 5 6 SN E00123456 1 00 Build 10 21 11 2005 AMETEK XTR 150 5 6 SN E00123456 1 00 Build 10 21 11 2005 AMETEK XTR 150 5 6 SN E00123456 1 00 Build 10 21 11 2005 AMETEK XTR 150 5 6 SN E00123456 1 00 Build 10 21 11 2005 ...

Page 193: ... trigger the foldback alarm to begin counting For example if the command is sent with the CV mnemonic and the output is enabled with no load attached open circuit the unit will operate in constant voltage mode and the foldback counter will begin counting If the CC mode was set and the output was enabled with no load connected the unit will operate in CV mode and the foldback counter will not trigg...

Page 194: ...ure Protection Lock OTP on page 3 30 maps to having the OTP latch flag set The OFF setting maps to having the OTP latch flag cleared The default is to have the flag cleared Interlock Enable Disable The interlock feature is explained in Interlock Function on page 3 33 Use the following command to enable and disable interlock Enabling interlock will allow the interlock feature to trigger based on th...

Page 195: ...ed to define the range from 0 to the level that will be input into the analog programming lines to control the output The command is equivalent to the procedure described in Analog Programming Mode on page 4 9 Commands SYSTem channel COMMunicate APRogram LEVel VOLTage ISOLated level SYSTem channel COMMunicate APRogram LEVel VOLTage level SYSTem channel COMMunicate APRogram LEVel CURRent ISOLated l...

Page 196: ...cates the value is controlled by the set point AVOLtage is used to set the output to be controlled by an analog voltage input ARESistive is used to set the output to be controlled by a resistor circuit IAVoltage is used to set the output to be controlled by the isolated analog voltage input IAResistive is used to set the output to be controlled by the isolated analog resistor circuit ...

Page 197: ...ssible using the SCPI command noted below Command SYSTem channel PROTection MASK mask Where mask is the bit mask for disabling the alarms See Table 5 19 for details Table 5 19 Alarms Bit Mask Bit Bit Weight Bit Name Description 0 1 AC Fail Not used Always 1 1 2 OTP Not used Always 1 2 4 N A Not used 3 8 Fan Stop Fan on the main board 4 16 N A Not used 5 32 Interlock Not used Always 1 6 64 OVP Not ...

Page 198: ...Remote Operation 5 70 M370185 01 ...

Page 199: ...6 Calibration and Troubleshooting Chapter 6 Calibration and Troubleshooting contains information and procedures for calibrating and troubleshooting the power supply ...

Page 200: ...ems need to be calibrated Programmed voltage Voltage readback Programmed current Current readback Non isolated voltage monitoring Isolated voltage monitoring Non isolated current monitoring Isolated current monitoring Isolated source for analog programming Non isolated source for analog programming Over voltage protection system CAUTION Equipment damage Calibration procedures should only be perfor...

Page 201: ...departure from the ideal slope of the measured versus programmed line Offset error is the magnitude of the measured value when the programmed value is zero For best results the next recommended action is gain calibration for 90 of maximum value and offset calibration for 10 of maximum value Perform gain calibration again Figure 6 1 Offset Intercept Error and Gain Slope Error Programmed Value I d e...

Page 202: ...n so that the real line and ideal line intersect at a programmed value of 90 Step 2 Offset Calibration Adjust the offset so that the real and ideal lines intersect at a programmed value of 10 Figure 6 2 Calibration Step 1 Gain Calibration Figure 6 3 Calibration Step 2 Offset Calibration ...

Page 203: ...Calibration and Troubleshooting M370185 01 6 5 6 Step 3 Recalibrate Gain Repeat Step 1 for best results Figure 6 4 Calibration Step 3 Recalibrate Gain ...

Page 204: ...the load 2 Connect the output terminals to a precision voltmeter 3 Turn both the power supply and the voltmeter to On 4 Set the current set point to maximum Set the supply output to 90 of the nominal voltage level 5 Turn on the output power 6 Read the voltage value on voltmeter display 7 Type the SCPI command with voltage value as parameter data For example type CAL OUTP 138 3 if you had an XTR 15...

Page 205: ... representing a short circuit using a precision ammeter 3 Turn both the power supply and the load On 4 Set the voltage set point to maximum Set the supply output to 90 of the nominal current level 5 Turn on the output power 6 The power supply starts up in Constant Current mode 7 Read the current value on the ammeter display 8 Type SCPI command with current value as parameter data For example type ...

Page 206: ...would type CAL OUTP CURR 0 50 if you had an XTR 150 5 6 calibrating with the current set point set to 0 56 A and the actual current measured was 0 50A After performing offset calibration it is highly recommended that you repeat gain calibration SCPI Command CALibration channel OUTPut CURRent ammeter reading in amps Important For best results both calibrations may be repeated several times To maint...

Page 207: ...SCPI command CAL PROT 6 The power supply will enter into self calibration mode The output voltage display blinks OVP CAL After several seconds the calibration will complete and the display will return to normal operation with output off Calibration of the power supply is complete The SCPI command s for these instructions are CALibration VOLTage PROTection Important The Voltage Calibration must be ...

Page 208: ...olt or use the rotary adjust Enter control 6 Turn the main output On by pressing the OUTPUT ENABLE Main button on the front panel or send the command OUTP ON The OUTPUT ENABLE Main button will illuminate 7 Enter interactive calibration mode by sending the SCPI command CAL MON 8 Press on the terminal keys or to reduce or increase monitoring value Adjust the monitoring value displayed on the voltmet...

Page 209: ...he command SOUR VOLT ModelVolt or use the rotary adjust Enter control 7 Turn the main output On by pressing the OUTPUT ENABLE Main button on the front panel or send the command OUTP ON The OUTPUT ENABLE Main button will illuminate 8 Enter interactive calibration mode by sending SCPI command CAL MON CURR 9 Press on the terminal keys or to reduce or increase the monitoring value Adjust the monitorin...

Page 210: ...ogramming The SCPI command is SYST REM SOUR AVOL 6 Turn the main output to On by pressing the OUTPUT ENABLE Main button on the front panel or send the command OUTP ON The OUTPUT ENABLE Main button will illuminate 7 Enter the interactive calibration mode by sending the SCPI command CAL OUTP ANAL 8 Press the terminal keys or to reduce or increase the main output voltage value Adjust the main output ...

Page 211: ...ive Non Isolated for Voltage Programming The SCPI command is SYST REM SOUR ARES 5 Turn the main output On by pressing the OUTPUT ENABLE Main button on the front panel or send the command OUTP ON The OUTPUT ENABLE Main button will illuminate 6 Enter the interactive calibration mode by sending the SCPI command CAL OUTP ANAL RES 7 Press the terminal keys or to reduce or increase main output voltage v...

Page 212: ...put source as Voltage Non Isolated for Current The SCPI command is SYST REM SOUR CURR AVOL 6 Turn the main output On by pressing the OUTPUT ENABLE Main button on the front panel or send the command OUTP ON The OUTPUT ENABLE Main button will illuminate 7 Enter the interactive calibration mode by sending the SCPI command CAL OUTP ANAL CURR 8 Press the terminal keys or to reduce or increase the main ...

Page 213: ...APR LEV CURR 4 4 Set the input source as Resistive Non Isolated for Current Programming The SCPI command is SYST REM SOUR CURR ARES 5 Turn the main output to On by pressing the OUTPUT ENABLE Main button on the front panel or send the command OUTP ON The OUTPUT ENABLE Main button will illuminate 6 Enter the interactive calibration mode by sending the SCPI command CAL OUTP ANAL CURR RES 7 Press the ...

Page 214: ...output voltage to 100 by sending the command SOUR VOLT ModelVolt or use the rotary adjust Enter control 6 Turn the main output to On by pressing the OUTPUT ENABLE Main button on the front panel or send the command OUTP ON The OUTPUT ENABLE Main button will illuminate 7 Enter the interactive calibration mode by sending the SCPI command CAL MON ISOL 8 Press the terminal keys or to reduce or increase...

Page 215: ...e command SOUR VOLT ModelVolt or use the rotary Adjust Enter control 6 Turn the main output to On by pressing the OUTPUT ENABLE Main button on the front panel or send the command OUTP ON The OUTPUT ENABLE Main button will illuminate 7 Enter the interactive calibration mode by sending the SCPI command CAL MON CURR ISOL 8 Press the terminal keys or to reduce or increase the monitoring value Adjust t...

Page 216: ... for Voltage The SCPI command is SYST REM SOUR AVOL 6 Turn the main output to On by pressing the OUTPUT ENABLE Main button on the front panel or send the command OUTP ON The OUTPUT ENABLE Main button will illuminate 7 Enter the interactive calibration mode by sending the SCPI command CAL OUTP ANAL ISOL 8 Press on the terminal keys or to reduce or increase the main output voltage value Adjust the m...

Page 217: ... source as Resistive Isolated for Voltage Programming The SCPI command is SYST REM SOUR IAR 5 Turn the main output to On by pressing the OUTPUT ENABLE Main button on the front panel or send the command OUTP ON The OUTPUT ENABLE Main button will illuminate 6 Enter the interactive calibration mode by sending the SCPI command CAL OUTP ANAL RES ISOL 7 Press on the terminal keys or to reduce or increas...

Page 218: ...tage Isolated for Current The SCPI command is SYST REM SOUR CURR IAV 6 Turn the main output to On by pressing the OUTPUT ENABLE Main button on the front panel or send the command OUTP ON The OUTPUT ENABLE Main button will illuminate 7 Enter the interactive calibration mode by sending the SCPI command CAL OUTP ANAL CURR ISOL 8 Press the terminal keys or to reduce or increase the main output current...

Page 219: ...g of current J3 3 and the other to common J3 2 3 Set the Resistive APG level to 4 kΩ The SCPI command is SYST COMM APR LEV CURR 4 4 Set the input source as Resistive Isolated for Current Programming The SCPI command is SYST REM SOUR CURR IAR 5 Turn the main output On or send the command OUTP ON 6 Enter the interactive calibration mode by sending the SCPI command CAL OUTP ANAL CURR RES ISOL 7 Press...

Page 220: ...e attached to the non isolated voltage APG input to 90 of the nominal voltage level in this case 3 6 V 6 Turn the output power on 7 The power supply starts up in Constant Voltage mode 8 Read the input voltage value from the voltmeter connected in step 1 9 Type the SCPI input Voltage calibration command with voltage noted in step 8 as the parameter data For example you would type CAL INP ANAL 3 53 ...

Page 221: ... CAP APG input gain calibration 1 Connect a short across the power supply output 2 Connect a voltmeter and a DC voltage source to the non isolated current APG input lines J1 10 and J1 7 3 Turn the power supply On 4 Set the Current APG level to 4 V Send the SCPI command SYST COMM APR LEV CURR 4 5 Set the input source as Voltage analog APG Send the SCPI command SYST REM SOUR CURR AVOL 6 Set the volt...

Page 222: ...al current level in this case 0 400 V 2 Turn the output power on 3 Read the input voltage value from the voltmeter connected in step 2 of the gain calibration 4 Type SCPI input current calibration command with voltage noted in step 3 as the parameter data For example you would type CAL INP ANAL CURR 0 43 After performing offset calibration it is highly recommended that you repeat gain calibration ...

Page 223: ...n the 488 2 Arbitrary Program Block Data format If the calibration ever needs to be restored you can execute the same commands and write the arbitrary block data response that was received in the query as the parameter For example downloading the parameter data can be done from the hyper terminal as follows cal par 262 h2710 h0000 h2710 h0000 h2710 h0000 h2710 h0000 h1AA4 cal par apr 259 h7B h7F h...

Page 224: ...s use the SCPI command for returning the power supply to default calibration settings This can be useful when recalibrating the unit to a specific load but causes ALL calibration values to return to default values All types of calibration must be done to restore the unit to fully functional condition It is strongly recommended that the calibration coefficients be saved before using this command Se...

Page 225: ...power supply OFF immediately 2 Disconnect the power supply from the load and external programming 3 Test the power supply with no load running the tests in Step 5 Performing Functional Tests on page 2 8 4 If the tests show that the power supply is functioning normally check all load programming and monitoring connections and circuits 5 Check the AC input for correct voltage and frequency If the pr...

Page 226: ...If you require any further troubleshooting assistance call your service technician See Contact Information on page iii Table 6 1 Troubleshooting Symptom Check Further Checks and Corrections The power supply is not operating FLA FAIL is displayed Flash memory check sum error Do a reset See page 3 40 Important The power supply will boot with default options and calibration values ...

Page 227: ...I Command Reference Appendix A SCPI Command Reference provides a summary of the Standard Commands for Programmable Instruments SCPI that are supported by the XTR 850 Watt Series Programmable DC Power Supply ...

Page 228: ...s all IEEE 488 2 requirements SCPI Requirements The power supply conforms to the following SCPI requirements SCPI mandated commands Questionable Status Register QSR Condition Event Enable Operation Status Register OSR Condition Event Enable Status Byte Register SBR Standard Event Status Register SESR IEEE 488 2 SCPI Syntax and Style Parameters Units of Measure and Multipliers Refer to IEEE 488 2 s...

Page 229: ...nodes which are the building blocks of SCPI subsystems An example of a common root is CALibration and some of the commands that reside in the CALibration subsystem are CALibration OUTPut VOLTage DATA NR1 CURRent DATA NR1 CALibration is the root keyword of the command OUTPut is a second level keyword and VOLTage and DATA are third level keywords A colon is used to separate a command keyword from a ...

Page 230: ...e string other markings are used to identify different elements of the command syntax and are not sent with the string The following punctuation is sent with the command string Colons separate command keywords from lower level keywords For example CAL CURR STAT Blank spaces separate command keywords from parameter values For example CURR 0 1 Commas separate parameters from each other when more tha...

Page 231: ...Minimum and Maximum In the following example Minimum and Maximum are offered as alternative choices to declaring a specific parameter value CAL CURRent LEVel current MIN MAX The string CAL CURR LEV MIN sets the current calibration level to the minimum model value Using Queries A question mark lets you query the present value for most parameters For example to query the current calibration state us...

Page 232: ...el Common Commands The IEEE 488 2 standard includes a set of common commands for functions such as reset and self test These common commands always start with an asterisk contain 4 or 5 characters and may have one or more parameters The command is always separated from the parameter by a blank space Multiple commands sent in the same string are separated by a semi colon The following is an example...

Page 233: ... as decimal points optional signs and scientific notation Values such as MINimum and MAXimum are accepted as substitutes for numbers When DEFault is provided as a parameter the machine selects the default value automatically No units suffix should be included with the parameter only support for defaults units is available In cases where specific numeric values are accepted the power unit will roun...

Page 234: ...Libration root node go through the OUTPut node and then move down past the VOLTage and CURRent nodes which appear at that level to the ANALog node and then move through the optional VOLTage node to the ISOLated node Thus the command would then be CALibration OUTPut ANALog VOLTage ISOLated All commands can be formed by looking at this tree and taking the unique path from the root node to the leaf n...

Page 235: ...Sistive ISOLated CURRent ISOLated RESistive ISOLated VOLTage PROTection OVER RESTore DEFault INITiate IMMediate MEASure AProgram VOLTage DC ISOLated DC CURRent DC ISOLated DC SCALar VOLTage DC CURRent DC OUTPut PROTection CLEar FOLDback MODE DELay ...

Page 236: ... POLarity POWer STATe PowerON STATe AUXilliary STATe PowerON STATe PROGram READback STATe RECord STARt STOP DELete ALL REPeat STEP DWELl SOURce COMBine CSHare MODE VOLTage LEVEl IMMediate AMPLitude PROTection OVERvoltage LEVel UNDer LEVel CURRent ...

Page 237: ...ection INTerlock STATe TEMPerature LATCh STATus PRESet QUEStionable EVENt ENABle CONDition PTRansition NTRansition VOLTage EVENt ENABle CONDition PTRansition NTRansition TEMPerature EVENt ENABle CONDition PTRansition NTRansition OPERation EVENt ENABle CONDition PTRansition ...

Page 238: ...ENABle CONDition PTRansition NTRansition SHUTdown EVENt ENABle CONDition PTRansition NTRansition PROTection EVENt ENABle CONDition PTRansition NTRansition STANdard EVENt ENABle CLEar SBYTe EVENt SREQuest ENABle SYSTem FPANel TIMeout PROTection LATCh MASK RESet WAIT ...

Page 239: ... TEST RESet IDENtify REMote STATe SOURce VOLTage CURRent COMMunicate APRogram LEVel VOLTage ISOLated CURRent ISOLated MCHannel ADDRess PON VOLT CURR ENA VOLT CURR SAVE RECall VERSion ERRor NEXT CODE NEXT COUNt HELP HEADers SYNTax LEGacy ...

Page 240: ...th an error if queried Table A 1 IEEE 488 2 Commands Function SCPI Command Description Parameter and Range Query Select Address ADR Select the power supply unit to communicate with Address 1 30 Yes Clear Status CLS STATus channel CLEar Clears all the status data structures N A Query the Error Queue ERR Query the Error Queue for the oldest error event Standard Event Status Enable Query ESE STATus c...

Page 241: ...g_location Recall a User Memory Setting See SAV below Setting Index 1 5 N A Reset RST SYSTem channel RESet Resets all values to default state excluding calibration data N A Save User Settings SAV SYSTem channel SAVE setting_location Save a User Memory Setting N A Query Service Request Enable SRE STATus channel SREQuest ENABle Service Request Enable Query Yes Service Request Enable SRE STATus chann...

Page 242: ... Yes Read APG Input Voltage MEASurement SCALar APRogram VOLTage DC Measure and readback the voltage being input to the non isolated voltage analog programming input pin Yes Read Isolated APG Input Voltage MEASurement SCALar APRogram VOLTage ISOLated DC Measure and readback the voltage being input to the isolated voltage analog programming input pin Yes Read APG Input Voltage MEASurement SCALar APR...

Page 243: ...iate AMPLitude Set current set point immediate Current Set Point MAXimum MINimum Yes Set Immediate Voltage Set point SOURce channel VOLTage LEVel IMMediate AMPLitude Change voltage set point immediate Voltage Set Point MAXimum MINimum Yes Set Over Voltage Protection Level SOURce channel VOLTage PROTect ion OVERvoltage LEVel Set the over voltage protection level OVP Set Point MAXimum MINimum Yes Se...

Page 244: ... voltage protection OVP Voltage Set in Volts No Enter Output Voltage Data CALibration channel OUTPut VOLTage Sets the voltage output calibration level Voltage set in volts No Enter Output Current Data CALibration channel OUTPut CURRent Sets the current output calibration level Current set in amps No Calibrate the Voltage controlled Non Isolated Voltage APG feature CALibration channel MONitor VOLTa...

Page 245: ...NALog VOLTage Calibrates the isolated and non isolated VAP measurement commands NR1 Yes Calibrate the Current APG Input CALibration INPut ANALog CURRent Calibrates the isolated and non isolated CAP measurement commands NR1 Yes Calibrate the Voltage controlled Non Isolated Voltage APG feature CALibration channel OUTPut ANALog VOLTage Calibrate the voltage analog programming system NR1 nothing for i...

Page 246: ...ltage APG feature CALibration channel OUTPut ANALog VOLTage RESistive Calibrate the Resistive controlled voltage analog programming system NR1 nothing for interactive mode Yes Calibrate the Resistive controlled Isolated Voltage APG feature CALibration channel OUTPut ANALog VOLTage RESistive ISOLated Calibrates the Resistive controlled voltage analog programming system NR1 nothing for interactive m...

Page 247: ...Queries and loads the APG calibration parameters in arbitrary program block data format arbitrary program block data Yes Table A 5 SCPI Commands to Clear All Protection Mechanisms Function SCPI Command Description Parameter and Range Query Clear Output Protection OUTPut channel PROTection CLEar Clears the currently set alarms N A Table A 6 SCPI Commands for Foldback Protection Function SCPI Comman...

Page 248: ...Wer PON STATe Control Main Output Autostart State Enable Disable Yes Aux Output Control OUTPut AUXilliary STATe Control Aux Output State Enable Disable Yes Power Auxiliary Output Control OUTPut AUXilliary PON STATe Control Aux Output Autostart State Enable Disable Yes Table A 8 SCPI Commands for Triggering Function SCPI Command Description Parameter and Range Query SetImmediate Initiation of Trigg...

Page 249: ...est SYSTem channel TEST Perform unit Self test returns 0 if pass non zero value for failure Yes ID Query SYSTem channel IDENtify Query device ID string Yes Save User Preset SYSTem channel SAVE Save the user preset values Select any slot from 1 5 Setting Index 1 5 No Recall User Preset previously saved SYSTem channel RECall Load the user preset values Select any slot from 1 5 Setting Index 1 5 No Q...

Page 250: ...gram LEVel CURRent ISOLated Select level for Current APG Level can be between 2 10 volts Level 2 10 MAXimum MI Nimum Yes Select the address to communicate with SYSTem channel COMMunicate MCHannel ADDRess Select the current device to receive the commands The parameter for this command is the address set on the front panel under the remote Yes Select Address SYSTem COMMunicate SELF ADDRess Select th...

Page 251: ... is turned on ON OFF Yes OutputEnable Voltage Low SYSTem channel PON ENAble VOLTage Set the voltage set point to zero when the output enable button is pressed ON OFF Yes OutputEnable Current Low SYSTem channel PON ENAble CURRent Set thecurrent set point to zero when the output enable button is pressed ON OFF Yes Query SCPI Version SYSTem channel VERSion Returns the SCPI version to which the instru...

Page 252: ...tion Register See Table 5 11 on page 5 36 Yes Set Operation Status Enable Register STATus channel OPERation ENABle Access the Operations Enable Register See Table 5 11 on page 5 36 Enable Flags 0 65535 Yes Query Operation Status Event Register STATus channel OPERation EVENt Query the Operations Event Register See Table 5 11 on page 5 36 Yes Set Operation Status Negative Transition Register STATus ...

Page 253: ...hutdown Condition Register Yes Set Operation Status Shutdown Enable Register STATus channel OPERation SHUTdown ENABle Access the Operation Shutdown Enable Register See Table 5 12 on page 5 37 Enable Flags 0 65535 Yes Query Operation Status Shutdown Event Register STATus channel OPERation SHUTdown EVENt See Table 5 12 on page 5 37 Query the Operation Shutdown Event Register Yes Set Operation Status...

Page 254: ...page 5 37 Yes Set Operation Status Shutdown Protection Enable Register STATus channel OPERation SHUTdown PROTection ENABle Access the Operation Shutdown Protection Enable Register See Table 5 12 on page 5 37 Enable Flags 0 65535 Yes Query Operation Status Shutdown Protection Event Register STATus channel OPERation SHUTdown PROTection EVENt Query the Operation Shutdown Protection Event Register See...

Page 255: ...are ENABle Access the Operations Enable Register See Table 5 11 on page 5 36 Transition Flags 0 65535 Yes Query Operation Status Condition Register STATus channel OPERation CSHare CONDition Query the Operations Condition Register See Table 5 11 on page 5 36 Yes Set Operation Status Positive Transition Register STATus channel OPERation CSHare PTRansition Access the Operation Positive Trans Filter R...

Page 256: ...See Table 5 15 on page 5 45 Transition Flags 0 65535 Yes Set Questionable Status Positive Transition Register STATus channel QUEStionable PTRansition Access the Questionable Positive Trans Filter Register See Table 5 15 on page 5 45 Transition Flags 0 65535 Query Questionable Status Temperature Condition Register STATus channel QUEStionable TEMPerature CONDition Query the Questionable Temp Conditi...

Page 257: ...es Set Questionable Status Temperature Positive Transition Register STATus channel QUEStionable TEMPerature PTRansition Access the Questionable Temp Positive Trans Filter Register See Table 5 15 on page 5 45 Transition Flags 0 65535 Yes Query Questionable Status Voltage Condition Register STATus channel QUEStionable VOLTage CONDition See Table 5 15 on page 5 45 Query the Questionable Voltage Condi...

Page 258: ...ition Register STATus channel QUEStionable VOLTage PTRansition Access the Questionable Voltage Positive Trans Filter Register See Table 5 15 on page 5 45 Transition Flags 0 65535 Yes Query the Standard Event register ESR STATus channel STANdard EVENt See Table 5 10 on page 5 32 Same as ESR Query the Standard Event Status Register SERS Yes Enable the Standard Event register ESE ESE STATus channel S...

Page 259: ...n INTerlock STATe Control the Enable Disable state of the Interlock System Yes ON OFF Table A 12 Auto Sequence Commands Function SCPI Command Description Parameter and Range Query Delete all sequences PROGram channel DELete ALL Erases the sequence currently in memory N A Change Auto Sequence operating state PROGram channel STATe Access to the run state of the Sequence RUN STOP PAUSE Yes Program se...

Page 260: ...e program Sequence ready to run N A Set the Program Command Execution Delay Time PROGram channel STEP DWEL1 Sets the amount of time to delay between commands in a Sequence Dwell time in seconds Yes Read the current contents of the Autosequence programming buffer PROGram channel READback Read the current contents of the Autosequence programming buffer Yes Table A 12 Auto Sequence Commands Continued...

Page 261: ...SCPI Command Tree M370185 01 A 35 A ...

Page 262: ...A 36 ...

Page 263: ...B Error Messages Appendix B Error Messages provides information on the error messages which may appear Errors are placed in a queue as they are detected ...

Page 264: ...asis If the queue overflows the last error in the queue is replaced with error 350 Queue Overflow When all errors have been read from the queue further error queries return 0 No error The error queue is cleared when any of the following occur IEEE 488 2 section 11 4 3 4 Upon receipt of a CLS command Upon reading the last item from the queue ...

Page 265: ...ot allowed 109 Missing Parameter Fewer parameters were received than required for the header for example the SAV common command requires one parameter so receiving SAV is not allowed 110 Command header error An error was detected in the header 113 Undefined header The header is syntactically correct but it is undefined for this specific device for example XYZ is not defined for any device 121 Inva...

Page 266: ...Parameter error Indicates that a program data element related error has occurred 221 Setting conflict Indicates that a legal program data element was parsed but could not be executed due to the current power supply state The following list is not exhaustive but does cover some of the more common conditions that may contribute to this error OVP UVP Set Points The OVP and UVP limit the setting of th...

Page 267: ... parameter value Used where the exact value from a list of possible values was expected 291 Out of memory Used when the Autosequence programming buffer is full Table B 2 Execution Error List Error Code Error Message Description Table B 3 Device Specific Error List Error Code Error Message Description 300 Device specific error Indicates that the power supply could not complete the operation due to ...

Page 268: ...ce of any error in this class causes the query error bit bit 2 in the Event Status Register to be set Table B 4 Query Error List Error Code Error Message Description 400 Query Error This is the generic query error for the power supply used only when the other types of errors do not apply 365 Time out error This is a generic device dependent error Table B 3 Device Specific Error List Error Code Err...

Page 269: ...ese specifications are represented over the full operating temperature range Nominal line input voltage should be assumed unless otherwise stated All sense lines are configured for local operation by default Except where otherwise noted specifications apply to single unit operation only Specifications are subject to change without notice ...

Page 270: ...ed output current 5 mA 2 3 mV 27 mA 2 4 mV 25 mA 2 6 mV 19 mA 3 0 mV 13 4 mA 3 7 mV 10 mA 4 mV 9 2 mA 5 mV 7 8 mA 6 mV 7 1 mA 7 mV 6 7 mA 9 5 mV 6 1 mA 17 mV 5 6 mA 32 mV 5 3 mA Output Ripple rms 300 kHz Voltage Current8 8 mV 200 mA 8 mV 180 mA 8 mV 120 mA 8 mV 75 mA 8 mV 60 mA 8 mV 45 mA 8 mV 35 mA 8 mV 25 mA 8 mV 20 mA 10 mV 16 mA 25 mV 10 mA 50 mV 6 mA Output Noise p p 20 MHz Voltage 50 mV 50 m...

Page 271: ...ting constant input voltage 8 For 6 V models the current ripple is measured at 2 6 V output voltage and full output current For all other models the current ripple is measured at 10 100 output voltage and full output current 9 When using remote sense the total of the load voltage and the load line drops must not exceed the rated output of the power supply For example for an XTR 6 110 in an applica...

Page 272: ...n other ranges 0 2 of rated output current Voltage Readback Accuracy 1 of rated output voltage 0 1 of rated output voltage Current Readback Accuracy 1 of rated output current 0 2 of rated output current Isolation Prog and Readback Lines With respect to chassis potential 500 V With respect to chassis potential 500 V negative or positive main output 1500 V Voltage and Current Programming Resolution ...

Page 273: ... of rated output over an 8 hour interval with constant line load and temperature after a 30 minute warm up Hold up Time Typical 20 ms at any rated input line Transient Response Time 2 Time for the output voltage to recover within 0 5 at its rated output for a load change 10 90 of rated output current Output set point 10 100 2 Less than 1 ms for 6 V to 60 V models Less than 2 ms for 80 V to 600 V m...

Page 274: ...EC 1010 1 Pollution Degree 2 IEC 1010 1 Mechanical Specifications XTR 850 Watt W H D 8 4 1 7 19 0 inch 214 43 6 483 mm Weight 11 lb 5kg Cooling Forced air cooling by internal fans Regulatory Approvals Safety CSA 22 2 No 61010 1 and UL61010 1 Marked with c UL us CE EN61010 1 EMC Complies with EN55022 Class A FCC Part 15A for conducted emissions Complies with EN55022 Class A FCC Part 15A for radiate...

Page 275: ...in 214 2 mm 1 05 in 26 8 mm 1 72 in 43 6 mm Optional DC output cover 1 98 in 50 2 mm 18 9 in 479 9 mm 18 5 in 469 9 mm 17 99 in 456 9 mm 60 in 15 2 mm 26 in 6 5 mm x 2 1 61 in 40 9 mm 17 32 in 439 9 mm 30 in 7 6 mm Common Specifications for All Models M370185 01 C 7 C ...

Page 276: ...Figure C 2 XTR 850 Watt Mechanical Dimensions 60 V to 600 V Models 43 6 mm 1 7 in 214 2 mm 8 4 in 0 22 in 7 2 mm 0 28 in 447 5 mm 17 6 in 5 5 mm Specifications C 8 M370185 01 ...

Page 277: ... 6 25 storing parameters 6 25 command string punctuation not sent A 5 command string punctuation blank spaces A 4 colons A 4 commas A 4 semicolons A 4 constant current mode described 3 13 constant voltage mode described 3 13 current configuration memory settings 3 35 current share command 3 46 current sharing defined 3 42 D DC output connector illustrated 4 7 short circuit protection of 1 2 DC out...

Page 278: ...2 3 5 select and set model procedure 3 5 setting VOL and CUR modes 3 5 N normal display mode described 3 7 O offset calibration effect of 6 6 offset error described 6 3 P parameter types A 7 boolean A 7 discrete A 7 numeric A 7 string A 7 parameters units of measure and multipliers A 2 power supply proof of purchase WA 4 purchase date WA 4 serial number WA 4 S SCPI A 4 command hierarchy A 3 comman...

Page 279: ...Index M370185 01 IX 3 described 3 7 3 36 number available 3 36 stored values 3 36 ...

Page 280: ...IX 4 ...

Reviews: