27
EConoMy ModE sEttInGs
time Clock settings
ACtIon
dIsPLAy
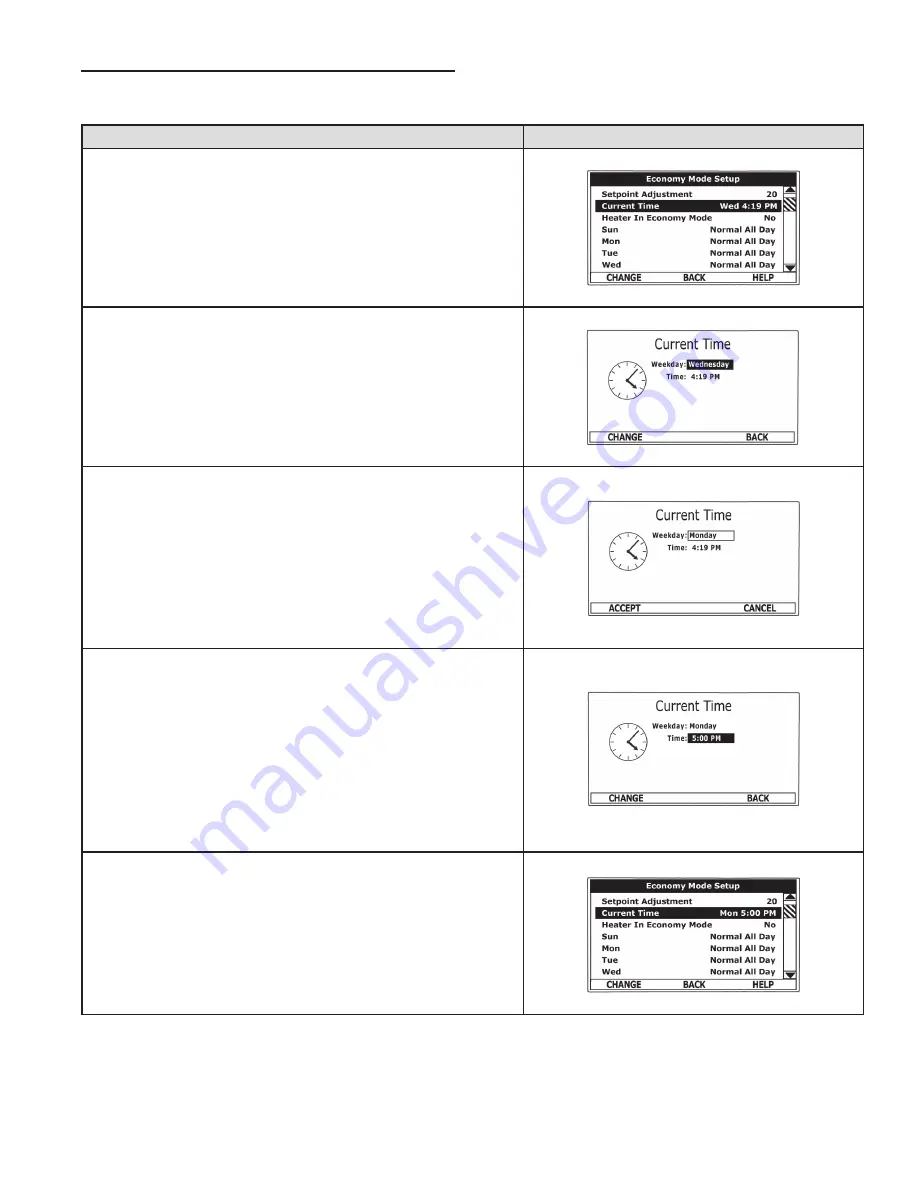
From the Desktop Screen navigate to the Economy Mode Setup menu.
Use the Up/Down buttons to select (highlight in black) Current Time sub
menu. Press the Operational Button underneath “CHANGE” to enter the
Current Time sub menu.
Use the Up/Down buttons to select the “Weekday” setting.
Press the Operational Button underneath “CHANGE” to activate the
adjustment mode for this setting.
Press the Up and Down buttons to adjust the Weekday setting to the
current day.
Notice how the text above the Operational Buttons on the display changes
to “ACCEPT” & “CANCEL” when the adjustment mode is activated and how
the current setting is outlined rather than highlighted in black.
Press the Operational Button underneath “ACCEPT” to enter and confirm
the new setting. Pressing the Operational Button underneath “CANCEL”
would discard the new setting and retain the previous setting.
Use the Up/Down and the CHANGE/ACCEPT Operational Buttons to
individually select and change the remaining time settings (Hour, Minutes,
AM/PM) to the current time in the same way as outlined above.
When finished making changes press the Operational Button underneath
“BACK” to confirm all new settings and update the control system. The
display will automatically return to the Economy Mode Setup menu.
The new settings should be displayed as the Current Time.


