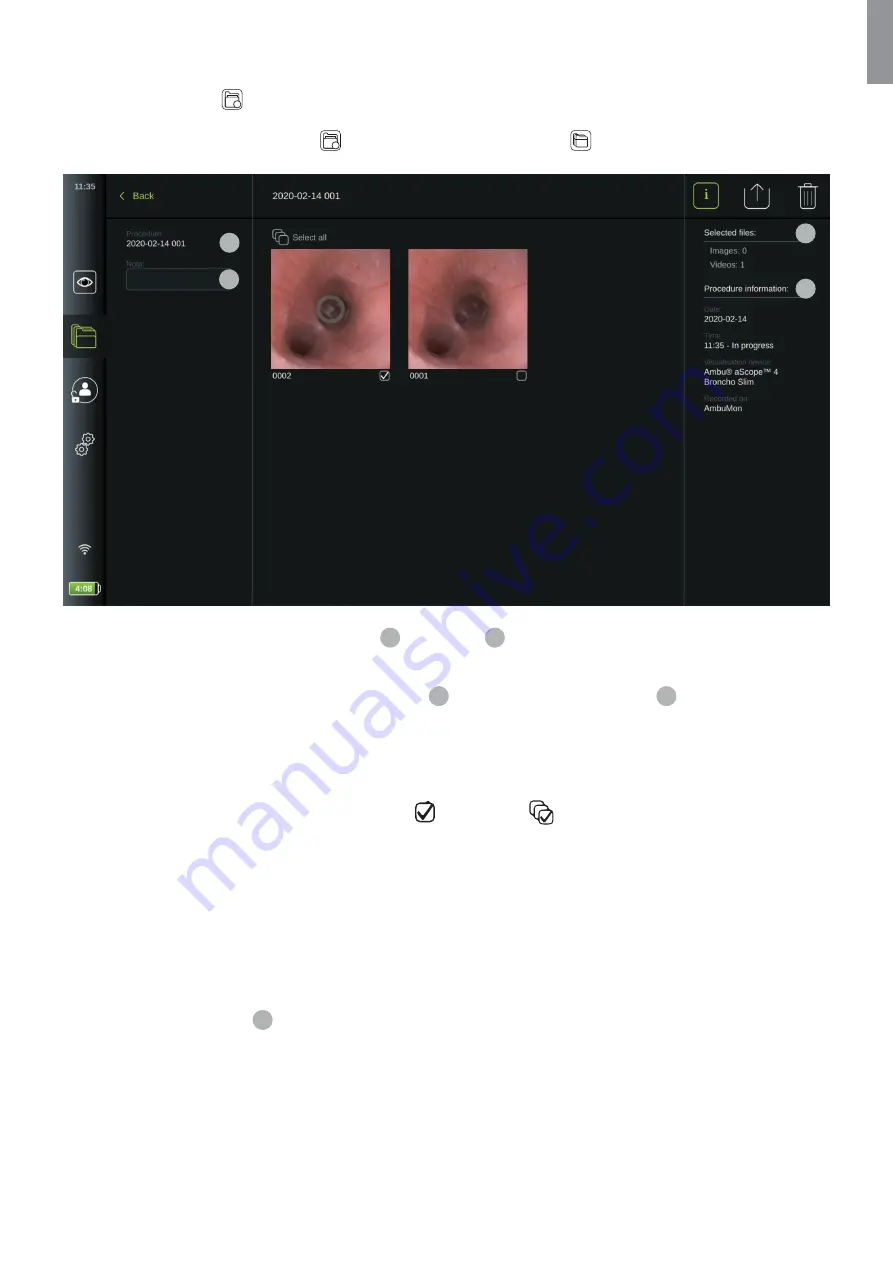
5.2.1. Viewing Procedure Folder in Archive
In the
Procedure folder
1
an overview of all recordings and information from the specific procedure is shown.
•
To access, press a
Procedure folder
1
in the procedure list in the
Archive
to view its content.
4
5
6
7
0:00:07
In the left side of the screen the
Procedure name
4
and a
Notes
5
field is shown. The notes field can be used for
adding a short description to the specific procedure.
In the right side of the screen the number of
Selected files
6
and the
Procedure information
7
is shown. The
Procedure information
includes
Date
for procedure,
Time
of day the procedure was done,
Duration
of procedure defined
as when the visualization device was connected first time and disconnected last time, the type name of
visualization
device
used for the procedure, and the name of the specific displaying unit (set up in
Settings
as
Device Name
).
All the recorded images and videos in the procedure are shown in descending order with the newest recording at the top left.
Below each recording is the file name and a selection box
.
The
Select all
icon is found above the recordings overview
The file name is: XXXX, indicating the image count, starting from 0001. The count does not change when other files
are deleted.
5.2.2. Adding a procedure note
The note field is intended for short descriptions about the procedure and the space is limited to 40 characters. The
procedure note is stored on the displaying unit with the procedure and part of the folder name when exporting image
data to USB (see section 5.2.5).
To add a note, press the
Note
5
field and use the keyboard to type.
User are advised not to add Protected Health Information (PHI) to the Notes area nor include PHI in the images or videos
as the risk of revealing PHI to non-authorized users may increase considerably.
31
EN


