29
EN
EN
General instructions
Safe use of telescopic ladders
3. Telescopic ladders (+ Chapter 1+2)
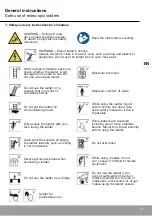
All locking mechanisms for the
extended rungs must be checked
and locked before using the ladder
as a leaning ladder.
Do not stick your hands / fingers
between the rungs while retrac-
ting the ladder.
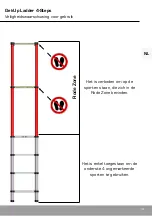
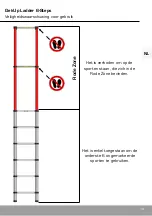
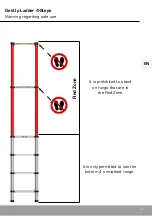
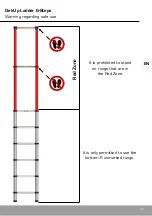
Do not stand on the last metre of
the telescopic ladder.
User instructions for telescopic ladders
Before use
•
Never use the ladder – except the Q-Top Get-Up 4-Steps and the Get-Up 6-Steps – without a
stabilizer beam.
•
Before using the ladder, mount the stabilizer beam (included in the delivery) according to the
mounting instructions on the stabilizer beam.
Extending a telescopic ladder up to maximum height
•
Place the telescopic ladder upright on a clean and sturdy surface.
•
Put a foot on the bottom rung to keep the ladder in position while extending it.
•
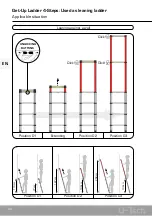
When extending a telescopic ladder, start with the upper most rung and extend it until the
rung is locked. This only happens when the underlying rung is also pulled upwards while
extending the ladder, otherwise the first rung will not lock. This rung is locked when the locking
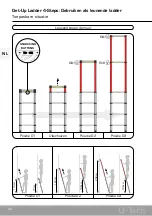
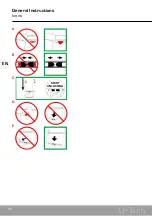
knobs (under the left and right side of the rung) have protruded completely outwards (Figure
A). For additional safety, the ladder is constructed in such a way that it retracts and extends
slowly. Extending the ladder might therefore demand extra power.
•
Repeat this with the next rungs, until the telescopic ladder is completely extended.
•
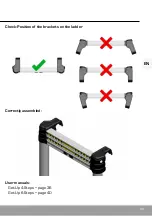
Check again the position of all the locking knobs under the rungs and all slides on the ladder
(Figure A+B).
Retracting a telescopic ladder
•
Place the telescopic ladder upright on a clean and sturdy surface.
•
When retracting a telescopic ladder, start with the one to last bottom rung.
•
Hold the ladder tightly in an upright position at the bottom rung attached to both the side
rails (Figure C+E).
•
Using both thumbs, slide the slides at the centre of the rung inwards (Figure C).
•
Attention: all the following rungs retract automatically! Pay attention that your fingers do not
get jammed between the sliding parts or rungs (Figure D+E).
•
At all times, prevent that half a step is created. This can occur if you retract rungs that are
positioned higher.
•
Never retract the telescopic ladder by manually pressing the locking knobs at the left-hand
and right-hand side under the rungs (Figure D).
•
Never unlock the telescopic ladder when one or both hands are on a rung (risk of jamming!)
(Figure D).
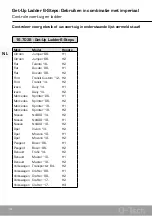
Summary of Contents for Q-Tech 16.7033
Page 4: ...4 NL NL Algemene instructies Pictogrammen A B C D E START UNLOCKING ...
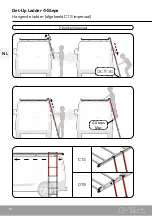
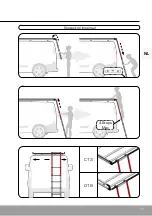
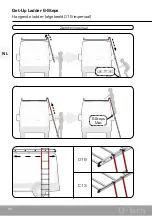
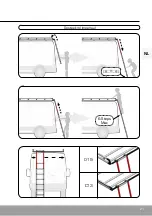
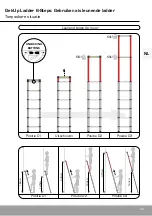
Page 17: ...17 NL NL Opsteekrol imperiaal C13 O19 4 Steps Max ...
Page 21: ...21 NL NL Opsteekrol imperiaal 6 Steps Max O19 C13 ...
Page 26: ...26 EN EN General Instructions Icons B C D E START UNLOCKING A ...
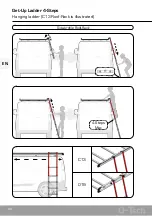
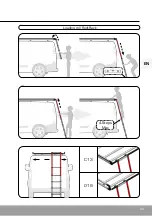
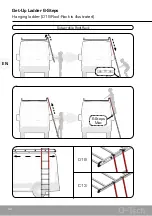
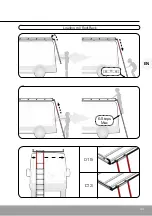
Page 39: ...39 EN EN Loading roll Roof Rack C13 O19 4 Steps Max ...
Page 43: ...43 EN EN 6 Steps Max O19 C13 Loading roll Roof Rack ...
Page 48: ...48 FR FR A B C D E START UNLOCKING A Instructions générales Pictogrammes ...
Page 61: ...61 FR FR Rouleau de la galerie de toit C13 O19 4 Marches Max ...
Page 65: ...65 FR FR Rouleau de la galerie de toit 6 Marches Max O19 C13 ...
Page 70: ...70 DE DE B C D E START UNLOCKING A Allgemeine Anleitungen Piktogramme ...
Page 83: ...83 DE DE C13 O19 Laderolle Dachgepäckträger 4 Schritte Max ...
Page 87: ...87 DE DE Laderolle Dachgepäckträger O19 C13 6 Schritte Max ...
Page 90: ...90 DE DE ...
Page 91: ...91 DE DE ...

