


Chapter 2: Quick Start Tutorial
2–7
Procedures
© December 2009 Altera Corporation
TimeQuest Timing Analyzer Quick Start Tutorial
After you enter the
set_false_path
in the GUI, all generated report panels are
labeled “Out of Date,” indicating that the report panels do not contain results that
reflects the current state of constraints or exceptions in the TimeQuest Timing
Analyzer. To update the report panels, you must regenerate all of the reports.
At the command-line, re-enter the commands. In the GUI, right-click on any
out-of-date report in the report panel list and select
Regenerate
or
Regenerate all
.
After you update the timing netlist, verify that the clock-to-clock transfer has been
declared false with the procedures in
Table 2–15
.
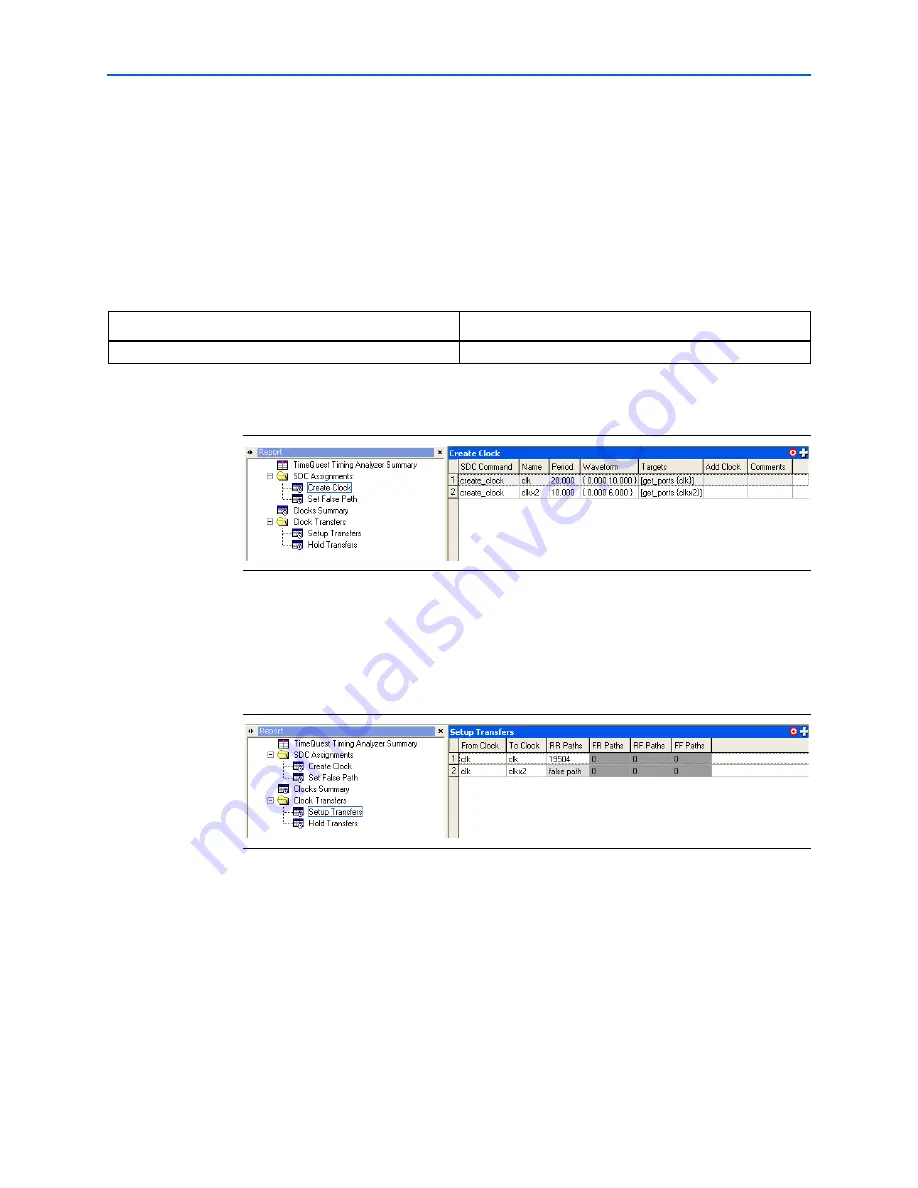
Figure 2–4
shows the new SDC Assignments report.
The report shown in
Figure 2–4
indicates that the clock constraints and the false paths
are correct.
Use the
Report Clocks
and
Report Clock Transfers
commands to verify that the two
clocks have been removed from analysis.
Figure 2–5
shows the Clock Transfers report.
f
The
RR Paths
column contains the comment “false path” to indicate that you have
declared the clock domains as false paths.
Step 10: Save Constraints to an SDC File
After you specify all clock constraints and false paths for the design, save the timing
constraints and exceptions to an SDC file with the procedures in
Table 2–16
.
Table 2–15.
Verifying Using the Report SDC Command
TimeQuest Timing Analyzer GUI
TimeQuest Timing Analyzer Console
In the
Tasks
pane, double-click
Report SDC
.
Type:
report_sdc
r
Figure 2–4.
SDC Assignments Report
Figure 2–5.
Clock Transfers Report


