background image

Qu-SB

 Getting Started Guide 

16 

 AP10287 iss1


The reset default is all pre fade, all channels assigned and the 

sends  post-EQ  (affected  by  the  EQ  but  not  the  compressor). 

This is ideal for using the mixes as monitor sends.  

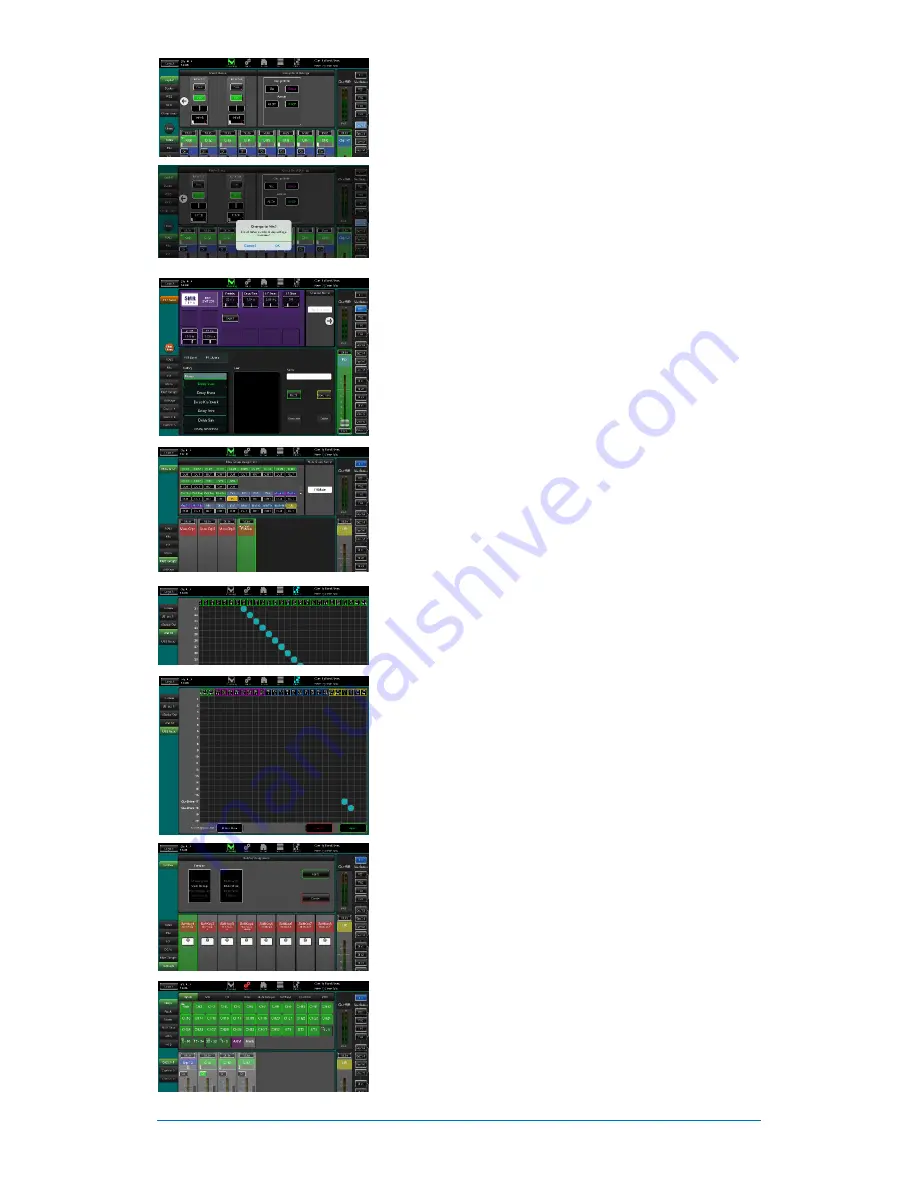
Set  up  the  Groups

  –  These  can  be  configured  as  audio 

subgroups  or  additional  stereo  mixes,  for  example  when 

working with many in-ear monitors. Use the 

Processing

 screen 

Mix tab and touch the right arrow to choose Mix or Group mode. 

If you are using subgroups to LR then remember to turn off the 

assignments of those channels to the LR mix. 

Set up the Matrix sends

 - Use the 

Processing

 screen MTX tab 

to work with its send levels and routing. 

Set  up  the  FX

  –  Select  an  FX  send  or  return  and  use  the 

Processing

 screen FX tab to set up the 4 built-in FX units. The 

reset default sets up two reverbs, a delay and an ADT effect. To 

change these use the Library button and recall the FX type and 
preset for each. Touch the right arrow to change its patching. 

Effects  such  as  reverb  and  delay  use  Mix->Return  patching. 

You can also insert an FX into a channel or mix. 

Set up Mute and DCA Groups

 – Use the 

Processing

 screen 

Mute Grp and DCA tabs to name and assign the groups. It can 

be  useful  to  assign  a  mute  or  DCA  group  to  the  FX  returns 

providing a quick way to silence or reduce the effects between 

songs. 

Choose the Direct Output application

 - Think about how you 

want  to  use  the  channel  direct  outputs  for  example  for  USB 

recording, ME-1 personal monitoring, channel Ducker trigger or 

single  channel  FX.  Set  your  source  preference  in  the 

Processing

  screen  Preamp  page  of  any  input  channel.  This 

setting is global and affects all direct outputs. 

Patching to the optional ME-1 personal monitor system 

- Go 

to the 

I/O Patch

 Monitor screen to patch Qu outputs to the 40 

ME-1  sends.  It  is  typical  to  send  the  input  channel  direct 

outputs.  Recommended  direct  out  setting  is  post  delay,  pre 

fader, post mute. 

Patch the USB outputs

 – Use the 

I/O Patch


USB Audio screen 

to patch any of the Qu outputs to the 

Qu-Drive

 multitrack and 

rear panel 

USB B

 streaming port. These share the same patch. 

USB  streaming  uses  all  32  outputs  Qu-Drive  recording  is  fed 

from the first 18 outputs. Qu-Drive stereo recording is fed from 

outputs 17-18. 

Live show multitrack recording typically uses the channel Insert 
Sends so that live mixing does not affect the recording. You may 

wish to change this to Direct Outputs for studio recording and 

other applications.  

Assign the SoftKeys

 – The SoftKeys can be user assigned for 

various functions such as mute, tap tempo, scenes, Qu-Drive 

transport and more. Assign these using the 

Processing

 screen 

SoftKeys strips. Confirm using the 

Apply

 button. 

Footswitch

  –  You  can  assign  control  to  a  single  or  dual 

footswitch.  Use  the 

Setup  /  Control  /  Footswitch

  screen  to 

choose  the  function  and  calibrate  the  operating  mode  of  the 

switch. 

Assign the Custom Layers

 – Use the 

Setup

 screen Strips page 

to drag and drop strips to the three available custom strips. 


Summary of Contents for QU-SB

Page 1: ...For Firmware Version V1 9 Publication AP10287...

Page 2: ...ment under the terms of the warranty does not provide right to extension or renewal of the warranty period Repair or direct replacement of the product under the terms of this warranty may be fulfilled...

Page 3: ...knowledge and information with other Qu users Download the Qu Mixer Reference Guide for more information on the Qu setup and mixing functions General precautions Ensure an adequate service loop and st...

Page 4: ...ital snake AR2412 24 Mic Line in 12 Line out AR84 8 Mic Line in 4 Line out Part AR2412 Part AR0804 AB168 16 Mic Line in 8 Line out Remote AudioRack Part AB1608 Qu Pad app for iPad Qu You app for iOS a...

Page 5: ...rk 11 6 2 Connect dSNAKE option 12 6 3 Power up the mixer 12 6 4 Connect the iPad 13 6 5 Connection problems 13 6 6 Get to know the Qu Pad app 14 7 Qu Start 15 7 1 Set a known starting point 15 7 2 Pr...

Page 6: ...g 32 Mic Line 1 stereo Line input 4 dedicated FX returns 12 mixes 4 mono 3 stereo LR 4 stereo groups 2 stereo matrix Local outputs for the 12 mixes LR and MTX1 2 Access other outputs via dSNAKE Abilit...

Page 7: ...Outputs PAFL Route to Outputs PAFL Route to PAFL ASSIGN PRE POST SENDS L R Output BAL ASSIGN PRE POST SENDS L R Output BAL Line Outputs Mix 1 10 Main LR CH17 32 Group and MTX Outputs Remote access to...

Page 8: ...ng option kit QU SB RK19 is available from Allen Heath Ensure adequate air flow Do not block the rear ventilation slots or the gap underneath the front of the unit To save space a shallow case with in...

Page 9: ...rol their own monitors Maximum Cat5 cable length is 100m 330 4 Qu Drive Type A USB socket to plug in a USB device such as a key or hard drive to store and transfer mixer data files scenes shows librar...

Page 10: ...ck inputs with the L input switching through the R socket so that you can also work with a mono source by plugging into just the L M input To work with RCA phono connections use jack to RCA converter...

Page 11: ...selection Position it high up to avoid obstacles such as people and equipment Avoid locating it behind pillars or walls near metal beams or on top of loudspeakers We recommend that you change the rou...

Page 12: ...roid devices to let musicians control their own monitors 6 3 Power up the mixer Important Before starting read the Safety Instructions Sheets packed with the mixer These can also be downloaded from th...

Page 13: ...If not the app will not connect to the mixer 6 5 Connection problems Qu mixer not shown in Qu Pad login list The mixer and router may have incompatible network addresses Try a Network reset by pressin...

Page 14: ...Keys You can also assign up to 3 Custom Layers with any combination of these 5 Channel processing The upper pane presents the related processing for the selected channel highlighted green on the fader...

Page 15: ...nto this and other Qu mixers you may use 7 2 Prepare the mixer for your session Choose the sources for the channels You can choose one of 3 sources for each mono and stereo channel Local socket rear p...

Page 16: ...use the channel direct outputs for example for USB recording ME 1 personal monitoring channel Ducker trigger or single channel FX Set your source preference in the Processing screen Preamp page of any...

Page 17: ...SoftKeys blocked Show memories A Show stores everything including the current mix settings all 100 scenes libraries and setup Shows are not stored within the mixer They are created directly to a USB...

Page 18: ...ultitrack Use the Home Qu Drive screen Recording creates WAV files in Qu directories on the USB device Stereo recording uses the same source as multitrack CH17 and 18 Play back Stereo or Multitrack Pa...

Page 19: ...xer settings and its memories This could be done to clear the system out before sending the mixer to a client or if you suspect a system problem To reset mix parameters before starting a show or sound...

Page 20: ...Qu SB Getting Started Guide 20 AP10287 iss1...

Reviews: