13/30
ALFA IN a.s. ©
www.alfain.eu
3. Cut off the curved or damaged end of welding wire and lead it through the
inlet liner
E3,
and the roll into the liner inside the EURO torch connector
(about 5 cm). Make sure, that you use the suitable groove.
4. Put the pressure arm
E2
down in that way, that the teeth or the gear fit and
fix it by setting the lever
E1
into vertical position.
5. Adjust the pressure nut that way that it provides constant movement of
wire but it does not deform wire. By pressing the button
A10
, placed in the
space of the wire feeder, turn on the motor of the feeder. The adjusting
screw is located under the plastic screws
E1
.
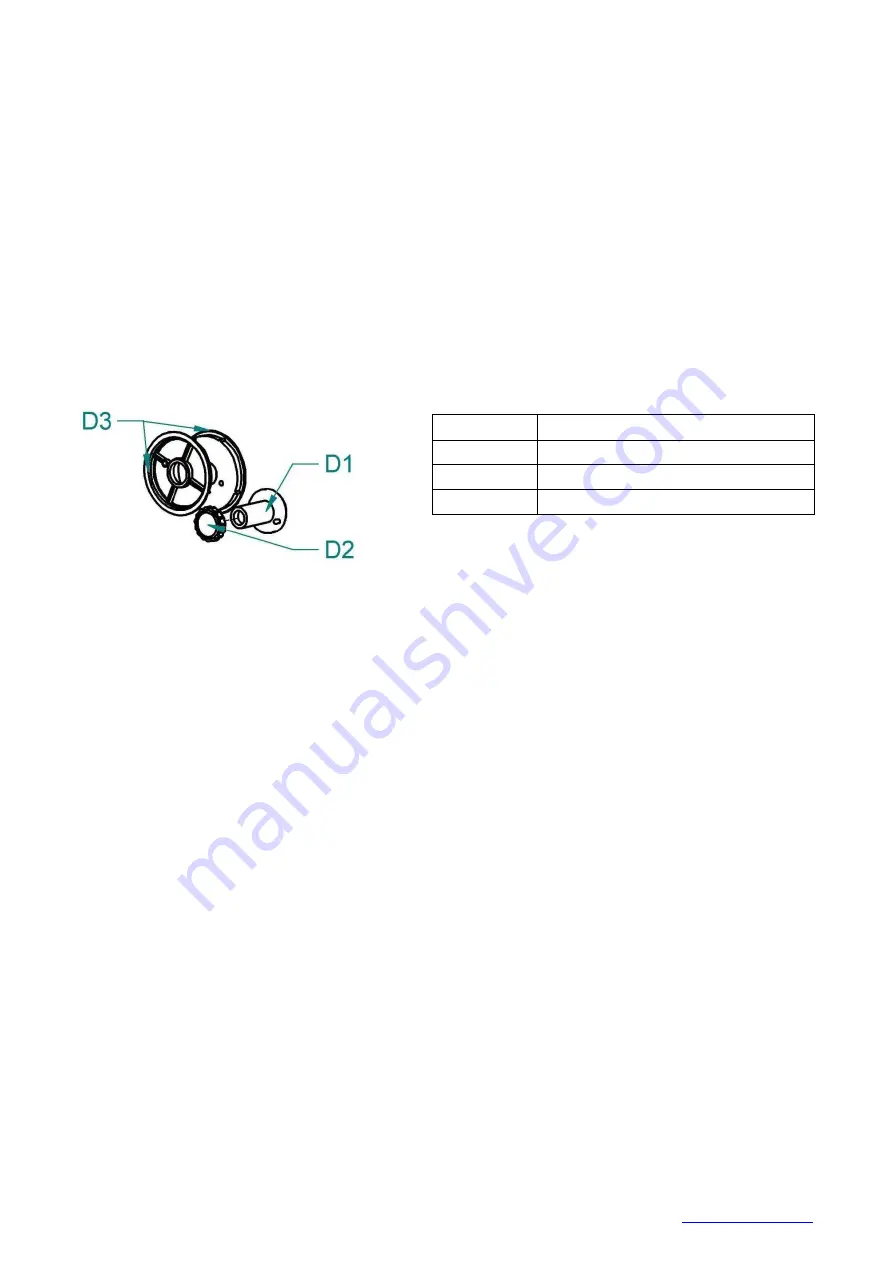
6. The spool brake is set by the manufacturer. If necessary, the brake can be
adjusted by a screw
D1
so that while stopping the feed, spool will be
stopped on time (it will avoid excessive release of wire). However, too tight
brake needlessly strains the feeding mechanism and thus slippage may
occur in the wire rolls.
Fig. 5 - Spool holder
ADJUSTING PRESSURE FORCE OF FEED ROLLS
Important thing for reliable operation of the feeding mechanism is the size of
pressure force of feed rolls.
The amount of force depends on the type of welding wire, for aluminum or tube
wire, we choose a smaller pressure force.
If the pressure force is too small, slippage may occur and thus irregular wire
feeding speed.
If the pressure force is too high, it will lead to increased mechanical wear of
bearings and it can damage the machine. Before putting into operation, clean
the rolls from preservative oil.
Pos.
Description
D1
Spool Holder
D2
Nut Spool Holder
D3
Adapter


