


4
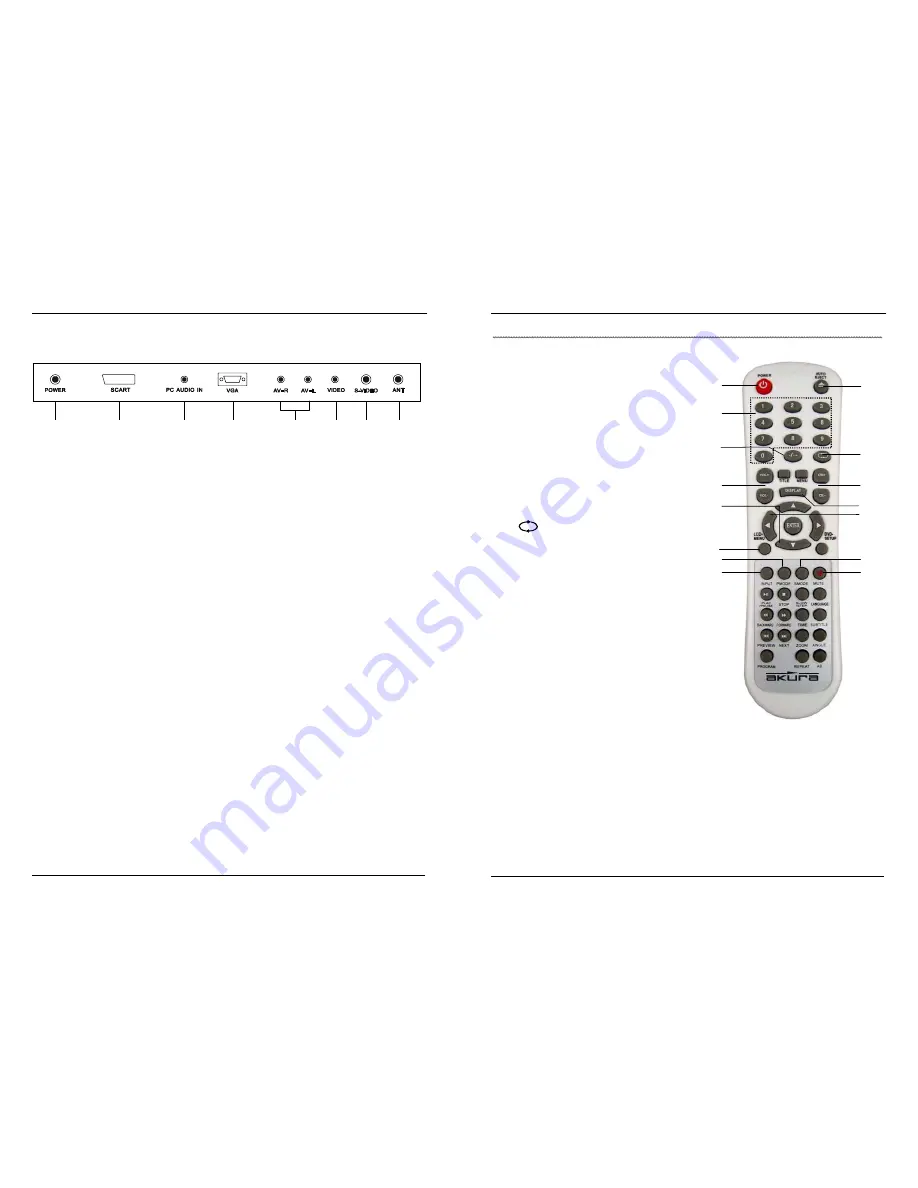
Brief introduction of the terminals on back cover
1. Power input terminal, DC12V.
2. VGA input terminal, connecting computer’s analog RGB signal.
3. S- video input terminal, connecting external AV equipment’s S-video signal.
4. Video input terminal, connecting external AV equipment’s video signal.
5. Audio input terminal, connecting external AV equipment’s audio signal.
6. VGA audio input terminal, connecting computer’s sound card.
7. 75
Ω
antenna input terminal, connecting CATV signal.
8. SCART input terminal.
Terminal board on back cover
6
5
1 2
7
4
3
8
5
Remote control (TV mode and so on)
1. POWER
—Power key
2. 0-9
—Numeric key
3. -/--
—
Switch between one-digit number and
multi-digital number.
4. VOL - / VOL+
—Decrease / increase volume
5. CH - /CH +
—Decrease / increase the
program number
6. AUTO
—To adjust the phase, clock,
H.POSITION and V.POSITION automatically
(only on PC mode).
7.
—Return to the last program
8. DISPLAY
—To display the current program
number and receiving system
9.
/
—To select menu item
10.
/
—To adjust menu item
11. LCD-MENU
—TV Menu key
12. PMODE
—To select picture mode:
PERSONAL, STANDARD, MILD and
FRESH. PERSONAL mode stores the
picture the user sets.
13. INPUT
—To select current input signal’s kind:
TV, SCART, PC-RGB, AV, S-VIDEO or DVD.
14. SMODE
—To select sound mode:
PERSONAL, VOICE, MUSIC and THEATRE
mode stores the sound the user sets.
15. MUTE
—Mute key
1
2
3
10
4
12
5
15
8
6
7
9
11
14
13
AHH17LCDVD


