


2
On back cover
ANT
Maintenance
In case of maintenance, please confirm that the power is turned off and the plug is
pulled out.
Do not use benzene, petrol or oil thinner to clean the TV.
Clean the cabinet with a soft and dry cloth. If the cabinet is very dirty, use a soft and
wet cloth, then dry it.
Clean the LCD panel with soft, dry paper or cloth, do not press the panel.
To avoid scratches please wipe the panel & TV box gently.
Other items
Please confirm that the power is turned off when the TV set is loaded and transported;
do not touch, especially do not press the panel during loading and transportation.
Do not turn on and off the TV set continuously, stop at least 2 seconds, otherwise it
will decrease the TV set’s life cycle.
Be careful with condensation at sudden temperature change. Condensation makes
damage to panel, wait for sometime (still be electrified), until it dissolves.
Avoid to display the still picture for a long time, it will damage the panel. We will not
repair the TV set free from charge caused by this reason.
Check the antenna periodically and change it in time when it is damaged.
Installation
Turn the TV set off when it is connecting the signal or power cord.
To connect the antenna
Connect the antenna or the CATV signal cable directly to the
antenna input terminal located at the back cover, otherwise it will cause
poor image.
Notes: 1. Please use 75
Ω
coaxial cable, in order to eliminate the
interference caused by the radio wave.
2. Do not band the antenna cable and the power cord
together.
To connect the power
Insert one end of the power cable of the adapter to the power input
terminal located at the back cover and other end of the power cable of
the adapter to the power outlet (AC 100V~240V 50/60Hz), which is
grounding perfectly.
The power adopted by this TV set: DC 12V 5A
When away for a long time, unplug the power adaptor’s plug from
AC power outlet.
On back cover
POWER
3
Remote control’s battery installation
Remove the battery cover; insert two size AAA batteries matching the +/- polarities of
the battery to the +/-marks inside the battery compartment.
The battery life should be about one year under normal use.
When the remote control will not be used for a long period of time,
remove the batteries to prevent leakage.
Do not use rechargeable Ni-Cd battery.
If it is out of battery, change the two batteries at same time.
Do not use different model (different material) battery.
Do not recharge the battery.
Brief introduction of operation system
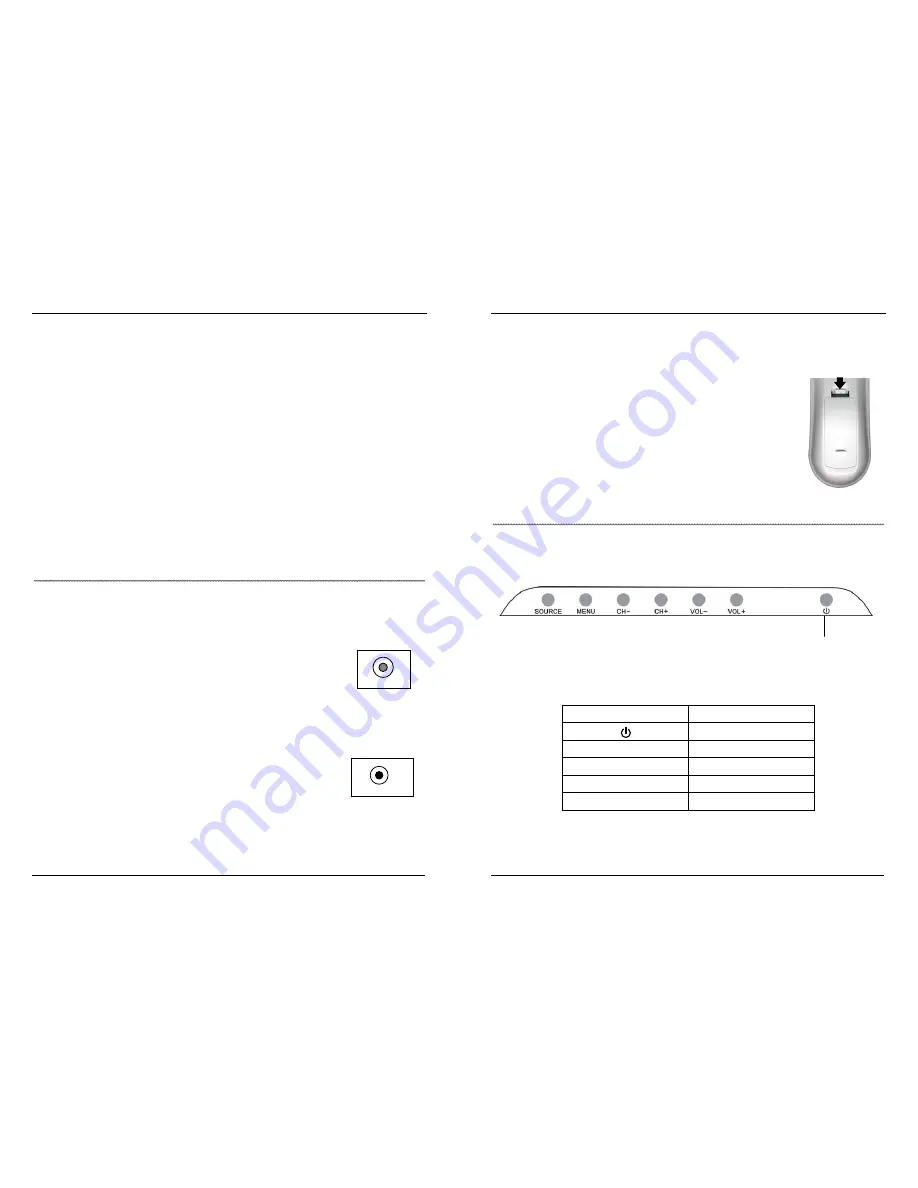
Brief introduction of control panel
Same function keys on control panel and on remote control
Key on control panel
Key on remote control
POWER
SOURCE INPUT
MENU LCD-MENU
CH - / CH +
CH - / CH +
VOL - / VOL +
VOL - / VOL +
Part of the Remote
Control’s back
Standby
Control panel


