background image

GETTING STARTED

Welcome to your AKASO Brave 6. To capture video and photos, you need a micro SD card
(sold separately).

OVERVIEW OF MODES

There are 7 modes: Video, Photo, Video Playback, Photo Playback, Video Setting, Photo
Setting and Camera Setting.
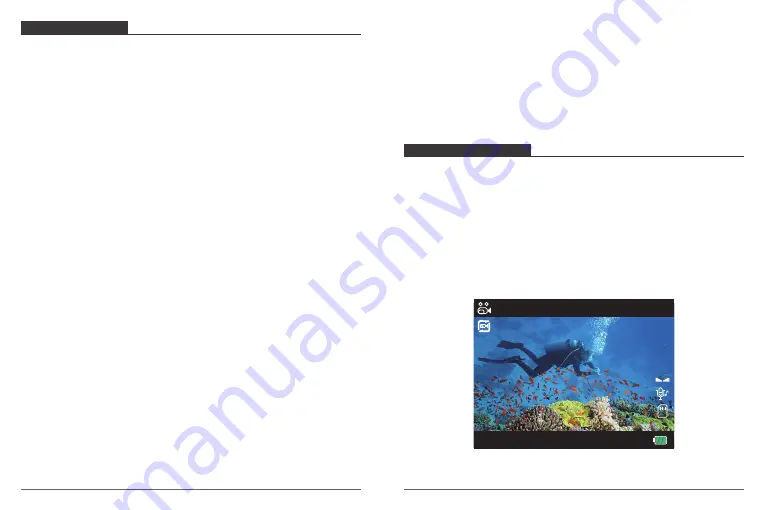
Video Mode

Video Mode is the default mode when you turn on the camera. 
In Video Mode, press Shutter button, the camera starts recording video. Press Shutter
button to stop recording video. Press Mode Button to take a still photo when recording
video. Press and hold Up or Down button to adjust the zoom level.

MICRO SD CARDS

Use brand name memory cards that meet these requirements:
• micro SD, micro SDHC, or micro SDXC
• Class 10 or UHS-I rating
• Capacity up to 64GB (FAT32)

Note:


1. Please format the micro SD card first in this camera before using. To keep your micro SD
    card in good condition, reformat it on a regular basis. Reformatting erases all of your
    content, so be sure to offload your photos and videos first.
2. FAT32 format Micro SD card stops recording when the storage of each file is over 4 GB
    and starts to record again on a new file.

POWERING ON + OFF


To Power On:

Press and hold the Mode button for three seconds. The camera beeps while the camera
status light is on. When information appears on the LCD display or the camera status
screen, your camera is on.

To Power Off:

Press and hold the Mode button for three seconds. The camera beeps while the camera
status light is off.

SWITCHING MODE

To Switch Mode:

Turn on camera, press Mode button to switch mode.

To Exit Mode:

Press the Mode button to exit mode.

TURNING ON / OFF Wi-Fi

To turn on Wi-Fi

Turn on camera, press Up button to turn on Wi-Fi. You can also enter Camera Setting to
turn on Wi-Fi.

To turn off Wi-Fi

Press Up button to turn off Wi-Fi.

EV

0.0

10/01/2018

16:03:13

01:17:15

1080 60FPS

A

3

03

04

Summary of Contents for Brave 6

Page 1: ...USER MANUAL Brave 6 Action Camera...

Page 2: ...rates uses and can radiate radio frequency energy and if not installed and used in accordance with the instructions may cause harmful interference to radio communications However there is no guarantee...

Page 3: ...DV APP Playing Back Your Content Deleting Videos and Photos On Your Brave 6 Offloading Your Content Adjusting The Zoom Level Reformatting Your Micro SD Card Maintenance Youer Camera Maximizing Batter...

Page 4: ...Power Mode Exit Button 3 Up WiFi Button 4 Down Button 5 Speaker 6 Lens 7 Micro USB Port 8 Micro HDMI Port 9 Screen 10 Battery Door 11 MicroSD Slot Note Camera does not record sound when it is in the...

Page 5: ...cro SD card in good condition reformat it on a regular basis Reformatting erases all of your content so be sure to offload your photos and videos first 2 FAT32 format Micro SD card stops recording whe...

Page 6: ...ack video Photo Playback Mode Press Mode button several times to switch to Photo Playback Mode In Photo Playback Mode press the Up Down button to playback Photo files Video Setting Mode Press Mode but...

Page 7: ...This option lets you capture a time lapse event and immediately view or share it as a video Time Lapse Video is captured without audio 5 Motion Detection Off On Default setting is off Motion detectio...

Page 8: ...Power Off 4 Screen Save Off 30 Seconds 1 Minute 3 Minutes Default setting is 1 minute Turns off the LCD display after a period of inactivity to save battery life To turn on the LCD display again press...

Page 9: ...ra returns to using the entire scene to determine the correct level of exposure 16 Scene Off Night Scene Portrait Light Painting Default setting is off 17 Frequency 50 Hz 60 Hz Default setting is 50 H...

Page 10: ...K button The selected file will be deleted 6 To exit the Video or Photo Playback mode press Mode button OFFLOADING YOUR CONTENT OFFLOADING YOUR CONTENT TO A COMPUTER To play back your video and photos...

Page 11: ...e camera Do not dry the camera or battery with an external heat source such as a microwave oven or hair dryer Damage to the camera or battery caused by contact with liquid inside the camera is not cov...

Page 12: ...Attach your camera to helmets gear and equipment MOUNTING YOUR CAMERA 19 20...

Reviews: