


10
8.Click the
OK button
at the bottom of the window.
When finished, you can open a browser window (e.g. Internet Explorer, Firefox) and enter
192.168.2.254 in the address field to access the Web interface for configuring advanced
settings
In Router mode, the Air 4240 allows you to connect your entire wired network to the Internet
wirelessly through a modem that does not have NAT or Firewall features.
Note:
How to change the mode of your device is explained in section 3.1 Operation Mode of
this manual.
2.2
Installing the Air
4240 as a Router
1. Connect the 9V power adapter included in the box to the power port of your device and
plug it into the wall outlet.
3. Using the Ethernet cable provided, connect the WAN port of the Air 4240 to a cable
modem or Internet gateway.
2.2.1
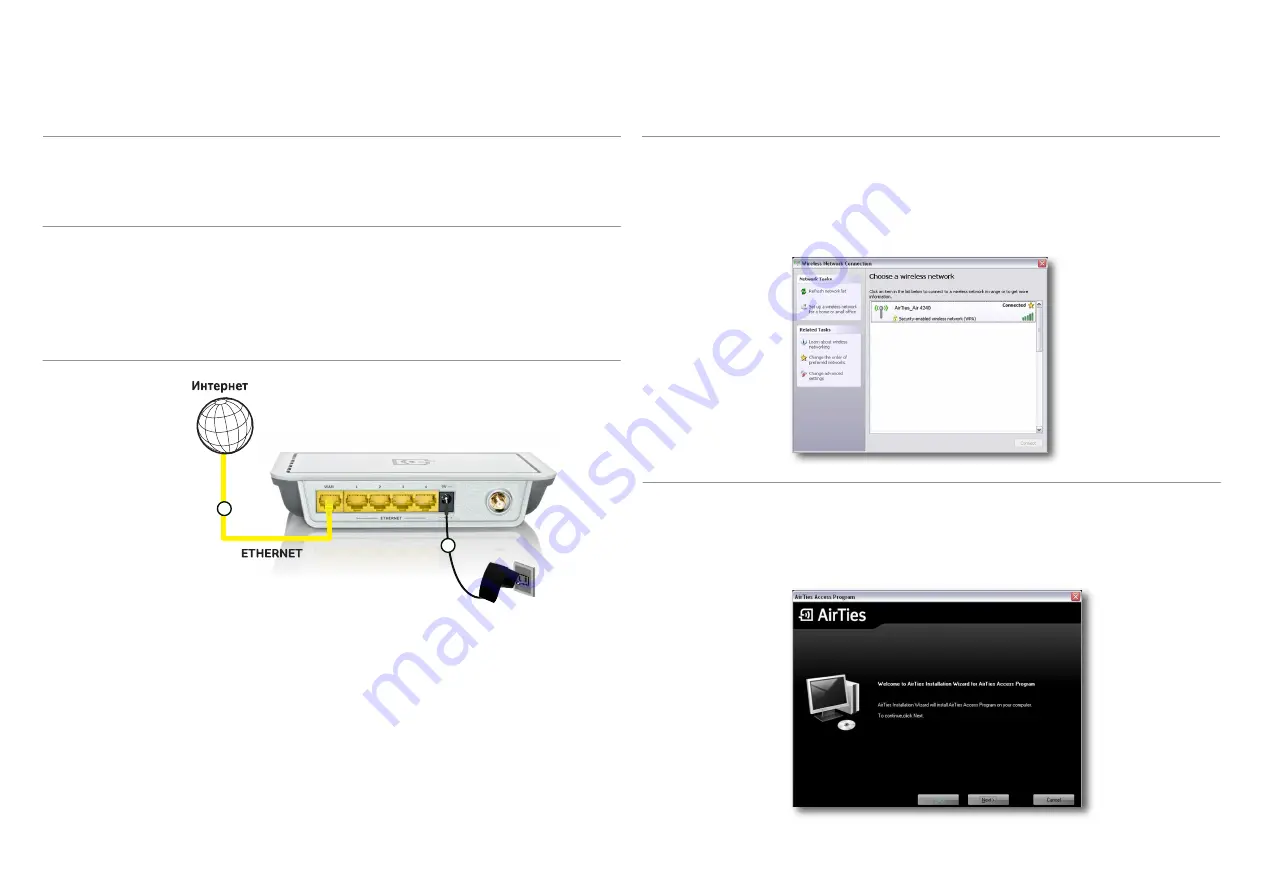
Connecting the
Cables for the Router
Mode
The Air 4240 cable connections must be complete before you can establish a wireless
connection to it.
1. First, check to make sure the wireless network client (802.11b/g or 802.11n) of your
computer is enabled.
2. Find the “
AirTies_Air4240
” network (SSID) on the wireless network search page of your
wireless network client and connect to it.
1. By using the AirTies Access Program you can access the Web interface of your device to
configure the encryption settings and other advanced settings of your wireless network.
2. Insert the Air 4240 Easy setup CD into your computer.
3. The AirTies Access Program installation wizard will start automatically. Click
Next>
to
start the installation.
2.2.2
Connecting
to the Air 4240 (In
Router mode)
2.2.3
Advanced Set-
tings Using the
AirTies Access
Program (in Router
mode)
1
2