


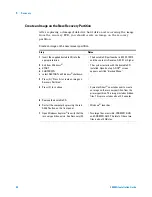

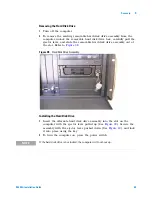


Recovery
5
E5505A Installation Guide
65
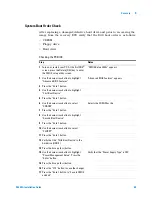
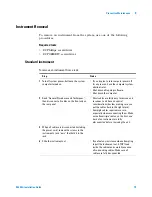
System Boot Order Check
After replacing a damaged/defective hard drive and prior to recovering the
image from the recovery DVD verify that the DOS boot order is as follows:
•
CDROM
•
Floppy drive
•
Hard drive
Checking the PC BIOS
Step
Notes
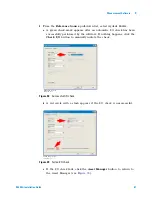
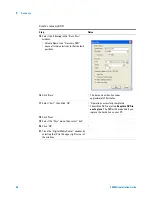
1
Turn on or restart your PC. At the first DOS
®
screen, press the Delete [DEL] key to enter
the CMOS setup utility screen.
“CMOS Setup Utility” appears
2
Use the down arrow button to highlight
“Advanced BIOS Features”
“Advanced BIOS Features” appears
3
Press the “Enter” button.
4
Use the down arrow button to highlight
“First Boot Device”
5
Press the “Enter” button.
6
Use the down arrow button to select
“CDROM”
Selects the CDROM as the
7
Press the “Enter” button.
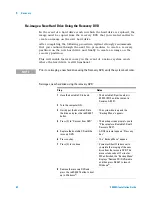
8
Use the down arrow button to highlight
“Second Boot Device”
9
Press the “Enter” button.
10
Use the down arrow button to select
“FLOPPY”
11
Press the “Enter” button.
12
Verify that the “Third Boot Device” is the
hard drive (HDD-0)
13
Press the Escape (Esc) button
14
Use the down arrow button to highlight
“Power Management Setup”. Press the
“Enter” button.
Verify that the “Power Supply Type” is ATX.
15
Press the Escape (Esc) button
16
Press the “F10” button to save the changes.
17
Press the “Enter” button to “Save to CMOS
and Exit”
Summary of Contents for E5505A
Page 18: ...18 E5505A Installation Guide 1 General Information ...
Page 22: ...22 E5505A Installation Guide 2 Flat Panel Display ...
Page 30: ...30 E5505A Installation Guide 3 System Interconnections ...
Page 84: ...84 E5505A Installation Guide 6 Preventive Maintenance ...
Page 96: ...96 E5505A Installation Guide A Service Support and Safety Information ...


