Model 8310-XX-X-XN
IM-493
Aeroflex / Weinschel
16
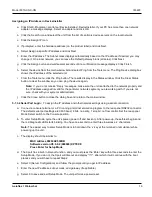
Assigning an IP Address in DeviceInstaller
a. Click
Start->Programs->Lantronix->DeviceInstaller->DeviceInstaller. If your PC has more than one network
adapter, a message displays. Select an adapter and click OK.
b. Click the Search icon and select the unit from the list of Lantronix device servers on the local network.
c. Click the Assign IP icon.
d. If prompted, enter the hardware address (on the product label) and click Next.
e. Select Assign a specific IP address and click Next.
f.
Enter the IP address. The Subnet mask displays automatically based on the IP address; if desired, you may
change it. On a local network, you can leave the Default gateway blank (all zeros). Click Next.
g. Click the Assign button and wait several seconds until a confirmation message displays. Click Finish.
h. Select the device from the main window list and select Ping from the Tools menu. The Ping Device dialog box
shows the IP address of the selected unit.
i.
From the Tools menu, click the Ping button. The results display in the Status window. Click the Clear Status
button to clear the window so you can ping the device again.
Note:
If you do not receive “Reply” messages, make sure the unit is attached to the network properly and
the IP address assigned is valid for the particular network segment you are working with. If you are not
sure, check with your systems administrator.
j.
Click the Close button to close the dialog box and return to the main window.
5-1.3.2 Serial Port Login:
To assign the IP address and other network settings using a serial connection:
a. Connect a console terminal or a PC running a terminal emulation program to the rear-panel RS232 connector.
The default serial port settings are 9600 baud, 8 bits, no parity, 1 stop bit, no flow control. Set the rear-panel
Mode Select switch to the Console position.
b. To enter Setup Mode, cycle the unit's power (power off and back on). After power-up, the self-test begins and
the red Diagnostic LED starts blinking. You have one second to enter three lowercase ‘x’ characters.
Note:
The easiest way to enter Setup Mode is to hold down the ‘x’ key at the terminal (or emulation) while
powering up the unit.
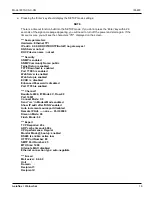
c. The display should be similar to:
MAC address 00204AC530DB
Software version V6.6.0.2 (080926) XPTEXE
Press Enter for Setup Mode
d. The Xport has a built-in timeout function, and you must press the ‘Enter’ key within three seconds to enter the
Setup Mode. If you do not, the Xport will timeout and display “?!?”, after which it will continue with the boot
process and you will have to repeat Step 2.
e. Select 0 (Server Configuration) and follow the prompts until you get to IP address.
f.
Enter the new IP address, subnet mask, and gateway (if applicable).
g. Select 9 to save and exit Setup Mode. The unit performs a power reset.
Summary of Contents for SmartStep 8310
Page 63: ......
Page 64: ......
Page 65: ......
Page 66: ......
Page 67: ......
Page 68: ......
Page 69: ......
Page 70: ......
Page 71: ......
Page 72: ......
Page 73: ......
Page 74: ......
Page 75: ......
Page 76: ......
Page 77: ......
Page 78: ......
Page 79: ......
Page 80: ......
Page 81: ......


