Aerco Benchmark BMK 2500, User Manual
The Aerco Benchmark BMK 2500 comes with a comprehensive User Manual, ensuring hassle-free operation and maintenance. Easily download this valuable resource for free from our manualshive.com, empowering you to optimize your experience with this top-notch product. Take control of your device now with the help of our detailed manual.
Share
Download


Reviews:
No comments
Related manuals for Benchmark BMK 2500

VFC 15-150
Brand: IBC Pages: 4
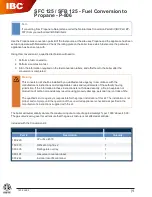
SFC-125
Brand: IBC Pages: 6

SL 30-175
Brand: IBC Pages: 74

Vela X N 24 MB/IT
Brand: Lamborghini Caloreclima Pages: 30

DOMINATOR Series
Brand: RBI Pages: 4

FUTERA II Series
Brand: RBI Pages: 4

FUTERA III Series
Brand: RBI Pages: 44

23c
Brand: Glow-worm Pages: 44

Tuscan 12-19
Brand: Hounsfield Boilers Pages: 8

DUO-TEC COMPACT
Brand: Baxi Pages: 76

Prestige SOLO 299
Brand: TriangleTube Pages: 5

MicoFlame Grande MFH2000
Brand: Camus Hydronics Pages: 36

ecoTEC exclusive 832
Brand: Vaillant Pages: 56

EFTC-140W
Brand: Kiturami Pages: 89

PF-110
Brand: PeerlessBoilers Pages: 70

UFT-100W
Brand: HTP Pages: 90

Supermicra 23 E
Brand: Hermann Pages: 44

Caldaia 35 Tech
Brand: Robur Pages: 32


