2 0
PCA-6178 User's Manual
1.10 Memory Installation Procedures
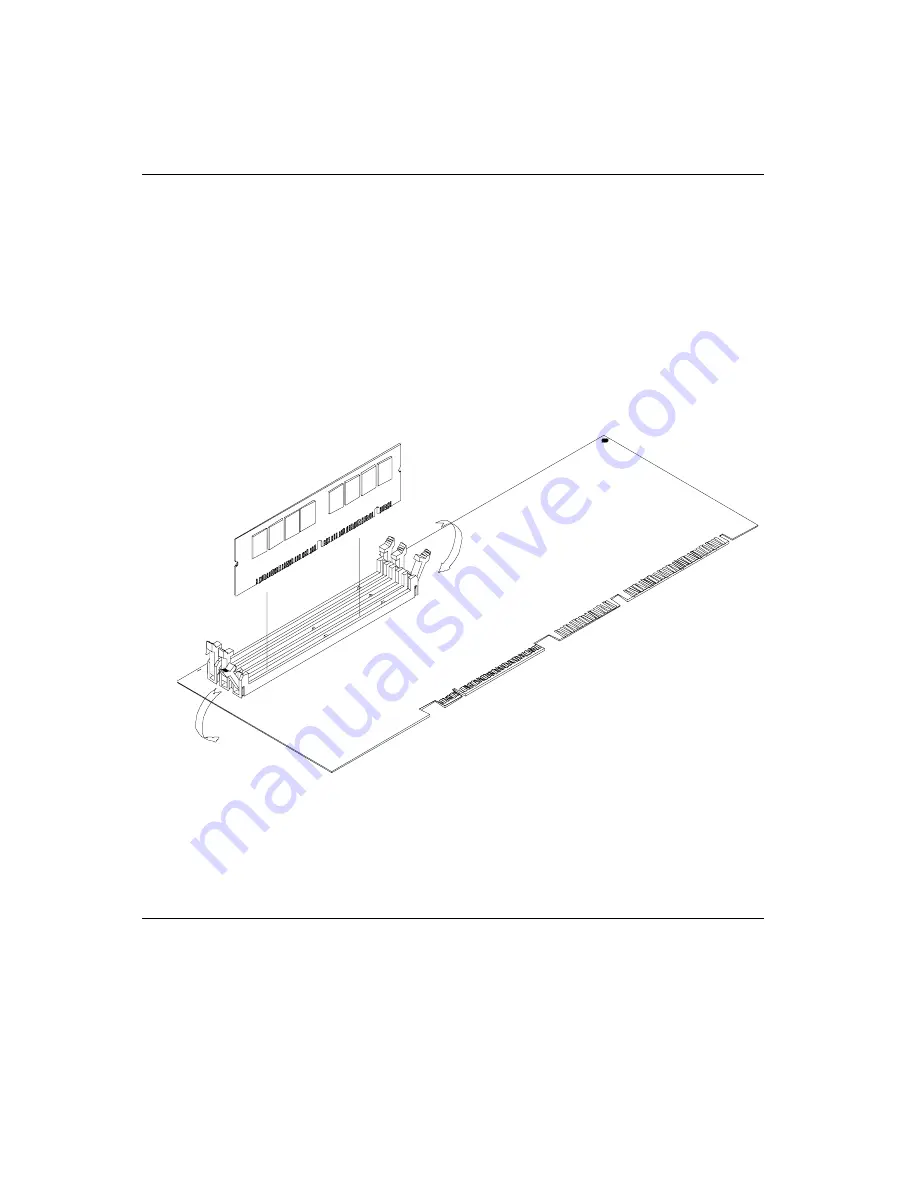
To install DIMMs, first make sure the two handles of the DIMM
socket are in the "open" position. i.e. The handles lean outward.
Slowly slide the DIMM module along the plastic guides on both ends
of the socket. Then press the DIMM module right down into the
socket, until you hear a click. This is when the two handles have
automatically locked the memory module into the correct position of
the DIMM socket (see Figure 1-3). To remove the memory module, just
push both handles outward, and the memory module will be ejected by
the mechanism in the socket.
Figure 1-3: DIMM installation
1.11 Cache Memory
Since the second level (L2) cache has been embedded into the Intel
®
Celeron™/Coppermine processor, you do not have to take care of
either SRAM chips or SRAM modules. The built-in second level cache
in the Celeron/Coppermine processor yields much higher performance
than the external cache memories. The cache size in the Intel
®
Celeron™/Coppermine processor is 128/256 KB.
Summary of Contents for CA-6178F-00B1
Page 1: ...PCA 6178 Full size socket 370 Intel Pentium III processor based PCI ISA bus CPU card...
Page 37: ...22 PCA 6178 User s Manual...
Page 49: ...34 PCA 6168 User s Manual...
Page 69: ...54 PCA 6178 User s Manual Click on the right driver for the installation...
Page 72: ...Chapter 4 PCI SVGA Setup 57 2 Click Finish 3 Start the installation...
Page 75: ...60 PCA 6178 User s Manual...
Page 93: ...78 PCA 6178 User s Manual...
Page 99: ...84 PCA 6178 User s Manual...
Page 104: ...Chapter 7 Onboard Security Setup 8 9 Follow the screen instructions to install the software...
Page 112: ...Chapter 7 Onboard Security Setup 9 7 2 Click Next 3 Click Next...
Page 113: ...98 PCA 6178 User s Manual 4 Start the installation 5 Finish the set up...
Page 114: ...Chapter 7 Onboard Security Setup 99 6 Click OK to restart the computer...
Page 115: ...100 PCA 6178 User s Manual...
Page 119: ...104 PCA 6178 User s Manual...
Page 137: ...122 PCA 6178 User s Manual...


