


OsmoPRO® Multi-Sample Micro-Osmometer User’s Guide
25
3. System operation
This section describes how to navigate several useful features of the OsmoPRO.
3.1 Main screen
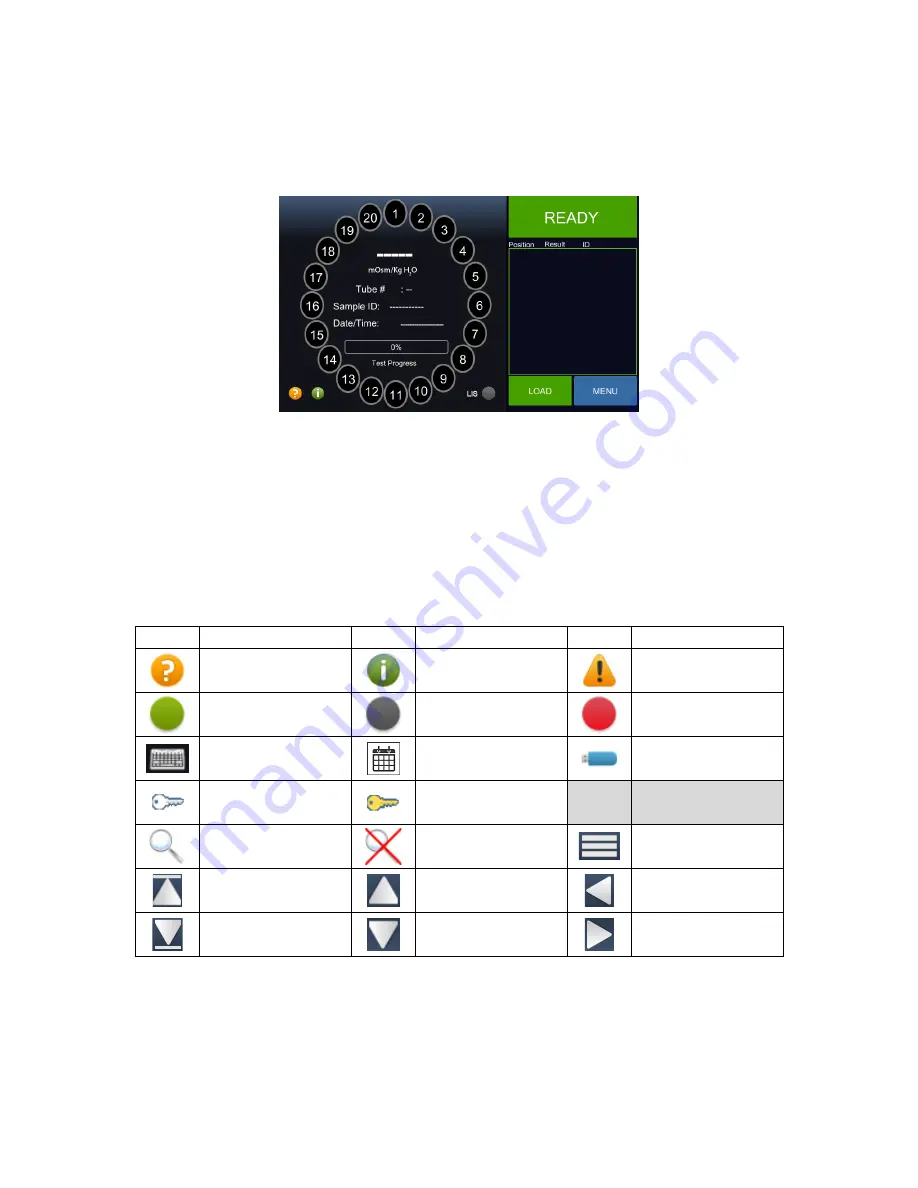
Figure 3.1: Main Screen
The
Main
screen (Figure 3.1) appears after the instrument is powered on. From this screen, the
user can navigate to all the functions of the instrument such as: Loading, Results, Calibration,
Diagnostics, Settings, and more. The left side of the screen shows the status of each sample
tube in the turntable; pressing a tube position will display its test result. During testing, test
results will appear in the center. The right side of the screen shows the instrument status, test
results, and menus. Several icons appear on the
Main
screen; others will appear on other
screens. The icons are defined in Table 3.1. To view, filter, send, print, calculate statistics,
chart, and export the results, turn to Chapter 6.
Icon
Description
Icon
Description
Icon
Description
Legend Information
Assistance
Error
LIS connected
LIS disabled
LIS enabled and not
connected
Keyboard
Calendar
USB
Operator and
supervisor access
Supervisor only
access
Search filter
Clear search filter
Clear selection
Top page
Page up
Left arrow
Bottom page
Page down
Right arrow
Table 3.1: Icon Definitions


