
1314-900 Revision BA
250W Precision Calorimeter
22
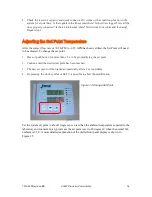
Manual AC Calibration Procedure
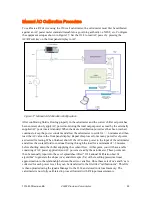
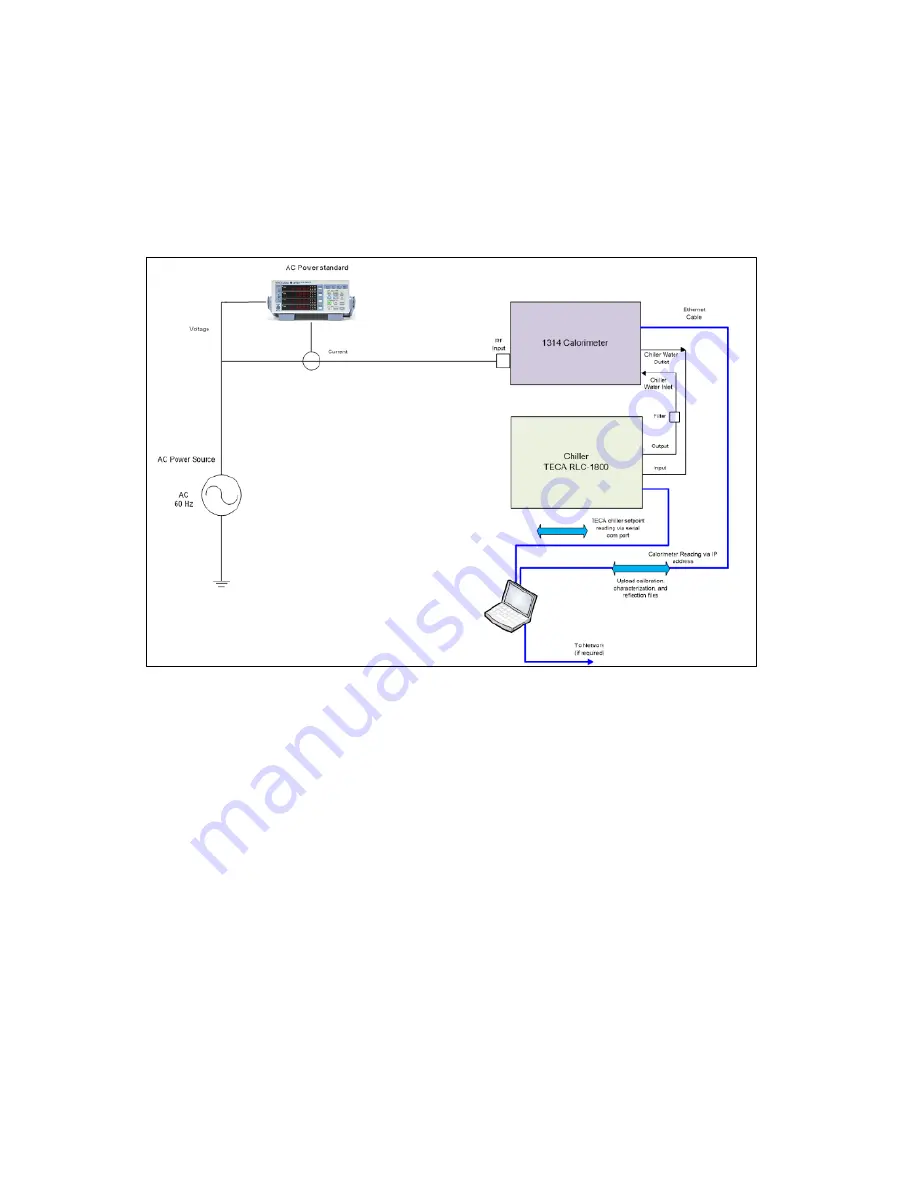
To calibrate a RF device using the 250 watt calorimeter, the calorimeter must first be calibrated
against an AC power meter standard traceable to a governing authority i.e. NIST, etc. Configure
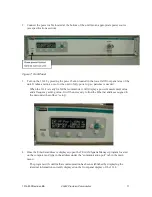
the equipment setup as shown in Figure 17. Set the 1314 to read AC power by pressing the
AC/RF soft key on the front panel display to AC.
After confirming fluid is flowing properly in the calorimeter and the correct chiller set point has
been entered, slowly apply AC power monitoring the total output power as read by the externally
supplied AC power meter standard. When the desired calibration power level has been reached,
continue to keep the power constant and allow the calorimeter to settle for >~ 6 minutes and then
read the AC value in the front panel display. Repeat this process for as many power level points
as desired for testing. When finished, shut off the AC source power to the input of the calorimeter
and allow the coolant fluid to continue flowing through the load for a minimum of >3 minutes
before shutting down the chiller supplying the coolant flow. At this point, you will have a table
consisting of AC power applied versus AC power as read by the calorimeter. These points can
then be manually input into the excel spreadsheet titled “1314 annual Calibration best fit
algorithm” to generate the slopes (m’s) and intercepts (b’s) of the resulting piecewise linear
approximation to the relationship between these two variables. Once these sets of m’s and b’s are
collected for each power level, they can be transferred to the file titled “calibration.ini”. This file
is then uploaded using the Iguana Manager to the 1314 and stored in its local memory. The
calorimeter is now fully calibrated to proceed forward with RF input measurements.
Figure 17: Manual AC Calibration Configuration


