


Operator’s Guide
6
With the
VGM-1041
mounted as part of your sound system and set up
according to the
Installer’s Guide
later in this manual, operation is as simple as
it could be!
Front Panel Controls & Indicators
Power
– When you power up your sound system, the
VGM-1041
goes through
a self-check routine which among other things, lights up all front panel LEDs in
sequence. Once this “light show” finishes, your mixer is ready to use.
Gain
controls – adjust as needed for good listening levels. You can apply labels
on a blank panel above or below your mixer (as shown here) to describe their
actual use. Depending on the microphones and their placement, about halfway
to 2/3 up should provide good usable level. If not, ask your system’s installer
whether they have set the rear panel
gain preset
switches (see Page 16). The
gating and compression features mean you’ll d
o
less knob-turning than would
be needed with non-automatic mixers.
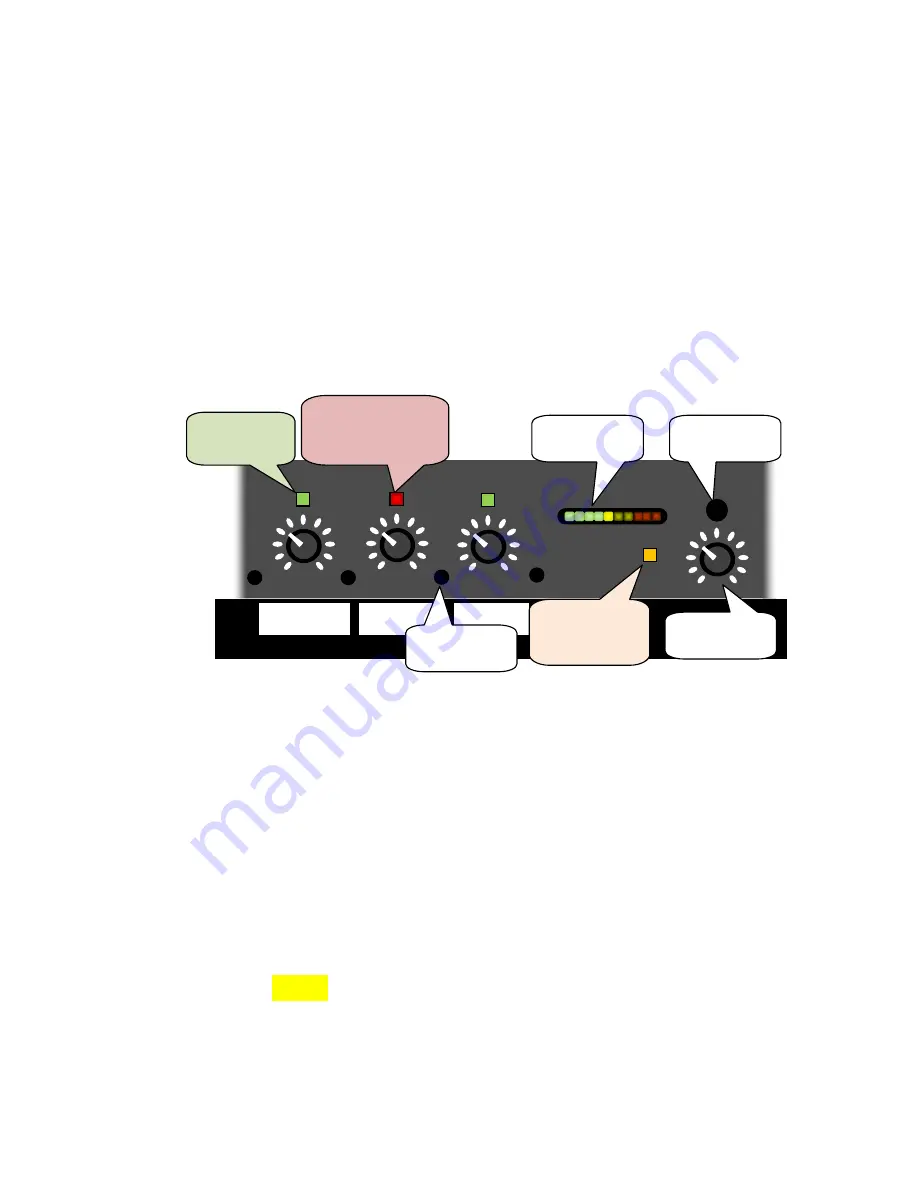
Gate/Clip
LEDs – above each microphone gain control. Each lights
green
when
the mixer gates that microphone ON. Use these LEDs to identify live mics.
These LEDs light yellow when
Prefad
e is active, and
red
when their input
channels are in danger of “clipping” (excessive level) – reduce their gain to
remedy this condition.
C O M P R E S S
AUX 2
VGM1041
1
AUX 1
MIC 10
Headphone
Volume
Stage Left
Music
Phone
Mic is
Gated ON
Steady Yellow = Cue
Peak flash Red =
Clipping!
Headphone
Jack
Lights when
Compression
Is active
Shows Main or
Prefade Levels
Prefade (Cue)
Bus Enable


