


18
Chapter 1
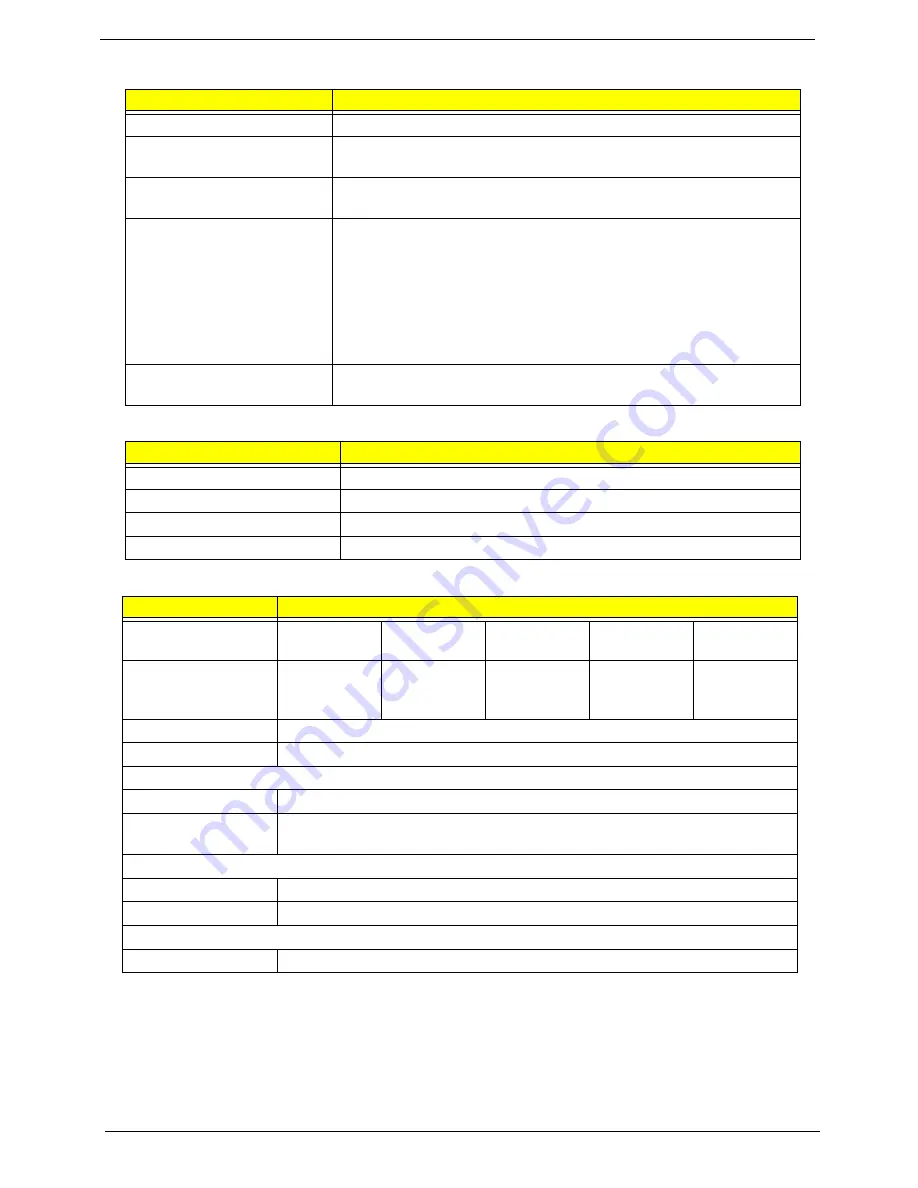
System Power Management
Power and Keyboard Controller
Hard Disk Drive Interface
ACPI mode
Specification
Mech. Off (G3)
All devices in the system are turned off completely.
Soft Off (G2/S5)
OS initiated shutdown. All devices in the system are turned off
completely.
Working (G0/S0)
Individual devices such as the CPU and hard disk may be power
managed in this state.
Sleeping State (S3)
CPU set power down
VGA Suspend
PCMCIA Suspend
Audio Power Down
Hard Disk Power Down
CD-ROM Power Down
Super I/O Low Power mode
Sleeping State (S4)
Also called Hibernate state. System Saves all system states and data
onto disk prior to power off the whole system.
Item
Specification
Controller
ENE KB926
Total number of keypads
99-/100-/103-key keyboard
Windows logo key
Yes
Hotkeys
See “Hot Keys” on page 13.
Item
Specification
Vendor/model name
Seagate
HGST
Toshiba
Western
Digital
Samsung
Capacity (MB)
160, 250,
320, 500
160, 250,
320, 500
160, 250,
320, 500
160, 250,
320, 500,
640
160, 250,
320
Bytes per sector
512
Data heads
2-4
Drive Format
Disks
1-2
Spindle speed
(RPM)
5400
Performance Specifications
Buffer size
8 MB
Interface
SATA
DC Power Requirements
Voltage tolerance
5V ±5%
Summary of Contents for LX.PWJ02.001
Page 6: ...VI ...
Page 10: ...X Table of Contents ...
Page 34: ...24 Chapter 1 ...
Page 52: ...42 Chapter 2 ...
Page 76: ...66 Chapter 3 5 Lift the Speaker clear of the Upper Cover ...
Page 78: ...68 Chapter 3 5 Lift the Right Speaker Module clear of the device ...
Page 84: ...74 Chapter 3 5 Lift the USB board clear of the device ...
Page 90: ...80 Chapter 3 11 Disconnect the Bluetooth to mainboard cable ...
Page 92: ...82 Chapter 3 4 Carefully lift the Thermal Module clear of the Mainboard ...
Page 103: ...Chapter 3 93 7 Disconnect the LVDS cable from the panel ...
Page 105: ...Chapter 3 95 5 Lift the microphone set and cable clear of the LCD cover ...
Page 121: ...Chapter 3 111 5 Connect the fan cable ...
Page 124: ...114 Chapter 3 6 Connect the LVDS cable to the mainboard 7 Connect the microphone cable ...
Page 127: ...Chapter 3 117 4 Connect the USB cable to the mainboard and lock the connector ...
Page 130: ...120 Chapter 3 4 Replace the FFC and press down as indicated to secure it to the Upper Cover ...
Page 146: ...136 Chapter 3 ...
Page 175: ...Chapter 6 165 Aspire 5251 5551G 5551 FRU List ...
Page 176: ...166 Chapter 6 Screw List ...
Page 177: ...Chapter 6 167 ...
Page 206: ...196 Appendix C ...
Page 210: ...200 ...