22
Chapter 1
•
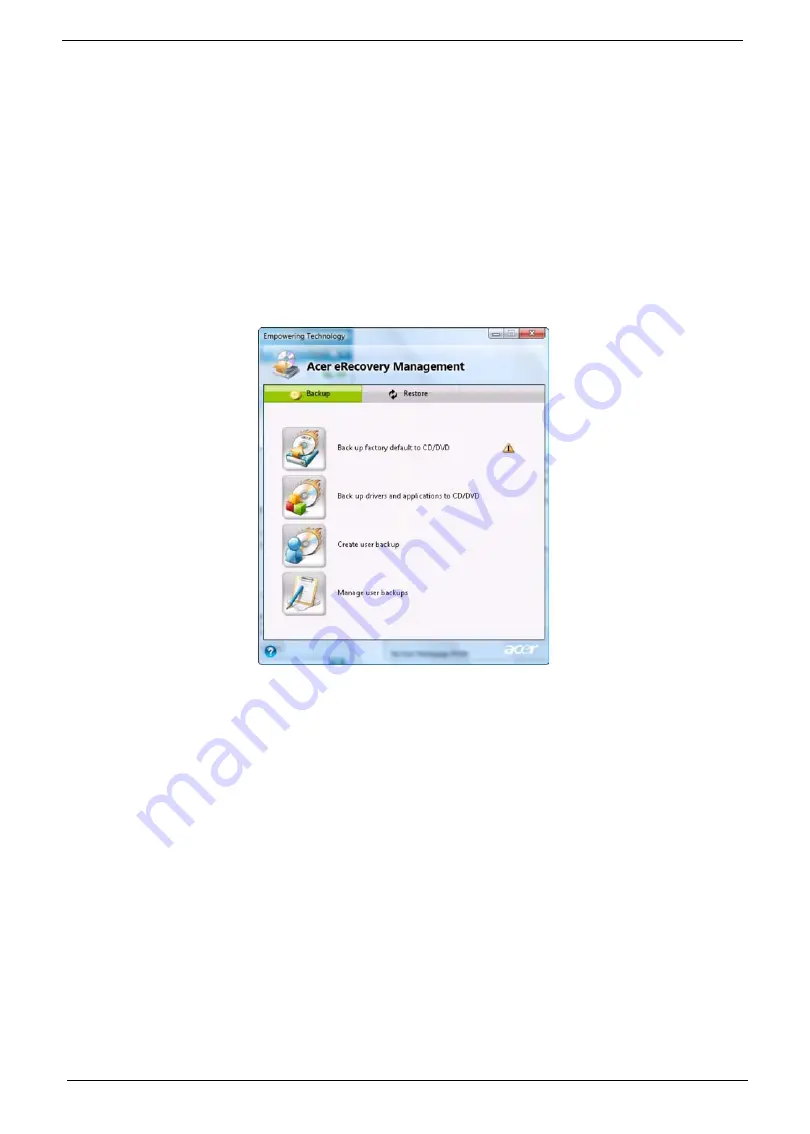
Back up factory default to CD/DVD
•
Back up drivers and applications to CD/DVD
•
Create user backup
•
Manage user backups
•
Restore:
•
Restore system to factory default
•
Reinstall applications/drivers
•
Restore system from user backup
•
Password settings
To use the password protection feature of Acer eRecovery Management to protect your data, you must first set
the Empowering Technology password. To set the password, refer to the section "
Empowering Technology
password
".
For more information, please refer to"Acer eRecovery Management" on page 62 in the Acer System User's
Guide.
NOTE:
If your computer did not come with a Recovery CD or System CD, please use Acer eRecovery
Management's Backup factory default to CD/DVD feature to burn a backup image to CD or DVD. To
ensure the best results when recovering your system using a CD or Acer eRecovery Management,
detach all peripherals (except the external Acer ODD, if your computer has one), including your Acer
ezDock.
Summary of Contents for Aspire 8735
Page 6: ...VI ...
Page 10: ...4 Chapter 1 System Block Diagram ...
Page 54: ...50 Chapter 2 ...
Page 71: ...Chapter 3 67 2 Remove the two captive screws securing the hard disk drive cover ...
Page 94: ...90 Chapter 3 19 Disconnect the Media console cable from LEDB1 on the main board ...
Page 112: ...108 Chapter 3 21 Remove the USB board module from the lower case ...
Page 118: ...114 Chapter 3 13 Detach any adhesive tapes and any cable that is glued to the LCD panel ...
Page 119: ...Chapter 3 115 14 Disconnect the FPC cable from the LCD panel ...
Page 136: ...132 Chapter 4 F5h Boot to Mini DOS F6h Clear Huge Segment F7h Boot to Full DOS Code Beeps ...
Page 143: ...Chapter 4 139 ...
Page 144: ...140 Chapter 4 ...
Page 145: ...Chapter 5 139 Motherboard Jumper and Connector Locations Chapter 5 ...
Page 146: ...140 Chapter 5 ...
Page 150: ...144 Chapter 5 ...
Page 152: ...146 Chapter 6 Aspire 8735 8735G 8735ZG Series Exploded Diagram ...
Page 170: ...158 Appendix B ...
Page 172: ...160 Appendix C ...


