


3 System upgrades
30
2
Install the top cover.
(1) Place the top cover on the chassis so that the tabs on the cover
align with the slots on the chassis.
(2) Slide the top cover toward the front of the chassis until it is
fully closed.
Removing and installing an optical drive
The system supports a slim SATA optical drive.
1
Observe the ESD precautions described on page 22.
2
Perform the pre-installation instructions described on page 22.
3
Remove the top cover. See page 29.
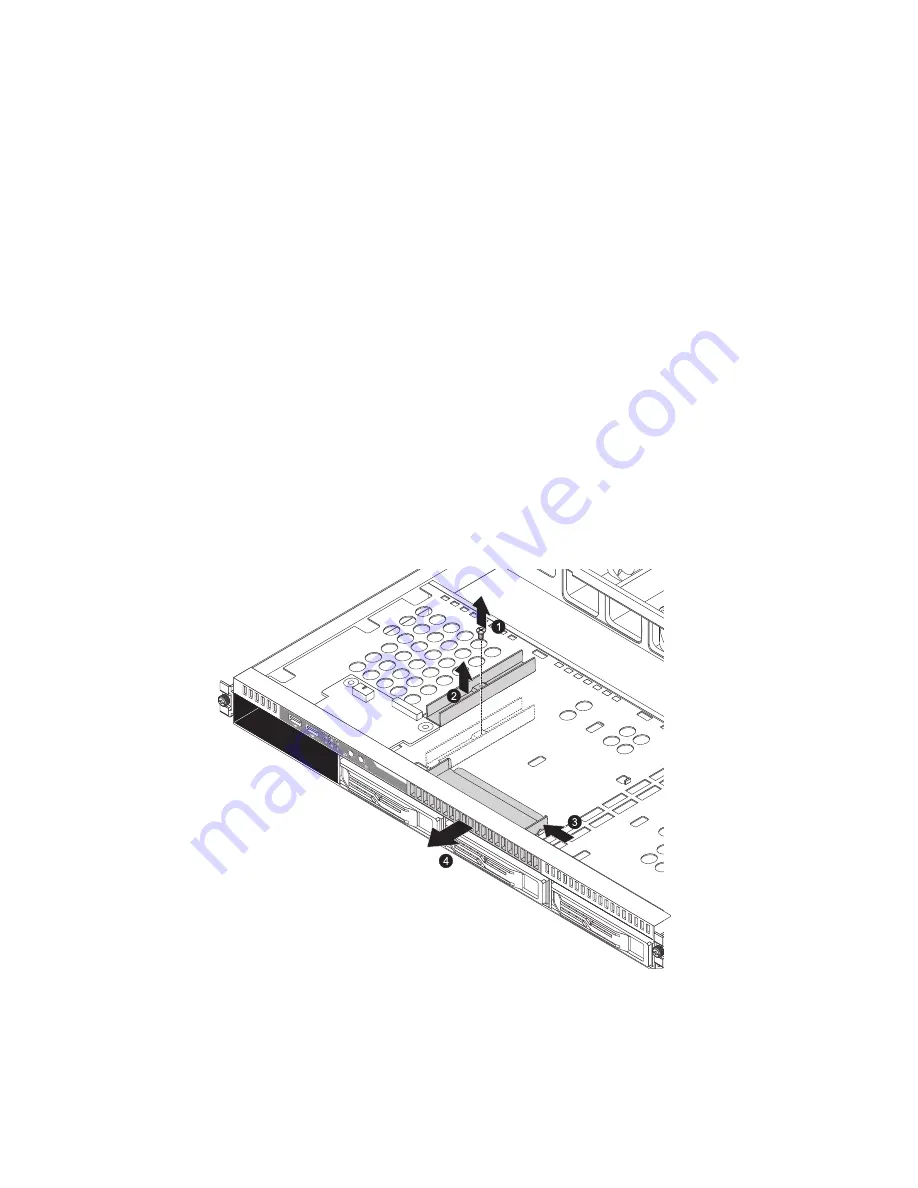
4
Use a screwdriver to remove the screw (1) on the ODD bracket.
5
Remove the ODD bracket (2).
6
Push the ODD cover plate to the left (3) and pull it out of the
system (4).
7
Insert a new drive (1). The drive is properly inserted if you hear a
click and the locking tab (2) locks into place.
Summary of Contents for AR320 F1 Series
Page 1: ...AR320 F1 Series User Guide ...
Page 14: ...xiv ...
Page 18: ...xviii ...
Page 19: ...1 System tour ...
Page 31: ...2 System setup ...
Page 38: ...2 System setup 20 ...
Page 39: ...3 System upgrades ...
Page 71: ...4 System BIOS ...
Page 104: ...4 System BIOS 86 ...
Page 105: ...5 System troubleshooting ...
Page 116: ...5 System troubleshooting 98 ...
Page 117: ...Appendix A Server management tools ...
Page 123: ...Appendix B Rack mount configuration ...
Page 132: ...Appendix C Acer Smart Console ...
Page 171: ...153 ...


