


Appendix B Rack mount configuration
110
Installing the system into the rack
Caution! To minimize the chances of injuries, make sure that two
or more people help in installing the server.
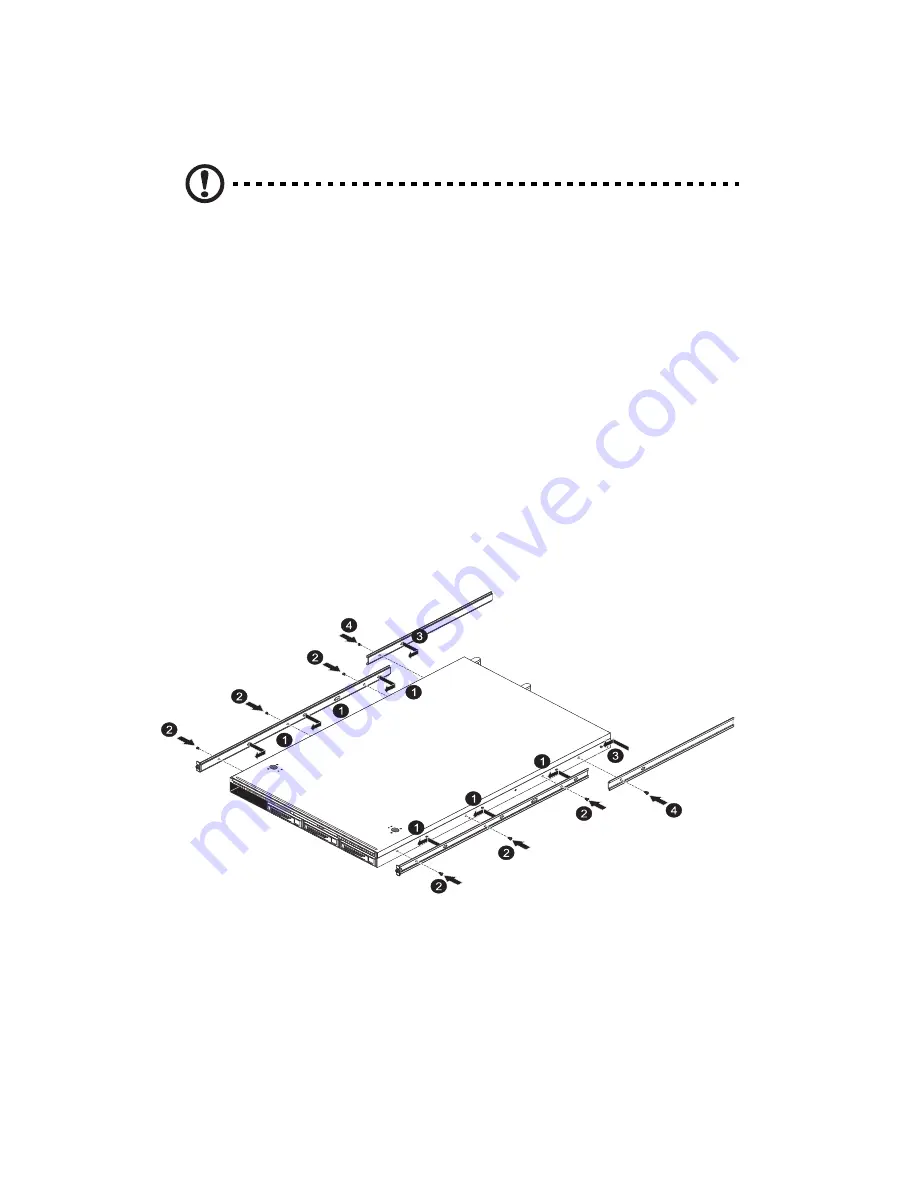
To install the system into a four-post rack
1
Confirm that the left and right inner rails have been correctly
identified.
2
Attach the inner rails to both sides of the server.
(1) Align the holes on the left and right front inner rails (1) to the
hooks on the left and right sides of the server.
(2) Secure the chassis with six screws (2) as illustrated.
3
Attach the rear inner rails to both sides of the server.
(1) Align the holes on the left and right rear inner rails (3) to the
hooks on the left and right sides of the server.
(2) Secure the chassis with two screws (4) as illustrated.
4
Install the mounting rails to the rack posts.
(1) Determine the vertical position in the rack. Refer to “Vertical
mounting hole pattern” on page 109 for more information.
(2) Align and insert the mounting rail with mounting holes on the
rack posts.
Summary of Contents for AR320 F1 Series
Page 1: ...AR320 F1 Series User Guide ...
Page 14: ...xiv ...
Page 18: ...xviii ...
Page 19: ...1 System tour ...
Page 31: ...2 System setup ...
Page 38: ...2 System setup 20 ...
Page 39: ...3 System upgrades ...
Page 71: ...4 System BIOS ...
Page 104: ...4 System BIOS 86 ...
Page 105: ...5 System troubleshooting ...
Page 116: ...5 System troubleshooting 98 ...
Page 117: ...Appendix A Server management tools ...
Page 123: ...Appendix B Rack mount configuration ...
Page 132: ...Appendix C Acer Smart Console ...
Page 171: ...153 ...


