3. Installation
User Guide
Page 3-6
SW16 will beep unless both power cords are plugged in.
3.2
Powering the System On and Off
3.2.1
Powering On
Before powering on, make sure that all cables and cords are properly installed and
connected.
1.
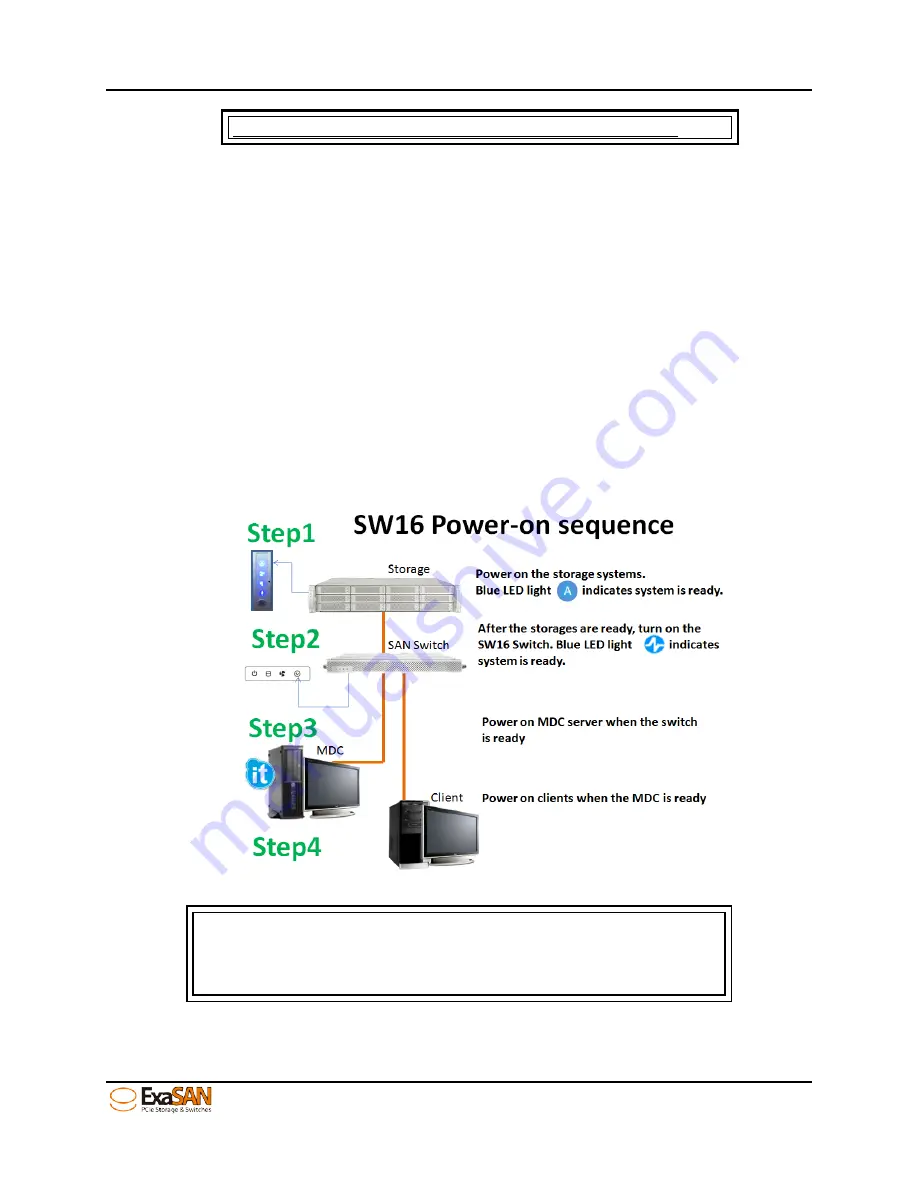
Press the power button on the rear panel of storage first. Wait until all the LEDs on the
left handle turn blue, then,
Turn power on for the ExaSAN SW16 by switching on the Power button. Wait for the
“Link LED indicator” (refer to Section 1.4.1.1, “SW16 Front Panel”) to turn into a solid
blue state. Soon thereafter, you will hear 3 beeps signifying that the clients can now
be powered on. You might hear other beeps, but the 3 beeps are significant,
indicating that it has fully booted up.
3. Turn on clients, MDC first (for non-SW16 ExaSAN switches), then the remaining client
workstations.
Figure 23: power on sequence
Caution
It is important to follow the correct Power On sequence. Failure
to do so may result in some features not functioning properly.
Summary of Contents for ExaSAN SW16
Page 10: ...1 Introduction User Guide 1 Introducing ExaSAN PCIe2 0 switch ...
Page 28: ...2 Preparation User Guide 2 Preparing to Install ExaSAN SW16 ...
Page 31: ...3 Installation User Guide 3 Installing the ExaSAN SW16 ...
Page 48: ...4 How to Use User Guide 4 Using ExaSAN switch web GUI ...
Page 85: ...4 How to Use User Guide Page 4 37 Step 3 Click Install Step 4 Click Continue Install ...
Page 95: ...4 How to Use User Guide Page 4 47 ...
Page 96: ...5 RAID Overview User Guide 5 RAID Overview ...
Page 100: ...Appendices User Guide Page 6 1 6 Appendices ...


