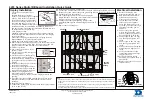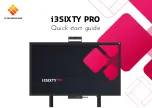


Once lined up, slide the glass board down
until the attached mounting clips slide into
place behind the Wall Mount Brackets.
Note:
Clips should slide in at the same time
for both the top and bottom Wall Mount
Brackets.
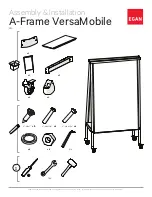
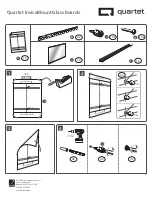
Step 13 – Place Board on the Brackets
Lift your InvisaMount Glass Dry-Erase Board
against the wall, slightly higher that the Wall
Mount Brackets.
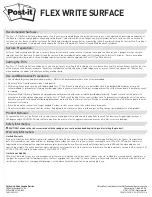
Step 14 – Attach Accessory Tray
Starting at an angle, press the Accessories Tray
up along the bottom of the glass whiteboard.
The glass should fit between the gap in the
back channel of the tray.
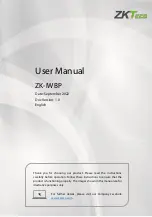
Push the tray up until the bottom of the back
channel is fully against the glass.
e
b