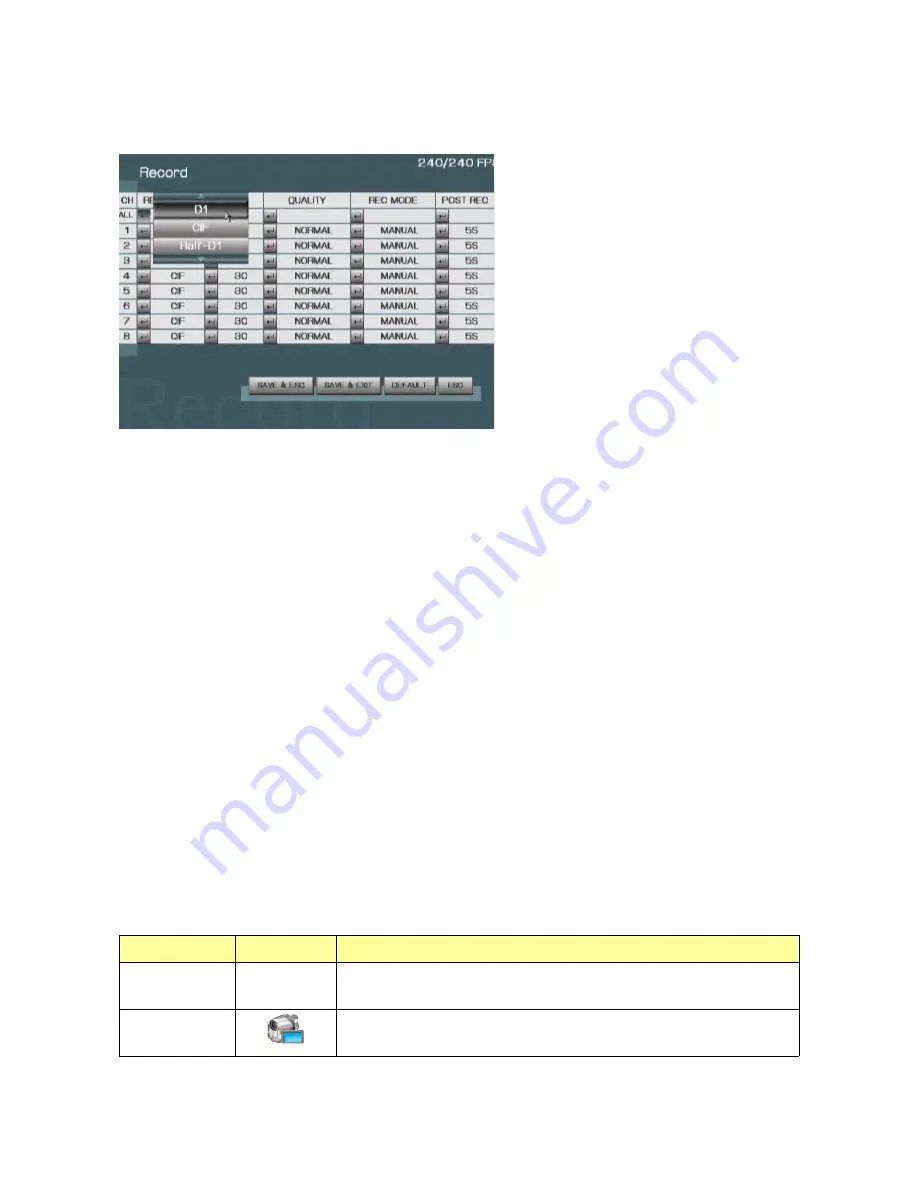
4.2 RECORD
To access
record setup
, press ENTER button after moving highlight icon to RECORD
ICON in Menu. Record setup menu will appear on monitor.
1) RESOLUTION:
CIF, HALF-D1, D1
In the record setup menu, move to the cell of RESOLUTION and CH which is to be setup
using direction (UP/ DOWN/ LEFT/ RIGHT) buttons. Recording resolution for specific CH
can be changed after pressing ENTER button. Use UP or DOWN and ENTER to select the
parameter.
2) FPS:
30, 15, 10, 7.5, 6, 5, 3, 2 (NTSC)
In the record setup menu, move to the cell of FPS and CH which is to be setup using
direction (UP/ DOWN/ LEFT/ RIGHT) buttons. Recording frames per second for specific
CH can be changed after pressing ENTER button. Use UP or DOWN and ENTER to select
the parameter.
3) QUALITY:
HIGHEST, HIGH, NORMAL, LOW
In the record setup menu, move to the cell of QUALITY and CH which is to be setup using
direction (UP/ DOWN/ LEFT/ RIGHT) buttons. Recording quality for specific CH can be
changed after pressing ENTER button. Use UP or DOWN and ENTER to select the
parameter.
4) RECORD MODE:
MANUAL, ALWAYS, MOTION, ALARM, EVENT, SCHEDULE,
DISABLE
In the record setup menu, move to the cell of RECORD MODE and CH which is to be
setup using direction (UP/ DOWN/ LEFT/ RIGHT) buttons. Recording mode for specific CH
can be changed after pressing ENTER button. Use UP or DOWN and ENTER to select the
parameter.
Record Mode
Icon
Description
MANUAL
If MANUAL mode is set, the channel would start recording
only by pressing the REC/STOP button on front panel.
ALWAYS
If ALWAYS mode is set, the channel would start recording
after system power on.
18


