


Recording
43
Recording
Schedule
Open the overview menu and select Settings. Next, click
on the "Record" icon. There are two types of configura-
tion and data recording available:
Recording
Configuration of video stream re-
cording from connected IP cam-
eras. Continuous data streams
are saved on the recorder.
Capture
Configuration of single image
capture from connected IP cam-
eras. Only single images are
saved on the recorder.
Note
Both types of recording can be configured in paral-
lel for each camera.
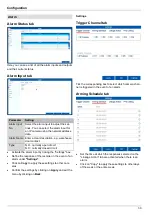
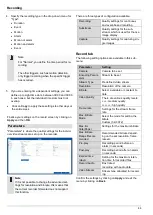
Record tab
The schedule is used to specify the recording times and
triggers (recording type) for the cameras.
Note
As there is no difference between the settings for
the Record and Capture tabs, they are only listed
once.
On the on-screen display, the hours for each day are
listed from left to right, and the days are listed from top to
bottom. On the right of the display, there is a colour key,
i.e. the time frames for recording are
displayed in the schedule in a different colour depending
on the "trigger" (recording type) in question.
Coloured icon
Key
Blue
Duration: period in hours
Light green
Event: a recording is made when-
ever any type of event (motion,
alarm input or VCA) occurs.
Yellow
Motion detection
Red
Alarm Input
Orange
Motion or alarm
Light blue
Motion and alarm
White
No selection
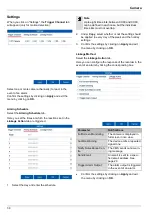
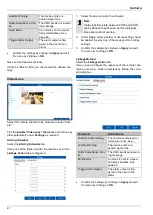
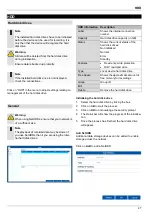
Select the camera and tick the
Enable Schedule
box.
Click on a
trigger
and use your mouse to highlight
the time period within the schedule.
Alternatively, click on
Edit
to configure the type and dura-
tion of the schedule down to the minute.
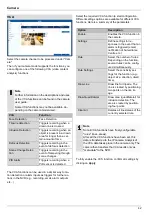
1. In the drop-down menu for "Schedule", select the day
to be set.
2. Activate/deactivate "All Day". If "All Day" is activated,
you cannot enter specific times as the setting now ap-
plies to the whole day.
3. If you wish to enter specific time settings, deactivate
"All Day".
Application example
If you want recording to run from 11:00 to 07:00,
you need to set up two time zones:
1. 11:00
–24:00
2. 00:00
–07:00